What Equipment Do You Need for Professional Drone Photography?
Photography has always been a favorite business venture among freelancers, but how does drone photography sound? With all the unique perspectives that a camera drone can provide, a drone may be the perfect way to stand out from all the other professional photographers peddling their services.
Drone photography is an idea that sounds good in theory but requires a lot of work just to get started. Aside from the FAA certification requirements for professional drone operations, you’ll also need to buy gear beyond the usual ones needed for photography. Let’s take a look at the list of equipment you’ll need before you can start shooting aerial photos and videos with your drone.
The drone
We’re starting with the most obvious: the drone itself. If you’re buying a drone specifically for photography, you can choose to either get a drone with an integrated camera or one that requires a camera as an accessory payload. There are advantages and disadvantages to both approaches which we’ll look into with more detail.
Integrated camera drones
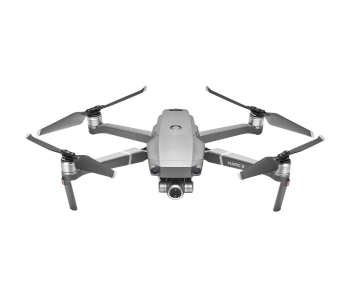
Most camera drones available today come with an integrated camera. The camera in these drones are permanently affixed and cannot be removed or replaced outside of hiring professional modification services. The standard firmware built into these drones also isn’t designed to work with any other camera aside from the ones that are already built in.
The primary advantage of an integrated camera drone is convenience. Integrated camera drones are operational out of the box. Within just a few minutes, you can already have a camera drone flying and taking very good aerial photos. The quality of the photos and videos also does not suffer since many out-of-the-box drones are now equipped with some of the best cameras that the industry has ever seen.
Price is also a compelling reason to get a drone with an integrated camera. These drones are typically much cheaper than those with interchangeable payloads. One of the best integrated camera drones, the DJI Mavic 2 Pro, costs close to $1500 nowadays. There are also cheaper options such as the DJI Mavic 2 Zoom with dual optical-digital zoom capability and the Parrot Anafi which offers a 4K camera for less than $1000.
The biggest downside of going this route is the lack of flexibility and customization options. Once you buy a drone with an integrated camera, you’re pretty much locked in to the specs of the drone. If you need a camera with a better zoom lens, a wider ISO range, or more automatic camera modes, you have no choice but to buy another drone.
It also leaves no room for other payload options, such as thermal cameras or multispectral sensors, which can be useful for professional applications outside of photography
Drones with interchangeable payload

There are several reasons why drones with interchangeable payloads belong to a class all their own. The most apparent is that they allow for a lot of flexibility. Using just a single drone, you can take a video using a high-speed camera, switch to another with a powerful zoom lens, and then switch to one that has object tracking capabilities.
These drones can even work with thermal cameras, LiDAR sensors, and multispectral sensors. If you’re entertaining the idea of using your drone for fields beyond photography, then you’ll find that an interchangeable payload is worth the price. Applications such as tower inspection, construction monitoring, precision agriculture, and mapping are some of the most lucrative that a drone operator can enter.
Having an interchangeable payload also means that you’re in full control of your drone’s specs and can even make upgrades without having to buy a new drone. You can start with a 4K camera but eventually upgrade to one with a 5.2K resolution or a wider dynamic range. A drone with an interchangeable payload simply has better longevity and can sustain long-term as a tool in your professional drone career.
The biggest hurdle, should you go for a drone with an interchangeable payload, is the absurdly high prices that they go for. For instance, the DJI Inspire 2 already costs more than $3000 without any payload accessories. The compatible Zenmuse X5S, a 5.2K camera, will set you back an additional $1500. You’ll also need to get different lenses to keep maintain versatile options for when you’re out on a paid gig.
All add-ons considered, you may end up spending anything between $10,000 to $15,000 for a professional drone photography setup. For those who are just getting into the drone photography business, this price may appear intimidating or simply inaccessible.
The camera
Even more important than your drone, the specs of your camera play a central role in how your images and videos will look like. If you’re getting a drone with an integrated camera, then you don’t exactly have much of a choice in the matter. You’ll be able to use only the camera that comes with the drone and nothing more.
The good news is that there are now a lot of integrated camera drone models that come with excellent cameras. The aforementioned DJI Mavic 2 Pro has a Hasselblad camera with 4K recording capabilities at 30 fps and a wide dynamic range via its 1-inch CMOS sensor. Considering that it’s an ultra-portable drone, it’s widely considered as one of the best camera drones available today.
The options are much wider for drone photographers who opt for drones with interchangeable payloads. Most drones offer a range of possible cameras that are specifically designed for compatibility. For instance, owners of the DJI Inspire 2 can choose between the Zenmuse X5S, a 5.2k camera with a Micro 4/3 sensor, or the Zenmuse X7, a cinematic Super 35 camera.
Another good example would be the Yuneec H520, a professional-grade drone with a hot-swappable payload provision. The choices for the H520 are a bit more versatile. There’s the E90 camera, a 4K camera with a 20 MP 1-inch sensor, and the E30Z camera which boasts of an impressive 30x optical zoom. There are also more specialized payload options, such as the CGOET dual thermal imaging and low-light cameras.
Drones designed to work with DSLR cameras are no longer as common nowadays, but they’re still around. A prime example would be the DJI Spreading Wings S1000+. This is a massive drone with a huge carrying capacity that was designed specifically to be mounted with a DSLR camera, although you’ll also need to get a gimbal separately.
As for which DSLR camera is best to be used with a drone, there are simply way too many options out there to list them all down. We recommend that you use whichever DSLR camera you’re comfortable with. If you’ve been doing photography for a living, you probably have a few in your arsenal.
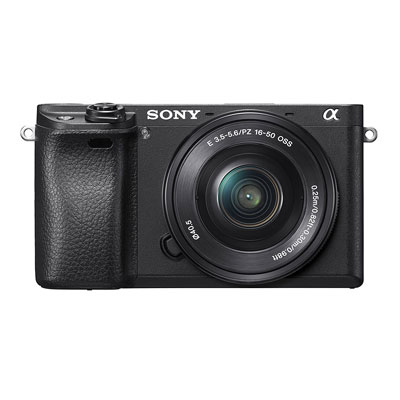
You may understandably be wary about hooking up a high-end and expensive DSLR to a flying machine that will always the possibility of crashing. If this is a concern, then we recommend setting up a beginner-class DSLR camera like the Sony Alpha a6300 Mirrorless Camera. This relatively inexpensive DSLR camera has 4K recording capabilities, performs well in low light, and can record in slow motion.
Whichever DSLR you pick, there’s one thing you need to make sure: that your drone can lift it. Don’t forget the weight of the lens as well as the gimbal.
Accessories
The drone and camera cover the basics of drone photography, but they are nowhere near enough for you to offer professional photography services. Reliability plays a role in the quality of services you provide, and the following accessories can help you deliver excellent output regardless of external circumstances.
1. Batteries
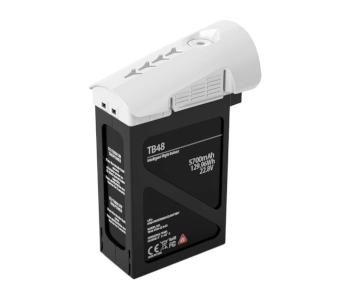
One of the first things you need to buy before you offer professional drone photography services are a couple of extra batteries. Most drones can only stay airborne for less than 30 minutes before their batteries have to be replaced. If you’re covering an event or doing a photo shoot, you may have to fly your drone for the better part of a day.
For this reason, it is always prudent to have two to three fully charged batteries on hand. The good news is that most drones use Li-Po batteries that have are relatively smaller and lightweight compared to Li-ion batteries of the same capacity. They are prone to mechanical damage, however, so make sure to keep them in a sturdy container.
2. Sun hood
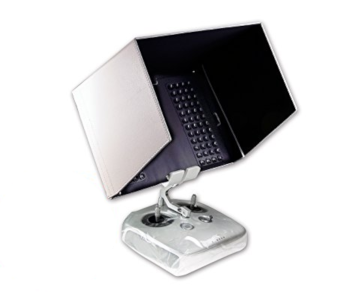
When composing a shot, you will rely a great deal on your camera’s real-time video feed. Whether it’s through your phone docked to the controller or a dedicated screen, you will very likely find your eyes glued to the video feed trying to find that perfect angle.
As most people know, looking at an LCD screen on a sunny day is a very bad idea. The glare from the sunlight can get so bad that you can end up not seeing anything on the screen at all. If you’re doing a paid drone photography gig, it’s easy to imagine how much harder the job will be or how much the quality of your pictures can suffer.
To prepare for such a situation, it’s a good idea to always pack a sun hood that’s compatible with your controller. As its name implies, a sun hood clips to your controller providing protection from sunlight and glare. This is a small and cheap addition to your photography gear, but its impact is invaluable.
3. Landing pad
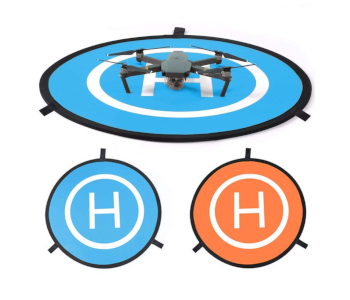
As a professional drone photographer, your whole career relies on the quality and condition of your gimbal and camera. The smallest scratch on your camera’s lenses or any damage on the gimbal that will prevent it from moving smoothly can lead to a drastic decline in the quality of your images and videos.
The problem is that the camera and gimbal are also often exposed to dust and sand, particularly when the drone is landing or taking off. Any uneven terrain or tall grass can also cause minor damage to your camera and gimbal setup.
A landing pad is a very inexpensive measure to avoid this hazard. Just unfold the pad, secure it to the ground using pegs, and use it as a takeoff and landing point.
4. ND filters
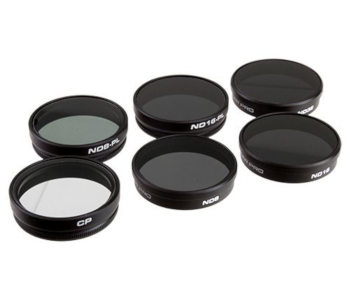
Drone photography often takes outdoors. While natural light is often something photographers seek out, it can also be harsh enough to result in overexposed photos. Since not all drone cameras come with adjustable exposure settings, you’ll have to settle for the next best thing – Neutral Density (ND) filters.
ND filters limit the amount of light that enters the camera’s sensor to create a more balanced imaged. For best results, you should get a complete set of ND filters with different light-blocking magnitudes. This lest you play around with your camera’s shutter speed, so you have the option to take those nice long exposure shots.
5. Image processing software
Being a professional drone photographer takes more than just drone flight and photography skills – you’ll also need to learn how to post-process the photos. Professional photographers often take photos in RAW or CinemaDNG formats where all the image data are stored, giving them more control over the exposure and color of the photos in post-processing.
You can also take advantage of any auto bracketing features in your camera, allowing you to create a composite image out of separate images taken at different exposure levels. This allows you to keep your photos as detailed as possible even in challenging lighting conditions.
Final thoughts
Drone photography is one of the most popular uses of drones for profit, particularly because it’s also the easiest to get into. However, that may be understating the amount of effort and financial investment needed to jumpstart a career as a professional drone photographer.
Picking the right equipment for professional drone photography may seem overwhelming because of all the choices available, not to mention the fact that they are often very expensive. While gear is important, you may take solace in the fact that skill still plays a bigger role in determining a photographer’s quality of output.

