
8 Best Tips for Time-Lapse Photography Using Drones

One of the most common use cases for modern drones is as a flying high-resolution camera. The drones of today are exceptionally well-equipped for pro-level photography, even in challenging conditions. Capturing shots from unique angles is also incredibly fun.
A nifty thing to do is to combine drones with well-established photography techniques, such as time-lapse photography. How exactly can this be done well using a drone? What are the best settings for time-lapse photography? Is there any special preparation needed to make sure that your time-lapse photos and videos look good?
What is time-lapse photography?
A time-lapse shot can be captured either using photos or videos. Recording videos is easy – just capture the video as normal and speed it up in post-processing. Capturing a series and then stitching them together to represent motion is the more popular method of time-lapse photography. You can do this easily by shooting in timed mode. Most drones can shoot stills in as small an interval as 2 seconds.
Time-lapse images attempt to simulate motion by taking a series of stills. This means that there must be an element of the scene that is moving rapidly. The most common subject of time-lapse images are clouds, stars, rivers and streams, or moving traffic. All of these can also be done using a drone camera.
1. Plan your shot

To capture time-lapse images using a standard camera, the camera is typically mounted on a tripod and pointed towards the subject. This prevents any jittering from the stills, making the finished product look a lot smoother. This also means that your camera can keep shooting images as long as it still has a battery or storage space.
Battery is a major limitation for drone-based time-lapse photography. Most drones can only fly up to 30 minutes or less. Using the camera continuously also tends to drain the battery quickly. At best, expect to only have around 20 minutes of flight time for time-lapse photography.
This emphasizes the importance of planning your shot. You have to know exactly where to fly the drone and what subject to focus on. This way, you waste less time and have more time to spend taking images. Also keep a close eye on your drone’s battery – all those great shots won’t mean anything if your drone crashes before you can retrieve it!
2. Check the weather
A good time-lapse image has to be taken in near-perfect conditions. Naturally, any rain or snow will likely ruin your shots. Wind speed is also another factor to consider. After all, you will need your drone to be as still as possible.
The best condition for time-lapse photography is if there is no wind at all. Wind speed of less than three miles per hour is also acceptable, although that may depend on the size and stability of your drone. If the wind speed is higher than three miles per hour, you might be better off just rescheduling your shoot for another day.
3. Leave space in your SD card
To create the time-lapse image, you will have to take several hundred stills. This can take up a lot of space, especially if you choose to shoot in RAW format (more on that later). As part of your preparation, make sure that you have an SD card with enough capacity to store all the stills. You can easily check the size of each individual still by taking test shots using your chosen settings.
4. Use Tripod mode (or equivalent)
If your drone comes with a Tripod flight mode, that would probably be your best bet for keeping it still enough to shoot time-lapse images. Tripod mode greatly slows down the movement speed of the drone so that it becomes less jittery.
Take note that these high-stability modes can prove to be counter-productive if you’re flying your drone on a windy day. Under these conditions, the drone will likely move about frequently to attempt to correct its position. All this means is that it’s bad idea to do time-lapse photography on a windy day, no matter how stable you think your drone is.
5. Keep the ISO low
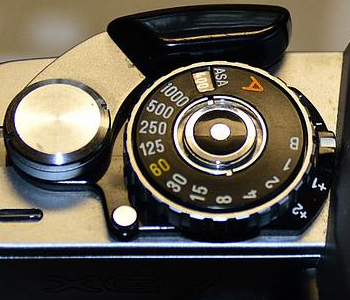
Unless you’re shooting under exceptionally dark conditions, it’s good practice to keep your ISO settings low. Try and take a few test shots at 100 or 200 ISO. This should just help avoid having your shots over-exposed.
Higher ISO settings can be an option if you’re taking a time-lapse image of the sunrise or sunset. About 600 to 800 should work well enough, but try not to go beyond that range.
6. RAW or JPEG?
If you’re a professional photographer, then you’re probably familiar with shooting in RAW mode. This preserves the color data of the image so that you can tweak its appearance during post-processing. If you have software that can do this, then you can certainly consider shooting in RAW mode. Of course, this also means that all your stills will take up more storage space.
JPEG compresses image data to save on storage space. The quality also isn’t all that bad – a lot of the visual details are still there, but you won’t be able to edit the white balance and color data later. JPEG images are also a lot easier to edit to create the final time-lapse image.
7. Use manual focus and exposure
Make sure to use manual focus and exposure when shooting time-lapse photos. Since your camera will be directed at a single subject for a long time, you would not want the focus or exposure to auto-adjust and ruin the shot.
A good trick is to enable the histogram so that you can adjust the exposure manually while the stills are being captured. This is particularly useful if you’re doing time-lapse photography of a sunrise or sunset.
8. Low shutter speed is best
Set your shutter speed to manual and to a relatively low value – 1/60 should work well in most situations. If your shots are still getting overexposed at this setting, you may have to use neutral-density filters.
Final thoughts
Time-lapse images are incredibly fun to shoot, and they are even more fun when done with a drone. A drone is essentially just a flying camera, so many of the standard photography rules still apply.
However, you will need to contend with factors such as wind speed and the drone’s short battery life. These are things you can easily prepare for. Just make sure to check the weather and to go out there with fresh batteries and formatted SD cards. It’s going to take a few tries before you can refine your time-lapse photography techniques, but they are very much worth the effort.