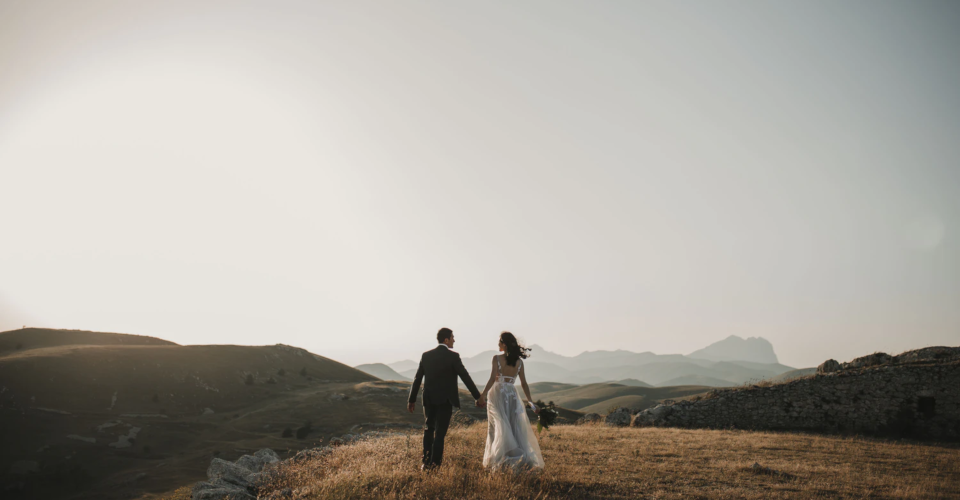
Tips on Taking Awesome Wedding Photos Using Drones

Wedding photography is a trade as old as camera technology. Since a wedding is one of the most momentous events in a person’s life, it makes sense to have as many photos of it as possible. This need for documentation has made wedding photography a huge business that had stood the test of time.
Lately, drones have been used to augment the services of wedding photographers. Obviously, taking photos using a camera drone requires a different set of skills than if you only had a DSLR camera. What does it take to become successful in using drones for wedding photography? Here are some of our tips:
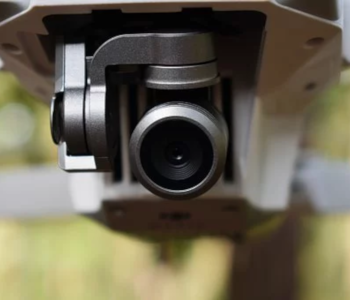
1. Get a quiet drone with a good camera

The first order of business is to get a drone that’s fit for the job. Naturally, you would want to get a drone that can capture high-resolution videos and photos – anything less than 4K resolution would be embarrassing for your clients. There are also a couple of other factors to consider, such as the ISO range of the camera and the extent of its dynamic range. You never know how challenging lighting conditions will be on the day of the wedding, and you would want to have a camera drone that can adjust and still shoot clear and vibrant photos.
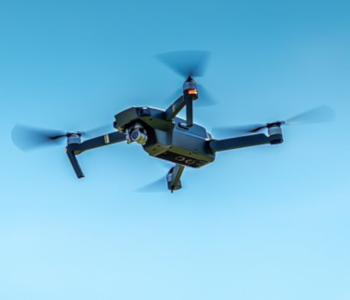
One other thing you need to recognize about drones is that they can be very loud. When you’re working an event that is as solemn as a wedding, your drone can become a huge distraction. While it’s impossible to find a drone that qualifies as “quiet,” there are a couple of options that we can best describe as “less loud.”
Lastly, you might find yourself traveling a lot when taking drone coverage gigs. For convenience, you might want to invest in an ultra-portable drone that is both lightweight and small enough to fit inside a regular backpack.
Several options satisfy all these conditions. The DJI Mavic 2 Pro remains one of the best ultra-portable camera drones today with its 1-inch CMOS sensor and an extra-wide ISO range and dynamic range. The DJI Mavic 2 Zoom is an equally good recommendation because of its dual optical-digital zoom capabilities, allowing you to hover at high altitudes and still capture high-resolution close-up photos.
Both drones mentioned above cost more than $1000 and may be out of the price range that starting drone photographers are comfortable with. A much more budget-friendly alternative is the Parrot Anafi which also offers a 4K camera stabilized by a mechanical gimbal and a couple of automatic camera modes.
2. Get insurance
All types of drone flight are inherently dangerous. However, you may find yourself shooting in close quarters when covering a wedding, which presents an even higher level of risk. As a professional, you need to be prepared for accidents when taking on these jobs.
Getting drone insurance is practically expected of professional drone pilots. Some clients may even refuse to engage your services if you don’t have insurance, as it protects them as much as it protects you.
There are two types of drone insurance to consider: drone hull insurance and liability insurance. The first type will cover all the costs of repairing your drone or replacing its part should your drone get damaged in an accident. This is a traditional property insurance policy which has a coverage depending on the market price of your drone or payload accessories.
The second type, liability insurance, is arguably more important. This policy covers all financial obligations which you may be liable to in the event of a drone-related accident. This includes any property damage for the wedding venue or injury to any of the wedding guests or venue personnel. You may need to assess the level of risk you’re undertaking with wedding photography jobs to decide on how much coverage you need to get. Typical liability insurance policies have coverage of upwards of $1 million.
In any case, the cost of insurance premiums is something you need to consider in the pricing scheme of your services.
3. Fly indoors only if you must
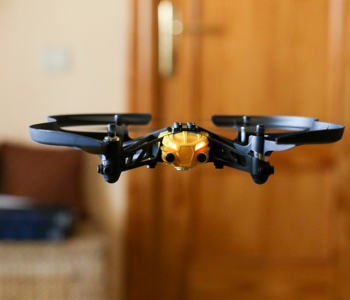
While drone photography is most suitable for outdoor events, some clients may ask you to capture drone photos or videos indoors. While this is not impossible, it is decidedly more complicated than flying your drone outdoors. Indoor drone flight is something you should only consider when absolutely necessary while exercising several precautionary measures.
If you’re going to fly indoors, make sure that the venue has a high ceiling. Your drone is also going to lose any GPS signals when it moves indoors, so you won’t be able to use GPS-aided stabilization or any GPS-dependent flight modes. You’ll also have to deactivate any obstacle avoidance systems, lest your drone simply stops moving because of the inherently obstacle-dense environment indoors.
To prepare yourself for flying indoors, you may want to practice flying your drone with no GPS stabilization. For DJI drones, this can be done using the ATTI or “Attitude” mode. Some models also offer a Tripod mode, which also similarly slows down the flight of the drone. It’s best to do this ahead of the event and somewhere safe.
Even with the required skill, you should still treat indoor flight as the last resort. In the interest of safety, you can propose switching to ground-based photography using DSLR cameras once the event moves indoors.
4. Check for airspace restrictions
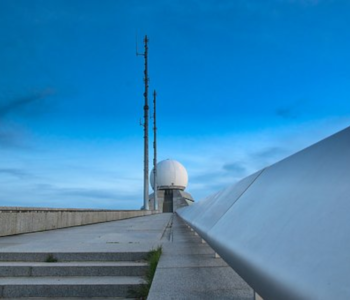
Once you take a job to cover a wedding, take the time to bust out a sectional chart and look for the location of the event. You need to check if the wedding will happen in an area covered by controlled airspace. If so, it’s best to prepare for airspace authorization ahead of the event.
Aside from the legal consequences of unauthorized flight in controlled airspace, you may also be flying a drone with built-in geofencing features. If the drone recognizes that it’s flying in a no-fly zone, it may refuse to take off at all. Don’t wait until the day of the wedding before you remedy such a situation.
The good news is that requesting for airspace authorization is now made very easy through the LAANC system. If you have a Part 107 license (and you should), you can simply access the LAANC system through popular drone flight apps such as Airmap or KittyHawk. This lets you request for airspace authorization directly from the FAA and receive a response in just a few minutes. You can do this ahead of time if you already have a scheduled wedding coverage.
5. Check for other flight restrictions

Aside from FAA restrictions on drone flight, you’ll also need to be wary of restrictions specific to your venue. National Parks have banned drone flight for years because of how disruptive and hazardous they can be to park visitors and employees. If the event is taking place in a National Park, the bad news is that you won’t likely get a waiver for the restriction.
Aside from the rules of National Parks, you also need to check state-specific or city-specific regulations on drone flight. Some municipalities may require you to apply for a permit before you can fly your drone, while others may have rules limiting how far or how high you can fly your drone. Most of these rules were borne out of privacy and safety concerns.
It’s best to check on this matter weeks or months ahead of the scheduled event. You may need to prepare documents, apply for permits, or talk with the client about alternative arrangements.
6. Bring extra batteries
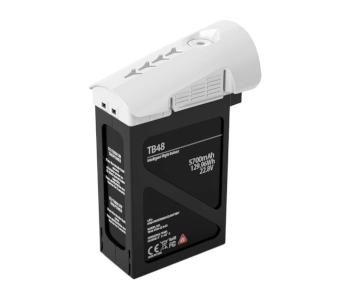
Most drones can only stay airborne for less than 30 minutes on a single battery cycle. This won’t be enough if you’re covering an event that will go for several hours, so make sure that you have a couple of fully charged batteries ready to go. Having several spare batteries requires a sizable investment, but it would be worse to miss out on key moments just because your drone can no longer fly.
You may also want to invest in a multi-dock charger to make battery management easier. A car charger adaptor will also be useful, so you’ll have another layer of backup in case of critical battery levels.
As part of good battery management, make sure that you don’t let your batteries run empty before you recharge them. If you’ll be storing your batteries for a long time, it’s best to charge them only up to about 50% capacity to avoid long-term damage.
7. Shoot in RAW format
Any camera drone worth its salt should give you an option to shoot in RAW format. A RAW image saves all the image data with minimal post-processing, allowing you more flexibility to adjust its exposure, white balance, and colors later on. By retaining all the image data, the RAW format gives the widest post-processing customization options. Essentially, it’s a “digital negative” that you can play around with, much like how traditional image processing was done in a darkroom.
The only consequences are that the files will be bigger because of all the image data and that you’ll need to spend a lot of time post-processing. The workflow is also inherently technical, so you might need to build your post-processing skills before you undertake this task. However, the resulting photos are invariably going to look much better when you maintain RAW format than if you shot them with automatic post-processing.
8. Use your AEB feature
Lighting conditions can get tricky when you’re doing a shoot outdoors. If the sun is shining too bright, the resulting glare may prompt you to lower your ISO settings. In more intimate scenarios, your first instinct may be to increase the exposure of your shots to capture richer detail. However, simply sliding the ISO settings up or down may not be a sufficient solution to more challenging circumstances.
A more reliable solution would be to take advantage of your camera’s Auto Exposure Bracketing (AEB) mode. When shooting under this mode, the camera takes several shots per click, each one with a different exposure level. This means that each image takes up more storage space, but it also means that you have greater flexibility for post-processing of the images.
Using an image processing software, you can create a composite image made from the images captured at different exposure levels. The result is an image that captures the maximum amount of detail – none of the details are over-exposed or under-exposed.
Exposure bracketing is an old photography technique. Some drones even offer a High Dynamic Range (HDR) feature which creates the composite image automatically for you. However, we prefer the degree of control that AEB provides.
9. Don’t fly in less than ideal weather

Weather is something all drone pilots need to be cautious of, especially if you’re offering professional services. As the day of the event draws nearer, you may want to check on the weather forecast so you can make the necessary preparations.
Flying a drone on a clear day with no winds is ideal. However, even the littlest bit of rain or strong winds can be problematic. When in doubt, it would be better to err on the side of safety and ground your drone. A crash, or any drone-related accident, would be a huge disruption to the wedding.
The best weather for flying a drone would be on a chilly day with no precipitation. Cold air is denser, therefore making it easier for the drone’s propellers to generate lift. This should provide a boost to your drone’s normal battery life.
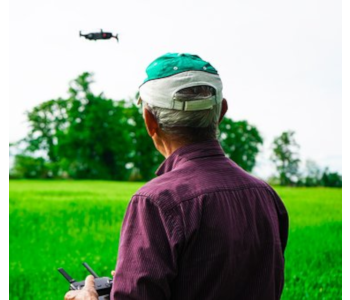
10. Avoid drawing attention
Even if you get the smallest and quietest drone that you can buy, it’s still going to draw attention in any crowd. Even at a wedding, the drone will unavoidably draw the eyes of the guest whenever it starts to fly. Do the couple and the organizers a favor by drawing as little attention to your drone as possible.
The first rule of thumb is to fly the drone only when necessary. Each time your drone flies, it must be with an intention. Do you simply want to take an aerial shot of the crowd or are you waiting to capture a shot of a specific moment? If you can take multiple shots on a single battery cycle and maximize how long your drone can stay airborne, then that would be better.
Another good practice is to fly your drone at an altitude high enough that it no longer causes the guests to get distracted. This is where a camera drone with a good zoom capability will come in useful. You could be hovering 100 feet in the air and still capture intimate moments without degradation of image resolution.
Why use a drone to capture wedding photos?
Using a drone to capture photos of weddings sounds bothersome, so why do it in the first place? Why not just stick to old-fashioned photography with DSLR cameras? Here are a few benefits of having drones for wedding photography:
Provides a unique angle
There are only so many angles and scenarios you can set up with a DSLR camera, and all those ideas have probably been done before. If you run a wedding photography business, then you probably already have go-to shots that you just repeat for different events.
Drone photography adds an extra dimension to your photos, both figuratively and literally. All those old and tired rehearsed scenes can be given new life when you shoot them from different angles. You can also take photos that capture just how big the crowd of guests is or ones that show off the beauty of the venue.
Excellent for outdoor shots
Drone photography really shines when it’s used to cover outdoor weddings. Whether it’s in a garden or a beach, the couple will surely appreciate how drone photos will give them unique ways of remembering their momentous day. If you’ve been covering weddings long enough, you’ll know that there are venues that just asking for a zoomed-out aerial photo.
Outdoor shots also make great additions to your portfolio. It may only take one good job before you can see clients running for your services.
Lets you charge premium rates
If you already run a photography business, the main benefit of adding drones to your arsenal is that it justifies increasing your rates. Most medium-sized studios charge a flat fee of at least $700 or a per-hour fee of $200. This is for a complete wedding photo and video package with additional drone services.
Super-popular photographers and studios can even charge close to $5000 for complete wedding day photography services.
Final thoughts
Wedding photography may be an old trade, but we can already see how it is evolving because of drone technology. If you’re already doing professional wedding coverage, then a drone could be a good way of keeping yourself distinct from your competition. Not only does a drone expand the services you can offer, but it also lets you charge higher rates.
Just keep in mind that flying a drone requires a new set of skills that you’ll need to learn. There’s also the matter of red tape – you’ll have to get a Part 107 certificate, register your drone, and apply for insurance. All the effort and investment is going to be worth it once you make it big.