Best 3D Printers for Schools and Libraries

Shopping for 3D printers is hard. Shopping for the best 3D printers for schools is even harder because you need to be on the lookout for very specific features. Not every product out there can be used for educational purposes. Even the ones being marketed as such don’t really have what it takes.
| Budget |
|---|
 |
| FlashForge Finder |
| 4.6/5.0 |
| 44.1 lb |
| Wi-Fi, USB |
| Low noise level and user-friendly touchscreen interface. |
| Check Amazon |
| Best Value |
|---|
 |
| BIBO2 |
| 4.7/5.0 |
| 28.7 lb |
| Wi-Fi, USB, SD card |
| Filament run-out detector and resume print after power loss. |
| Check Amazon |
| Top Pick |
|---|
 |
| Robo 3D R2 |
| 4.8/5.0 |
| 30.2 lb |
| Wi-Fi, USB |
| Filament run-out detector and relatively fast print speed. |
| Check Amazon |
In this guide, we introduce you to the best 3D printers for schools and libraries that you can buy today. The products mentioned here have all been carefully analyzed and judged according to our own set of criteria, detailed right below our quick-look comparison table. So rest assured that whichever product you pick, you are guaranteed a high-quality 3D printer that can keep up with all your classroom needs.
Best 3D Printers Comparison Table
| Make and Model | Weight | Connectivity | Price |
|---|---|---|---|
| Robo 3D R2 | 30.2 lb | Wi-Fi, USB | Check Price |
| FlashForge Finder | 44.1 lb | Wi-Fi, USB | Check Price |
| BIBO2 | 28.7 lb | Wi-Fi, USB, SD card | Check Price |
| Sindoh 3DWOX DP200 | 33.1 lb | Wi-Fi, USB | Check Price |
| Dremel Digilab 3D40-EDU | 43.6 lb | Wi-Fi, USB | Check Price |
Buying guide: what to look for and what to avoid
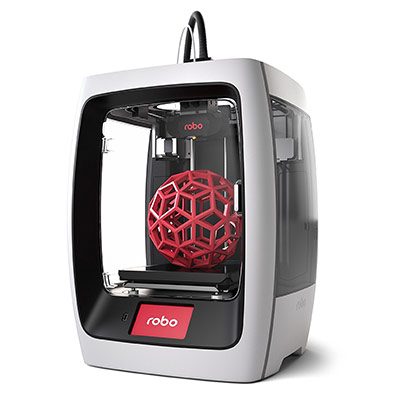
1. Robo 3D R2
Editor’s Rating: 4.8/5
The R2 is one those things that make you really appreciate Kickstarter and other crowdfunding platforms for helping bring amazing projects to life. It’s an exceptional machine that is not only recommended for educators but also for anyone who wishes to take up 3D printing as a hobby.
In a market full of copycats, the R2 stands out for having an eye-catching design that immediately tells you it’s not your usual run-of-the-mill 3D printer. It’s fully enclosed on all sides except at the top, with the print head receiving filament from a spool mounted at the back of the machine.
The R2 arrives mostly assembled, needing only a few parts that need to be installed. It’s not that hard to attach the remaining parts, even for non-techies. Just make sure everything is secured in place to avoid potential malfunctions along the way. The initial setup should only take about 30 minutes to one hour, maybe two hours if you take your time reading the instructions and making sure everything is good.
It’s obvious the R2 was built with user convenience and ease-of-use in mind, boasting a number of features that make 3D printing a breeze for everyone, most especially beginners. Leading the way is the intuitive touchscreen interface located at the base of the machine.
The 5-inch touchscreen allows you to start, stop, and pause prints. The R2 also includes a built-in memory that can store up to 500 3D models. Using the touchscreen interface, you can easily access the stored 3D models and print them anytime. But most impressively, the touchscreen interface includes an onboard slicing software that allows you to prepare your 3D models without a computer. It’s not every day you encounter a 3D printer with that kind of feature.
The R2 can be operated wirelessly. With the Robo app, you can print directly from your smartphone and, coupled with the integrated camera, monitor the print progress remotely. It’s not exactly something that would see a lot of use in a classroom setup, but it’s there in case you need it.
Featuring a heated build plate, the R2 is compatible with all sorts of filament types, giving you the chance to teach your students about the ins and outs of different materials. It’s best to research beforehand about the required print settings for each material and prepare the R2 at least a day before your demo. The build plate has great adhesion by default, so you don’t need to resort to hairspray, glue, or other tricks.
The R2’s performance is remarkable. It’s got outstanding print quality and prints relatively fast, and the large build size means you and your students can experiment with more complex 3D models. It’s equipped with a filament run-out detector, too. As soon as it’s out of filament, the R2 gives you a heads-up and waits for you to load a new roll of filament.
The R2 can be really loud while printing, though. It’s not loud enough to drown out your voice and distract your students during lectures, but it’s definitely noticeable in the background. But aside from the noise level issue, the R2 is free from other notable performance issues that can be a deal-breaker for some people.
Reliable and consistent, the R2 is the best 3D printer that you can get for educational purposes. It’s easy to use, includes a number of convenient features, and is backed by a manufacturer that actually cares about its customers.

| Tech Specs |
|---|
| Resolution: 20 microns |
| Volume: 8 x 8 x 10 in |
| Filament: 1.75 mm |
| Type: ABS, PLA, Nylon, and others |
| Weight: 30.2 lb |
| Connect: Wi-Fi, USB |
| The Pros |
|---|
| Easy to set up and use |
| Large build volume |
| Built-in camera for remote monitoring |
| Onboard slicer in the touchscreen interface |
| Built-in memory |
| Outstanding print quality |
| Filament run-out detector |
| Relatively fast print speed |
| Excellent customer service |
| The Cons |
|---|
| Not fully enclosed on all sides |
| High noise level |
2. FlashForge Finder
Editor’s Rating: 4.6/5
FlashForge is one of the most popular brands in the business. The China-based company has produced a number of highly rated 3D printers over the years, with the FlashForge Finder being one of the most affordable of the bunch.
Designed for both home use and classroom use, the Finder is a low-cost 3D printer that comes with a set of features not normally seen in 3D printers under $400. It arrives assembled, so you don’t need to spend hours putting it together. It’s housed in a robust frame that guarantees stability while printing.
The Finder has a built-in touchscreen interface. It’s a user-friendly and responsive interface with clear icons and straightforward options. It’s actually not very common for a $400 3D printer to have a touchscreen interface. Most products in the same price range come with a knob-operated LCD, which feels outdated in today’s world of smartphones and tablets.
Since no major assembly is required, and the initial setup only takes about 30 minutes or so, the Finder is basically a plug-and-play 3D printer. It’s very easy to use even if you have no prior experience with 3D printers or are not particularly skilled with electronics. It’s one of those no-fuss 3D printers that simply gets the job done.
The Finder’s print quality is really good for a low-cost 3D printer. With the right print settings, the Finder can thoroughly outshine other products that go for twice the price. But on the flip side, the Finder can only use PLA filaments. It’s the reason it’s not fully enclosed and lacks a heated build plate, which is necessary for materials like ABS. If you plan to teach your students about different types of materials, it’s best to look at other options on the market.
The Finder is notable for being fairly quiet while printing. It’s not on the same level as the Original Prusa i3 MK3 but it’s definitely more low-key than the Robo 3D R2. It prints relatively fast, too, though the actual print speed depends on the resolution and the volume of the 3D model – the larger and more detailed, the longer the wait.
It’s not like you can print particularly large-volume 3D models, though. The Finder’s build volume is on the stingy side, so you’re pretty much stuck with small trinkets – although that hardly matters if you’re teaching a bunch of kids (below 12 years old). For high school and college use, you might want a larger and more capable 3D printer.
It’s worth noting that while the Finder can use third-party filaments, the built-in spool holder – which goes in at the back of the machine – is designed specifically for FlashForge filaments. So you need to build your own external spool holder if you plan to use filaments from third-party companies such as Hatchbox and 3D Solutech.
If you only have a $400-500 budget, the Finder is the best one you can buy right now. It’s super-reliable, produces good print quality for a budget 3D printer, has excellent customer support, and is perfectly safe to use for kids. It’s also wireless-enabled, which is convenient but not always reliable.
| Tech Specs |
|---|
| Resolution: 100 microns |
| Volume: 5.5 x 5.5 x 5.5 in |
| Filament: 1.75 mm |
| Type: PLA |
| Weight: 44.1 lb |
| Connect: Wi-Fi, USB |
| The Pros |
|---|
| Sturdy frame |
| Easy to use |
| Hassle-free initial setup |
| Removable build plate |
| Low noise level |
| Good print quality |
| User-friendly touchscreen interface |
| Helpful customer support |
| The Cons |
|---|
| Can only use PLA filaments |
| Integrated spool holder not compatible with third-party filaments |
| Small build size |
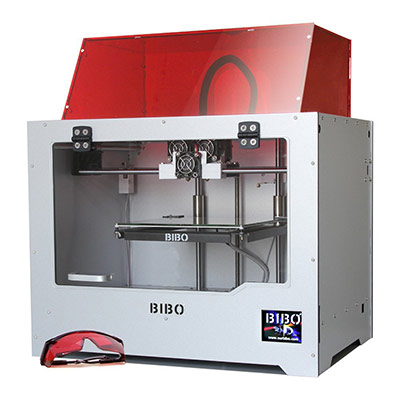
3. BIBO2
Editor’s Rating: 4.7/5
The BIBO2 may not be the most play-and-plug 3D printer for schools, but it’s certainly the most loaded with features, even rivaling the Robo 3D R2, our top pick. It’s a dual extruder 3D printer that delivers superb value at a fairly affordable price, so it’s basically a shoo-in for our best value pick.
Setting up the BIBO2 can take up to two hours, which includes the initial tinkering with the print settings. The BIBO2 requires a bit of assembly at the onset. Some of the parts – like the acrylic covers – still need to be installed. The minor assembly is straightforward and can be done in less than one hour, though the process could have been faster if the written instructions were more helpful.
Going through the initial print settings is the harder part, especially for non-techies. Like many other 3D printers, the BIBO2 needs a fair amount of tinkering before you can produce your first successful print. So before you think about your lesson plan, make sure you watch videos and read tips online on how to set up the BIBO2 properly.
Or, alternatively, you can contact the manufacturer and request for technical support. BIBO provides top-class customer service, answering inquiries in a timely manner and ensuring that every customer comes away satisfied with his or her purchase. Lots of manufacturers could learn a thing or two about how BIBO handles after-sales support.
Sure, the initial setup is longer compared to the other products here, but the BIBO2 is definitely worth your time and effort. As mentioned, the BIBO2 is packed with features. Perhaps the most notable of which is the built-in laser engraver, which you don’t normally see on a $900 3D printer. It’s just a regular laser engraver, though – nothing fancy or anything like that.
Similar to the R2, the BIBO2 is equipped with a filament run-out sensor. Once a filament roll is fully consumed, the machine automatically pauses the print and waits for you to load a new spool. The BIBO2 can also resume your print progress after a power failure. In the event that one of your K-12 students accidentally yanks out the power plug, you will be able to continue where you left off.
The BIBO2 includes a heated build plate, allowing you to introduce your students to a variety of materials, including ABS, HIPS, TPU, and PETG. The maximum build size is fairly large, too, so there’s definitely room for a lot of experimentation, especially with the dual extruder setup. The print quality is good, and with the proper settings, the BIBO2 can produce exceptional results.
The BIBO2 is fully enclosed on all sides, with a pair of removable acrylic covers. For PLA filaments, you need to keep the openings uncovered. For ABS and other filaments that need consistent temperatures, keep the openings covered. The enclosure also helps with the noise level and keeps curious fingers safe from the heated build plate.
A reliable and durable workhorse, the BIBO2 is the best 3D printer for schools that you can get without hitting the $1,000 mark. It’s easy to use, requires minimal assembly, packs a number of helpful features, and comes with a dual extruder setup. If the R2 is too expensive for you and the FlashForge Finder is too limited for your classroom needs, get the BIBO2.
| Tech Specs |
|---|
| Resolution: 50 microns |
| Volume: 8.4 x 7.3 x 6.3 in |
| Filament: 1.75 mm |
| Type: ABS, PLA, PVA, and others |
| Weight: 28.7 lb |
| Connect: Wi-Fi, USB, SD card |
| The Pros |
|---|
| Dual extruder |
| Easy to use |
| Fully enclosed, with removable front and top covers |
| Filament run-out detector |
| Has built-in laser engraver |
| Resume print after power loss |
| Top-class after-sales support |
| The Cons |
|---|
| Wireless connection can be unreliable |
| Crappy instruction manual |
| Not plug-and-play |
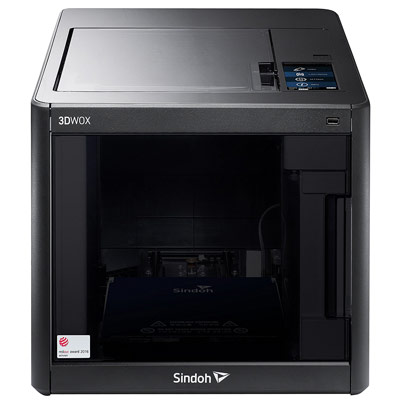
4. Sindoh 3DWOX DP200
Editor’s Rating: 4.5/5
The Sindoh 3DWOX DP200 is the most plug-and-play 3D printer on this list. If the Robo 3D R2 didn’t exist, the DP200 would be our top pick.
The DP200 is a fully enclosed 3D printer with a clean, no-nonsense design. Everything is secured inside the enclosure, including an internal spool holder that looks like a hard disk drive. The top cover can be flipped opened for ventilation. Right next to the top cover is an intuitive touchscreen interface. Inside, the DP200 features a removable build plate, an integrated camera, and a LED light.
Setting up the DP200 is a straightforward affair. The DP200 boasts an auto-loading filament system that makes loading the filament idiot-proof. Just insert the cartridge and the printer will do the rest – no need to manually guide the filament to the print head, which can be tricky sometimes. The DP200 also includes an assisted bed leveling system in which you simply turn the gears underneath the build platform according to the instructions displayed on the touchscreen interface.
The default printing software is easy to set up and use. It includes an easy mode, which makes slicing and editing 3D models accessible for beginners. In all, the DP200’s entire initial setup – both on the hardware side and software side – should only take around 20 minutes. If you have prior experience with 3D printers, you can probably do it in less than 15 minutes, which sounds almost comical.
In terms of performance, the DP200 is mostly on point. It’s a reliable 3D printer capable of producing outstanding print quality with the right settings. The large build volume means you and your students can print more than just small, non-functional items. The bad news is that the DP200 isn’t the fastest 3D printer out there. It’s slower than other 3D printers in the same price range, although not to the point that even small, low-resolution 3D models would take forever to complete.
The biggest reason we picked the R2 for our top choice is that the DP200 requires you to use proprietary filaments. Using third-party filaments will void your warranty. Not to mention the auto-loading filament system only works with Sindoh spools. Even if you manage to find a way to get around that, the DP200 is optimized for Sindoh filaments, so you might run into more issues than normal while using a third-party filament.
The DP200 is also limited to PLA and ABS, so you won’t be able to introduce your students to more advanced materials. It’s not really a major issue if you’re teaching K-12 students. But for higher education, we recommend a 3D printer with an open filament system.
Despite its limitations, the DP200 is still one of the best 3D printers for schools that you can buy today. It’s incredibly easy to set up right out of the box and requires minimal tinkering between prints. If you want a true plug-and-play 3D printer, the DP200 is for you.
| Tech Specs |
|---|
| Resolution: 50 microns |
| Volume: 7.9 x 7.9 x 7.3 in |
| Filament: 1.75 mm |
| Type: ABS, PLA |
| Weight: 33.1 lb |
| Connect: Wi-Fi, USB |
| The Pros |
|---|
| Plug-and-play |
| Auto-loading filament system |
| Assisted bed leveling system |
| Fully enclosed |
| Integrated camera for remote monitoring |
| Reliable wireless connection |
| Large build volume |
| Printing software has an easy mode |
| Good customer support |
| The Cons |
|---|
| Slow print speed |
| Can only print PLA and ABS |
| Needs proprietary filaments |
5. Dremel Digilab 3D40-EDU
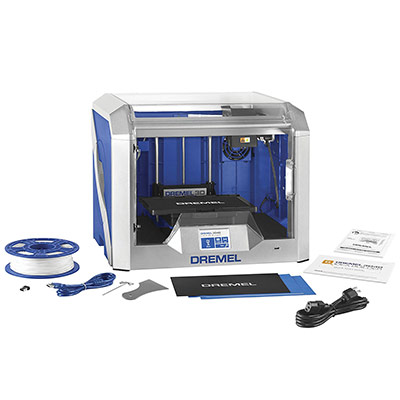
Editor’s Rating: 4.5/5
Like the Sindoh 3DWOX DP200, the Dremel Digilab 3D40-EDU is one of the most plug-and-play 3D printers out on the market. But just like the former, the 3D40-EDU’s limitations hold it back from taking the crown from the Robo 3D R2.
The 3D40-EDU is a 3D printer designed specifically for classroom use – the “EDU” in the product name pretty much tells you that. It’s an educational bundle of the 3D40, featuring extra items that make it more classroom-ready than the regular 3D40 bundle.
The initial setup takes about 30 minutes. The 3D40-EDU arrives fully assembled and requires minimal tinkering on the hardware side before you can start your first print. The default printing software isn’t the most user-friendly, though, so you might want to pick up a different slicer.
The 3D40-EDU is fully enclosed, so it’s perfectly safe to use inside the classroom. The enclosure keeps curious fingers from accidentally making contact with the moving parts, which can result in serious injuries. The enclosure also helps keep the noise level down. In fact, the 3D40-EDU is one of the quietest 3D printers on the market, so you don’t have to worry about it distracting your students during lectures.
Included in the package is a set of lesson plans to help you educate your students about the basics of 3D printing. In addition, you get access to a 4-hour professional development course designed specifically for teachers.
Most 3D printers come with one or two free spools of filament. The 3D40-EDU includes not one, not two but four free spools of filaments, which come in white, blue, black, and orange. Dremel was also generous enough to include an extra build plate and a bunch of extra build tapes in the package, so you’re pretty much set with everything you need to get started right away.
The 3D40-EDU’s print quality is good. It’s consistent and detailed even with the default print settings. The print speed is fairly fast, too, with small 3D models only taking a few hours to complete. But of course, the actual print speed depends on the volume and resolution of the 3D model.
In terms of material options, the 3D40-EDU is even more limited than the DP200. It can only print PLA, which is generally regarded the safest material to use in a classroom setup. The good news is that you can use third-party filaments, but you need to build your own external spool holder since the 3D40-EDU’s internal spool holder is designed for Dremel filaments. If you want a Dremel 3D printer that can print other materials, check out the 3D45.
Sturdy and easy to use, the 3D40-EDU is one of the best pure educational 3D printers on the market. Unlike other products, it’s actually bundled with items designed to help both students and educators. It’s reliable, easy to set up right out of the box, has excellent customer support, and comes with an intuitive touchscreen interface.
| Tech Specs |
|---|
| Resolution: 100 microns |
| Volume: 10 x 6 x 6.7 in |
| Filament: 1.75 mm |
| Type: PLA |
| Weight: 43.6 lb |
| Connect: Wi-Fi, USB |
| The Pros |
|---|
| Plug-and-play |
| Fully enclosed on all sides |
| Easy to use |
| Includes 30 lesson plans for educators |
| Get access to a professional development course |
| 4 free spools of filament |
| Extra build plate and build tapes |
| Fast print speed |
| The Cons |
|---|
| Wireless connection is not the most reliable |
| Limited to PLA filaments |
| Third-party filaments don’t fit in internal spool holder |
| Dremel software can be confusing |
Contents