Which Software is Essential for 3D Printing?

Strictly speaking, you only need a slicer to do 3D printing, while an STL repair software would be useful when downloading free STL files. If you want to expand your horizons, then 3D design software would be perfect for making your own 3D models. G-Code viewers and remote monitoring apps are also generally recommended for troubleshooting and quality-of-life improvements.
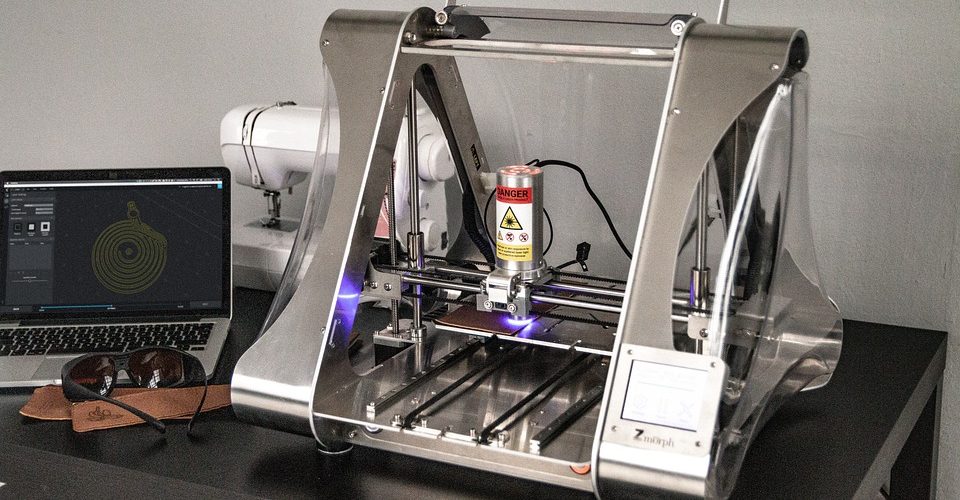
When 3D printing is discussed, the focus is typically on the hardware while the importance of software is overlooked. Software is just as equally important, especially if you want to level up your 3D printing skills. Which software should you have to enrich your 3D printing experience?
The most essential – Slicers
The process of slicing a 3D model is at the very core of 3D printing. However, slicers do more than just divide a 3D model into very thin layers. It also translates these sub-divisions into a machine language that the 3D printer can understand. This G-Code is basically a set of instructions that dictate the temperature, speed, and movement of the 3D printer components.
There are a lot of slicers out there and your 3D printer probably already came with an installer for one. While there is a wide selection, the most popular ones can be narrowed down to just two – Cura and PrusaSlicer. Both of these are excellent slicers but performance can vary depending on your printer and the 3D model you are working with.
Of the two, Cura is often considered the more beginner-friendly option. Developed by Ultimaker, Cura is open-source software with capabilities that can be expanded using plugins that have been created through the years. The interface of Cura can be customized to adjust to your level of skill and experience. The more complex settings are instrumental if you want better control over your print output quality.
If you need a Slicer with more advanced capabilities, then PrusaSlicer is the more suitable option. A reworked version of the open-source software Slic3r, PrusaSlicer has native support for Prusa 3D printers and has profiles for most of the common 3D printing materials. It can be used for both filament and resin 3D printers. While it is more well-known for its expert-level customization, PrusaSlicer is just as useful for basic 3D printing jobs.
For troubleshooting – STL repair
One of the best things about owning a 3D printer today is the fact that you can easily download STL files from various websites that are designed for 3D printing. There are designs out there for practically anything – from detailed miniatures to full-body-sized armor.
However, not all 3D models are ready or optimized for 3D printing. Errors may pop up every now and then, the most common of which is non-manifold geometry. The good news is that you can still salvage these 3D models with good STL repair software.
For this section, we will be focusing on standalone STL repair software and not include software for general 3D modeling and web-based platforms. With that limitation in mind, we are down to two popular options – Meshmixer and MeshLab.
Meshmixer is a free mesh editing program made by Autodesk. It is quite advanced and was considered one of the best mesh editing platforms at the peak of its popularity. If you’re just doing STL repairs, then Meshmixer has built-in functions for automatically spotting and repairing them. Perhaps the only downside of Meshmixer is the fact that it is no longer being updated by Autodesk, although it is still available to download.
MeshLab is another free software designed for mesh modeling. It is a bit more limited in capabilities than Meshmixer, but also has a much simpler interface and workflow. It might be the more practical option if all you want to do is to repair an STL file for 3D printing. MeshLab also has several automatic tools for STL repair.
For simulations – G-Code viewers

The G-Code is the language of the 3D printer. It is a very basic program that the 3D printer follows to determine how the print head moves, the temperature at which it prints, and how fast the extruder gears rotate.
A G-Code viewer is a program that allows you to view a simulation of the 3D printing project based on just the G-Code. There is actually a good chance that you will not be needing this software, as most slicers are perfectly capable of providing a visualization of the project based on the G-Code that it generates. This is certainly the case for Cura and PrusaSlicer, for instance.
However, a G-Code viewer can be useful if you want to take a closer look at the potential output of a specific G-Code. From there, you can make small tweaks to fine-tune how the print will look. This can even be useful for troubleshooting if there is a G-Code that is particularly giving you trouble.
The great news is that you won’t even need to download anything – all the highly recommended G-Code viewers are web-based and completely free to use. There are two solid options here – the G-Code Analyzer and NCViewer.
Of the options here, G-Code Analyzer is the much more accessible choice. It has a clean user interface and a fairly simple workflow. Aside from providing visualization of the project, G-Code Analyzer will also provide estimates of the printing time and the total distance traveled by the print head.
NCViewer can seem a bit more intimidating at first glance. Despite the unremarkable interface, this is actually a very powerful tool for visualization of both 3D printing and CNC machining. As the visual model is built, you can click on individual components to highlight the relevant line of code for that part. The platform also allows you to switch between different views and watch as the visual project is being built layer by layer.
For customization – 3D modelers
The ultimate frontier of 3D printing comes when you can design your own 3D models. This is, after all, the goal of 3D printing – to turn the objects in your mind into reality. Learning how to do 3D modeling can take a bit more practice but is certainly worth the effort.
There is an entire industry out there for 3D modeling, so picking just one software can be tough. These design platforms can vary greatly in terms of ease of use, features, and price. There are programs that are more specialized in 3D sculpting, and others that are more suitable for engineering or technical 3D models.
To present a good sample of the available 3D modeling software, we will narrow it down to three very different programs – TinkerCAD, Blender, and Fusion360.
TinkerCAD is a very popular option for beginners. It is a free, web-based app with a fairly simple interface that allows you to combine a range of basic 3D shapes to build a complex model. TinkerCAD can be useful if you’re designing small parts for 3D printing. However, it is quite limited in its capabilities and is a platform that many people outgrow as they develop more skills.
Blender is a very popular 3D design platform and perhaps the one with the most diverse applications. It is widely used by artists, animators, and video game designers. There are even entire short animated films that are made entirely on Blender. That said, Blender has a pretty steep learning curve. The great news is that it remains a free and open-source software.
Fusion360 by Autodesk is a 3D design software that is used on all sorts of professional applications. It shines in creating 3D models of complex engineering parts and devices. It is also a great platform for collaboration between different designers. As a professional-grade software, a subscription to Fusion360 is considerably expensive. This is certainly the kind of software that needs extensive training.
Nice to have – Remote control
While not entirely necessary, it’s nice to have the option to monitor and control your 3D printer remotely. 3D printing jobs can take more than a dozen hours between which you will want to get work done, do some errands, or get some rest. Remote control allows you to do all these things while still keeping an eye on your 3D printer.
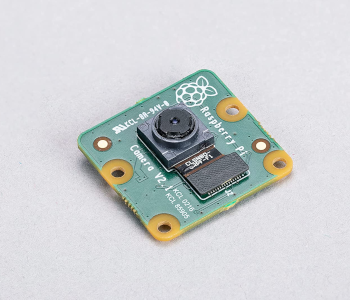
As you might have figured out, there is also a hardware component to remotely controlling a 3D printer. The best way to do this is to connect a Raspberry Pi micro-computer to your printer’s control board. This is a pretty common modification and you can find many tutorials online on how you can do it for your specific 3D printer.
You will then need to install OctoPrint on the Raspberry Pi. OctoPrint is actually one of the most versatile pieces of software that you can use for your 3D printer. It is a web-based 3D printing host that is capable of slicing models, generating G-Code, and providing visualization of the G-Code. There is also a huge repository of OctoPrint plugins that will further expand the capabilities of the software.
As a web-based platform, OctoPrint is the perfect tool for remote control and monitoring of your 3D printer. You will need a compatible webcam, of course. Camera modules for the Raspberry Pi will be perfect such as the Arducam or the official Raspberry Pi Camera Module.
Through the OctoPrint web app, you can view a real-time video of your 3D printer, monitor print temperature, wirelessly upload G-Code files, or terminate a printing job immediately if it messes up. Being able to do all these remotely is a huge quality of life improvement and is worth the effort of setting up a Raspberry Pi on your 3D printer.
Final thoughts
Using a 3D printer goes beyond just buying the 3D printer and tinkering with its parts. At the very core of the 3D printer is the firmware that controls all the 3D printer’s parameters and operations. This means that you will also need software to communicate with the 3D printer firmware so that it does exactly what you need.
There is a large ecosystem of software platforms out there for 3D printing and 3D modeling. We highly recommend exploring all these options – they can enrich your 3D printing experience in ways that you would not have expected.