FAQ Guide for Those Who Want to Go Into 3D Printing

3D printing is now at a point where it is popular and affordable enough to attract newcomers. It’s still incredibly fun, of course, and can be a good tool to start or help out with a business. However, 3D printers can still be intimidating for beginners as there simply has not been anything like them before.
We made this FAQ to help out those who are on the verge of buying a 3D printer but still have some questions that they need to be answered. We won’t be delving into technical matters like addressing common 3D printing problems. Instead, we will just be providing answers so that buyers can make more informed decisions.
What is 3D printing?
3D printing, also known as additive manufacturing, refers to a range of manufacturing techniques that build a part or object layer by layer. The reference for the part being 3D printed is a digital 3D model.
Additive manufacturing provides a stark contrast to the more established method of subtractive manufacturing. In subtractive manufacturing, the part is created by cutting out material from a single solid piece. Aside from the waste generated by this method, it is also limited in terms of the geometrical complexity of the parts it can produce.
The method of building the object by layer gives additive manufacturing the benefit of extra design freedom. This is perhaps one of the biggest selling points of 3D printing as a manufacturing technique. It also uses up less material than subtractive manufacturing. On the flip side, 3D printing is generally a slower process and produces parts with lower mechanical strength.
How do 3D printers work?

Although all 3D printers work using the additive manufacturing concept, there are different techniques by which this is carried out. Since this FAQ is geared towards beginners, we will be focusing on the two most accessible methods – Stereolithography (SLA) and Fused Deposition Modeling (FDM).
SLA uses a liquid resin as raw material. It relies on the concept of photopolymerization, which results in almost-instant curing of the liquid resin into a solid plastic. Allowing UV light to hit the liquid resin provides enough energy for the components in the resin to form long-chain polymers.
The liquid resin is contained in a resin vat with a submerged build plate. The UV light then hits the build plate at selected points, instantly solidifying the resin. The build plate then moves very gradually, allowing for the fresh resin to be exposed and another layer to be cured by the UV light. This process is repeated until the part is completed.
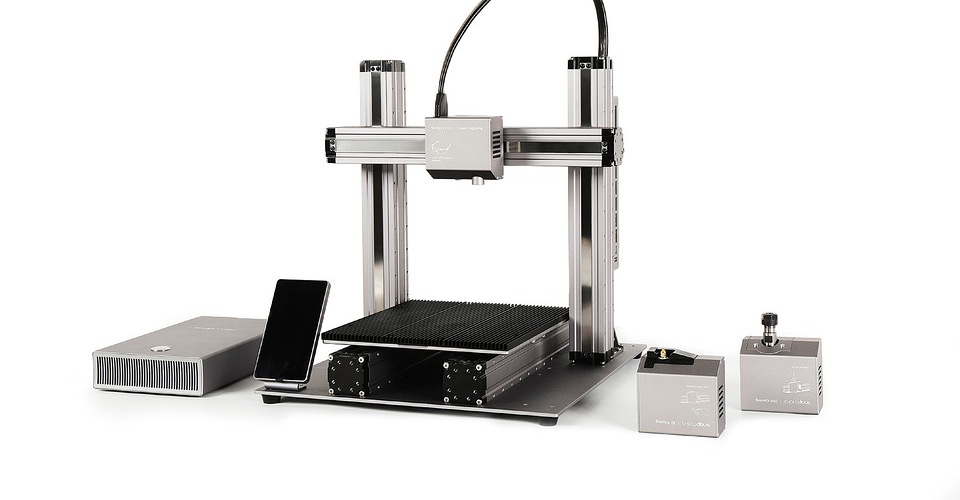
FDM uses plastic filament as raw material for 3D printing. This has become the far more common method nowadays and is likely the type of 3D printer that most people are familiar with. The mechanism of FDM printing is a lot simpler – the plastic filament is melted, extruded, and laid down on a printed layer by layer.
FDM printers have become popular because of their fundamentally simpler design, which means they are cheaper and easier to use. However, prints produced via FDM printing are limited via quality, resolution, and mechanical strength. FDM prints usually come out with highly visible layer lines that have to be sanded smooth if you want them to have a professional-grade finish.
Although most SLA printers are expensive, there are now affordable desktop-scale SLA printers that have bridged this price gap. SLA printers are capable of 3D printing at a much higher level of detail and resolution, making them ideal for professional use.
However, the liquid resin used in SLA printing is more expensive and can be quite messy to deal with. In most cases, SLA printers also require a post-curing step for them to develop mechanical strength. This means having to buy another piece of equipment.
If you’re looking for a 3D printer for use at home or in a small workshop, then SLA or FDM are both viable options. Each one has a unique set of benefits and drawbacks but is equally capable of turning digital models into real 3D objects.
What materials can I use for 3D printing?
If we’re keeping this discussion within the limits of SLA and FDM, then the simple answer to this question is that you’ll be 3D printing with plastic. More specifically, SLA uses photopolymer resin and FDM uses thermoplastics.
This does not mean that there’s a severe limitation on materials that you can 3D print with. Between SLA and FDM, there are probably several hundred options for you out there.
If you’re buying an SLA printer, then you can choose from a wide range of thermoset resins with different properties. There are resins specifically formulated to be stronger, more heat-resistant, flexible, or have a clear finish.
Although the selection of SLA resins is formidable, it is still smaller than that of 3D printing filaments used in FDM. A huge advantage of FDM being insanely popular is that there are now so many brands and variants of 3D printing filaments.
Among the basic filaments for FDM are PLA, ABS, PETG, HIPS, Nylon, TPU, and PVA. Each of these has its own unique perks such as UV-resistance, rubber-like flexibility, or solubility in water. If you don’t like your 3D prints to look like plastic, then you can also use composite filaments that will make your project look like metal, wood, or ceramic.
Some technologies allow for 3D printing using metals or ceramics, but these cost several thousand dollars. If this is something you’re interested in, your best bet would be to send over your 3D models and have them done by third-party providers of this service.
Do I need to learn 3D modeling?

A common concern from people who are considering buying a 3D printer is that they might not have any material for printing. After all, a 3D model is a lot more complex than an image or document file.
The good news is that there’s no need to create your own 3D models for you to get your money’s worth when buying a 3D printer. The 3D printing community is huge nowadays. Through sites like Thingiverse or Pinshape, hobbyists and professionals have been able to share and download 3D models either for free or for a price.
If you’re downloading 3D models off these sites, be wary of any licensing issues. Not all models can be used commercially. If you’re just printing them for personal use, then you should not have any problems at all. There is a virtually limitless selection of 3D models to download, so you are not likely to end up feeling like you have nothing to create with your 3D printer.
Printing downloaded 3D models is perfectly fine and is an accepted practice among 3D printing hobbyists. However, being able to create your own 3D models is certainly an invaluable skill. If you’re planning to venture into using your 3D printer for business, then learning 3D modeling should be a reasonable goal.
How do 3D printers “read” 3D models?
3D models can be saved in several different file formats, the most common of which are STL and OBJ. However, these models cannot be directly recognized by 3D printers. Through slicer software, a 3D model can be converted into a series of machine codes.
Quite literally, a slicer software “slices” a 3D model into very thin layers. These layers correspond to how the project will be physically built on the 3D printer. These slices also act as the reference for the slicer software when it generates the machine code that the 3D printer can recognize.
The algorithm that 3D printers follow is called G-Code. This is a rudimentary form of programming code consisting of simple instructions for the 3D printer to follow. Unlike more complex codes, G-Code does not have variables or any type of logic. The entire code is literally just a list of instructions such as in what directions the components of the 3D printer will move and by how far.
You typically won’t need to worry about the slicer software when you buy a 3D printer, as they are typically bundled together. If there’s another slicer software that you prefer, there’s also the option of buying it separately – just make sure that it’s compatible with your 3D printer. Ultimaker Cura, Simplify3D, and PrusaSlicer are some of the most popular options.
How much does a 3D printer cost?
Now is a great time to buy a 3D printer simply because of how affordable they have become.
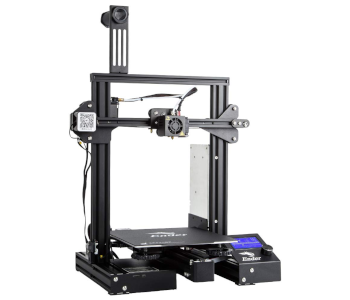
Most of the good FDM printers cost between $200 and $400. These include extremely popular models like the Creality Ender 3 Pro and the Anycubic Mega S. There are also models that cost less than $200, such as the Elegoo Neptune 2.
If you’re planning to use your 3D printer to offer professional services, then we suggest going for a higher-end model. The Flashforge Creator Pro 2 is a pretty good option with its dual extruders and built-in enclosure, although it costs almost $900.
The selection of SLA printers is smaller but there are still affordable options with the $200 to $300 price range. Recommended models include the Anycubic Photon Mono and the Creality Mono 3D Printer. Some more expensive models typically provide a bigger build volume. Both the Anycubic Photon Mono SE and the Longer Orange 30 are within the $300 to $500 price range.
As mentioned, a curing chamber is critical in SLA printing to make sure that your 3D prints come out as strong as possible. These should cost less than $100, like this curing machine by Sovol 3D. Elegoo also sells a 2-in-1 washing and curing machine which costs a little more.
Generally speaking, you can get a 3D printer for less than $500. This is just your initial cost. As with any hobby or business, there are additional expenses that you should anticipate.
What other expenses do I need to prepare for?
Aside from the 3D printer itself, you will have to spend money on a few accessories, gear, and supplies. Here is a quick rundown of the essential add-on items:
Filament or resin
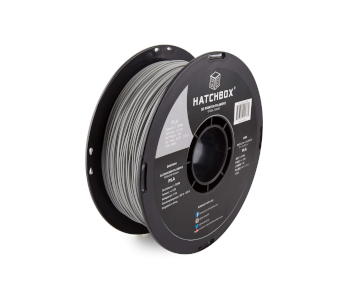
The raw material for 3D printing is the main recurring supply you’re going to need. Whether it’s filament or resin, you will want a steady supply of materials just in case you get the itch to 3D print something.
A 500-gram bottle of standard resin costs around $20. A 1-kilogram filament spool also costs about the same. If you want high-performance versions of standard materials such as those with better mechanical strength or heat stability, you will have to spend $10 or $20 more.
Safety gear
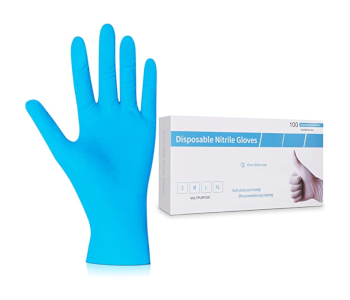
Keeping yourself safe is an important part of 3D printing. 3D printers tend to release chemical fumes or microplastics in the air, making it necessary to wear some kind of breathing protection. We also recommend using nitrile gloves, especially when handling raw plastic resin in SLA printing.
Putty knife set
A putty knife is an ideal tool for wrenching off a finished 3D print off the print bed. Just drive the knife underneath the base layer of the print with a bit of force and it should get pried off easily. Make sure to have a set of these putty knives, just so you always have the ideal shape and size for any situation.
Screwdriver and hex key wrench set
Troubleshooting is a way of life in 3D printing. In some cases, this may involve taking apart some portions of the 3D printer and putting them back together again. A problem can even be solved by just tightening any loose nuts or screws. A complete set of screwdrivers and hex key wrenches ensures you can address any minor troubles in your 3D printer.
Pliers
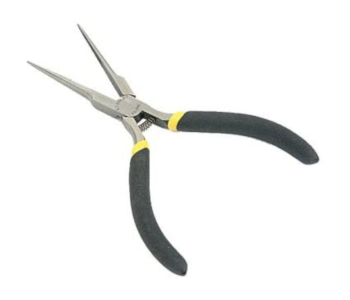
Support structures may be necessary for some models in 3D printing, particularly if there are overhanging features. While these provide structural stability, they can also be very hard to remove during post-processing. The weapon of choice for this step of the process is a pair of long-nosed pliers.
Zip-locked bags and silica gel
If you’re buying an FDM printer, one thing you need to know about 3D printing filament is that they are very hygroscopic. This means that they can absorb moisture readily from the atmosphere. This degrades the filament over time and can result in performance and quality issues during 3D printing.
The cheapest way to ensure that your filaments don’t absorb moisture during storage is to keep them inside zip-locked bags. Throw in a few packets of silica in there as well to absorb any residual moisture from the filament. Just keep in mind that air still diffuses into plastic, albeit very slowly, so you will need to replace the silica gel periodically.
Isopropyl alcohol
Isopropyl alcohol is a critical tool specifically for SLA printing. It is used to wash off residual uncured resin after 3D printing and before the post-curing step. Make sure to use nitrile gloves while doing the cleaning step and to dispose of the resulting solution according to your local recycling rules. Never dispose of uncured resin by flushing it down your sink.
Glass print bed
If your 3D printer comes with a metal print bed, then a print bed made of borosilicate glass may be the single most important upgrade you can make. A glass print bed heats up more evenly, does not warp after repeated heating and cooling cycles, and has a perfectly smooth surface. You can simply order a 3 to 4-millimeter plate of glass pre-cut according to the size of your print bed and attach it using binder clips.
Tape or glue
Bed adhesion can be a persistent problem in 3D printing, especially in FDM printers. When this happens, you will be glad to have some adhesive aid on hand. The common adhesives used in 3D printing are glue sticks, hairspray, blue painters’ tape, and Kapton tape. These are suitable for different conditions, so we recommend always having some of each one of them.
Sandpaper
Whether in FDM or SLA printing, a bit of sanding will almost always enhance how a finished print will look. This abrades the visible layer lines and is usually the pre-treatment before polishing or painting. The proper sanding procedure for 3D printed objects should involve a series of sandpapers with different grit numbers. Working your way up from low-grit to high-grit sandpaper should deliver better results and avoid heating of the plastic due to excessive friction.
How hard is it to learn to use a 3D printer?

Modern 3D printers are deliberately designed to be user-friendly. On the software side, loading up a 3D model and adjusting printer parameters is usually very easy and intuitive. The bigger challenge of 3D printing is being able to deal with problems on the mechanical side.
Troubleshooting is a natural part of 3D printing. Between bed adhesion, clogging, warping, stringing, and collapsing features, there are just a lot of things that can go wrong once a 3D printing project starts. In most cases, a single problem can be caused by several different factors. Thus, recognizing these problems and coming up with a solution requires going through a learning process and a lot of trial and error.
If you want to go into 3D printing, a bit of understanding of how heat works and how materials react to heat can be invaluable. A knack for tinkering will also be useful, especially since you will need to take some of the parts of your 3D printer apart every now and then, whether for repair or maintenance.
If you’re still apprehensive about buying a 3D printer because of the learning curve it takes, then check out this list of free online 3D printing courses.
How long does the 3D printing process take?
It’s tough to say exactly how long 3D printing a specific model will take. There are a lot of factors to consider. Naturally, a larger project will take longer to print than a small miniature or figurine. Printing with thin layers or at low speeds is ideal for preserving fine details in your model but will also extend how long the project will print. The increased infill can also lengthen the printing period but will invariably result in stronger prints.
For small figures like the classic Benchy, expect to spend about an hour for printing at the standard speed of 60mm/s. Larger models can take up to 12 hours. It’s not even uncommon for some 3D printers to be left running up to 24 hours when printing large and detailed designs.
If you’re worried about how you can keep track of projects that take more than 12 hours to 3D print, a good idea might be to set up a Wi-Fi camera facing your 3D printer. With this, you can just monitor the progress of the project using your phone, even when you have to step away for a bit.
How much maintenance does a 3D printer need?
3D printers have a lot of small, moving parts. A lot of these parts are also subjected to temperatures of up to 200 C or more. As with any piece of equipment exposed to extreme conditions, 3D printers need periodic maintenance and replacement of parts for them to continue working for several years.
Here are some of the regular maintenance activities that you can expect to do and how often you have to do them:
- Lubrication of print head guide rails (daily)
- Cleaning of print bed (every use)
- Check and adjust alignment belt tension (every use)
- Check electrical cables for damage (every use)
- Tightening of screws and bolts (every use)
- Level your print bed (daily or every use)
- Cleaning of nozzle (every change of filament or as necessary)
- Cleaning of extruder assembly (monthly or as needed)
- Clean the filters of the cooling fan (once a month)
- Replace the nozzle (yearly or when worn down)
- Replacement of print bed (when badly damaged or warped)
- Update firmware (when updates are available)
- Cleaning of circuit boards (every year)
This list paints the importance of maintenance in very broad strokes. As you might expect, keeping a 3D printer in tip-top condition is a lot easier said than done. Our suggestion is for you to be ready with all the tools you’re going to need, plan a maintenance schedule, and stick to the plan as much as possible.
If you are unsure about how to set up a maintenance schedule for your 3D printer, the best option would be to ask for recommendations from the manufacturer. They are still the best authority when it comes to a 3D printer’s hardware. From our experience, doing preventive maintenance is still easier than stopping a print mid-way because of a clogged nozzle or poorly lubricated guide bars.
How long will a 3D printer last?
Again, this is not a question that has a definitive answer. The lifetime of a 3D printer depends on how heavily it is used and how well it is maintained. A 3D printer that is gathering dust in a garage probably won’t work well after a few months of being ignored. Similarly, a regularly used 3D printer can have broken down parts if it is not maintained regularly.
The environment of a 3D printer also plays a role in how long it will last. Any piece of machinery generally prefers cold and dry environments. A room with a lot of dust or moisture will speed up the rate at which metal components corrode or generate extra friction.
Based on accounts from owners of 3D printers, these printers can remain usable for up to eight or ten years. The disclaimer is that they have all been through some major parts replacement at some point. In some cases, the entire extruder assembly of a 3D printer will need to be replaced.
As a rule of thumb, a more expensive 3D printer can be expected to last longer. Recently developed 3D printer models that are surprisingly inexpensive have bucked this trend a bit, but it’s still a good rule to keep in mind. You can estimate the value of a 3D printer to decline by about $20 to $40 per year.
Final thoughts
Buying a new 3D printer is no longer as big of a financial undertaking now as it used to be, but it can still be a very intimidating concept. Most first-time owners have not owned or used anything resembling a 3D printer before.
The good news is that it does not take a lot of skill to start 3D printing. Modern 3D printers are deliberately designed to be as easy to use as possible. However, developing skills like 3D modeling and troubleshooting will go a long way towards helping you make the most out of your 3D printer.