How to Fix Layer Separation in Resin 3D Printing

Layer separation or delamination in resin printing is typically caused by insufficient exposure of layers resulting in sub-optimal curing. If increasing exposure times does not work, you may consider changing the orientation of the model. There may also be issues if the FEP film is due for replacement.
Resin printing seemed like the scarier and more intimidating version of desktop-based 3D printing some years ago, but that is no longer the case now. This does not mean that you can expect the resin printing experience to be free of issues. In this article, we will be tackling the potential problem of layer separation.
What is layer separation?
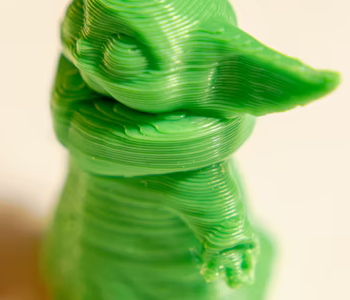
Layer separation, also known as delamination, is a defect that is observed when the layers of a 3D print separate from each other. It can also be described as layers peeling away from each other. In the case of resin printing, some pieces of cured resin can break off and float in the resin tank.
When layer separation happens, the defect is typically large and visible enough that the whole project will have to be redone. Layer separation affects not just the aesthetics of a 3D print, but also its mechanical integrity.
What causes layer separation in resin printing?
Layer separation is a fairly common problem in 3D printing, regardless of which technology is used. However, the root cause and possible solutions can be different for each type of 3D printing method. For resin printing, layer separation and delamination can be caused by the following factors:
Insufficient curing
The process of UV curing is at the very heart of the resin printing process. Through exposure to UV radiation, the compounds in the resin gain the energy to form molecular linkages and create long-chain polymers. The entire process of photopolymerization takes a fraction of a second, but there is still a prescribed time for optimal layer formation. Not meeting this prescribed time will almost certainly cause layer adhesion issues on top of other visual and mechanical problems.
Contaminated FEP film
The FEP film is the interface between the resin tank and the UV light element or optical window. For optimal curing, this FEP film must be very clean. Through repeated use, the FEP film in a resin printer tends to build up resin residue and possibly some other contaminants. The FEP film can also be contaminated by dirt, dust, or fingerprints. If this fouling becomes thick or prevalent enough, it can hamper the optimal curing of a resin layer.
Lack of supports
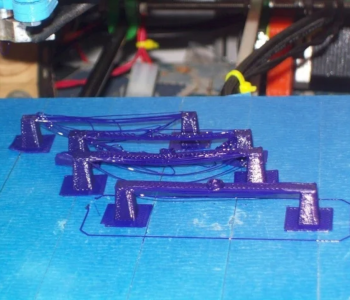
Overhangs and bridges are features that many 3D printing technologies struggle with. This is just a natural consequence of a manufacturing method that builds objects layer by layer. If you have overhangs in your model that lack support, these features may experience layer separation or fail altogether.
Unexpected or prolonged pauses
Ideally, you would want your resin printing project to proceed to completion without any pauses. However, unexpected things may come up that may force you to stop a project temporarily. This could include power outages, issues with the printer, or a need to refill the resin tank. Pauses can result in uneven curing, resulting in weakness in layer adhesion between newer and older layers.
Model orientation issues
Model orientation plays a huge role in resin printing, perhaps even more so than in filament-based 3D printing. As each layer of resin is cured, it has to be detached from the bottom of the resin tank to make space for a fresh batch of uncured resin. This detachment step is crucial and can actually cause the failure of the entire print. The rule of thumb is to minimize the surface area of each layer as much as possible to reduce the adhesive forces on the resin tank.
Low-quality resin
Working with a resin of poor or questionable quality is always a bad idea. Unlike filament, there is not much that you can do to get acceptable results when you’re using low-quality resin. If all other measures fail, you might need to consider switching to another photopolymer resin.
How to fix resin printing layer separation
Troubleshooting delamination can be a bit of a headache because it forces you to stop an ongoing 3D printing project and go back to the drawing board. There may be times when you do not notice that delamination has happened until the entire 3D print has been completed.
In solving this problem, we shall focus first on developing a few good practices before we delve into changing settings on your slicer.
Use dependable and high-quality resin
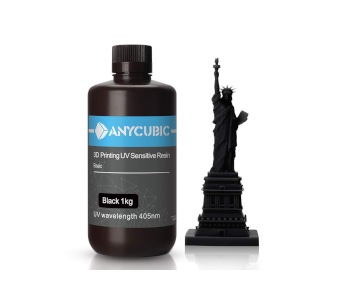
Here’s the first step – make sure that you’re working with good material. There are about a dozen reputable and dependable brands of photopolymer resin out there, so you have lots of choices. Good resin may be a bit more expensive, but pinching pennies may cause you to scrap lots of misprints and waste your time. Make the proper investment and buy a couple of bottles of good resin.
Keep your FEP film and resin screen clean
The common advice for resin printing is to keep it in a spot that is away from direct sunlight and any source of dust or debris. The optical elements of a resin printer are particularly sensitive to contaminants. If you have the means to cover up the 3D printer and resin vat when not in use, then do so.
Cleaning the resin vat or replacing the FEP film can also cause contaminants in the form of fingerprints. Make sure to use gloves when handling these parts.
After repeated prints, you may also end up with bits of cured resin sticking to your resin vat. These can be easily removed by gently running a plastic or rubber spatula back and forth over the vat’s bottom surface.
Over time, an FEP film can get cloudy and result in poor UV exposure to the resin. It can also end up with scratches because of print removal. When these signs become apparent, consider changing your printer’s FEP sheet.
Avoid pauses
Long pauses are always problematic in 3D printing whether you’re printing with resin or filament. You can avoid this by always making sure that there is enough resin in the vat. You can also buy a backup power source for your 3D printer, just to avoid having to pause it during short power outages.
Change the model’s orientation

Having an excessively high surface area on the layers of your print can make layer removal difficult, resulting in delamination. In deciding the orientation of your model prior to printing, emphasis must be placed on reducing this surface area as much as possible. This typically means tilting the model a few degrees from the horizontal.
Tilting the model a few degrees reduces the “peel force” when moving from one layer to the next. This typically enhances the surface quality of the finished print, although you may need to add supports to the model. A maximum tilt of 45 degrees can be used for any model, but you may want to balance this value with other factors such as the number of supports and printing time.
Increase exposure times
Increasing the exposure time for resin printing is a very easy fix for layer separation. Longer exposure leads to extended curing, which should make layers more robust and able to stick together.
When increasing exposure times, take note that there are two different exposure values – bottom exposure and normal exposure. Bottom exposure refers to the exposure time for the first few layers. This is typically longer to provide more support for the bottom layers. It is also possible to increase the number of bottom layers for your print.
Normal exposure refers to the exposure time for the rest of the layers. Both bottom and normal exposure times can be increased depending on where you are seeing delamination issues.
On the flip side, there is also such a thing as too much exposure. When exposure times are excessively long, it can result in bleeding and scattering of light. This in turn can create issues with detail resolution and accuracy in the Z-axis.
Add more supports
Supports are pretty much a necessary evil in 3D printing. If you’re observing layer separation or prints failing despite all the other measures mentioned here, then your model may not have enough number of supports.
The most straightforward solution would be to simply add more supports, either manually or using any of the automatic pre-set modes. It is also possible to vary the thickness of supports. Thicker supports are beneficial to provide better support to the bottom layers, while thinner supports can help retain fine details on the model.
In any case, the work that will go towards support removal must be considered when adding more supports to any project. A good tactic is to rotate the model to have most of its finer details facing upward, thus unaffected by contact with supports.
Use a fresh batch of resin

Reusing the resin that is left on the vat is one of the best things about resin printing. Under ideal circumstances, you never have to empty your resin vat unless it’s for cleaning. However, there may be very small pieces of cured resin floating around in your vat that can affect curing performance.
It is entirely possible to filter out the leftover resin and try to print with it again. If this still does not work, then you may have to open a new bottle of resin. Remember to possible the best practices when disposing of leftover resin. The easiest way would be to expose the resin to direct sunlight for a couple of days before disposal.
With some experience, orienting your 3D models for optimal resin printing will become second nature. It is also good to develop regular habits such as cleaning your resin vat and changing your printer’s FEP sheet.
Final thoughts
Delamination or layer separation is a fairly common problem encountered in 3D printing, whether you’re printing with resin or filament. There are some unique solutions to addressing this issue if you are using a resin printer. You might have issues with your resin or the printer’s optical elements.
The great thing about resin printers is that they do not have as many moving parts that can fail. A bit of knowledge about the curing process is the best tool that you need for troubleshooting.