How to Get Started with the DJI Phantom 3

DJI’s Phantom series of drones is one of the most well-known DJI drone series among hobbyists and light commercial users. This drone was made keeping in mind aerial cinematography and other photography jobs. Hobbyists and recreational users prefer the Phantom drones for its ease-of-use.
The Phantom drones are instantly recognized by their iconic design of 4 rotors on each end and a tall landing gear at the bottom. The Phantom series has seen Phantoms 1, 2, 3, and 4 released in the market. Even though there are rumors that the series may be coming to an end, the Phantom drones continue to be one of the top sellers for DJI.
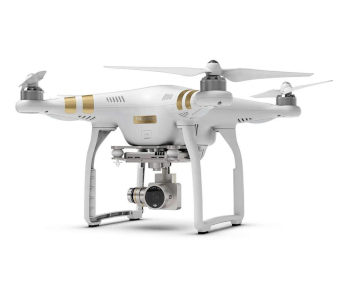
The DJI Phantom 3 is the 3rd generation drone of the Phantom series. It was released in April 2015. There are five variations within the Phantom 3 product line. First is the Phantom 3 Standard, the second is the Phantom 3 Advanced (with 2.7k video capability), the third is the Phantom 3 Professional (with 4k video capability), the fourth is the Phantom 3 4k, and the last one is the Phantom 3 SE (which can do C4k video).
If you are used to flying drones, or if you previously owned a Phantom 2 and want to upgrade, then the Phantom 3 is quite easy to master. If you are new to flying drones, then a quick start guide will help you a lot in successfully conducting your first drone flight. Regardless of your drone experience, the following steps are going to help you set up and start flying your new Phantom 3 in no time.
Step 1 – Unbox the Phantom 3 drone
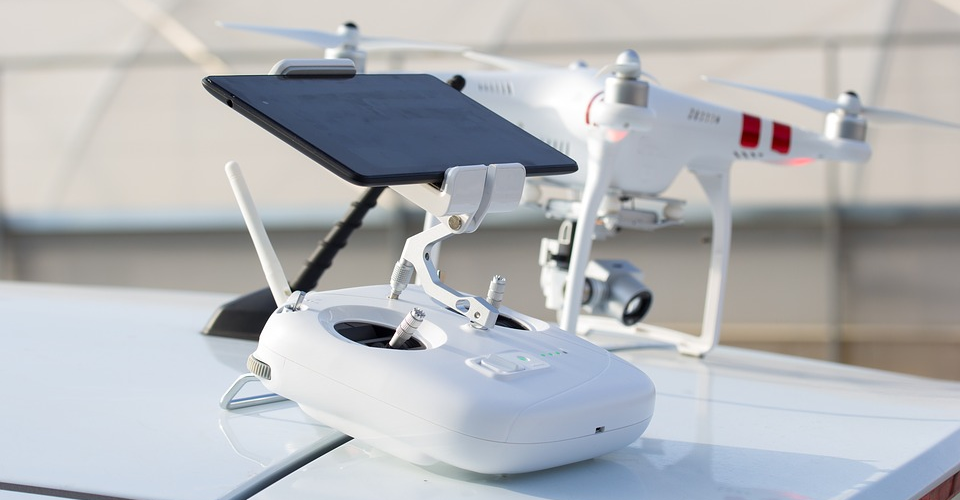
Unbox your new Phantom 3 drone. In the box, you will find a user manual, the drone, its components, and a controller. Make sure you take a good look at all the items in the box and check them to ensure nothing is damaged. The Phantom 3 Professional drone has gold stripes on it, the Advanced drone has silver stripes, and the Standard version has red stripes. The box will also have a pouch of 2 sets of propellers. One set is a spare while the other is the primary set.
Step 2 – Charge the batteries and the controller
The first and foremost step is to charge your flight batteries and the controller. DJI normally ships the drone/flight battery with a 50% charge on it. However, the best practice is to fly your drone only when it is fully charged up to 100%.
You should follow this practice every time you commence a new flight. For example, if you flew the drone for a few minutes and the battery goes from 100% to 70%, then it is preferred that you charge it back to a 100% before letting the drone take flight.
The battery pack of the drone is located between the arms and the camera gimbal. The battery module will slide out quite easily. Pull it out and locate the charging port on the side face of the battery module. Then, plug the charger module to the charging port on the side of the battery pack. The other end of the charger module is simply the power supply cord which plugs into a wall port.
Please note that the charger module has two connectors. The large connector will connect to the battery pack while the smaller connector is for the controller. When the battery begins to charge, you will see a scrolling bar light located at the bottom face of the battery pack. The scrolling bars give you an indication of how much the battery is charged. Once the charging is finished, the lights will go out.
Next, we need to charge the remote controller. The small connector on the power supply cable will plug into the controller charging port which is located on the side face of the controller. The remote controller also has a scrolling light indicator on the bottom below the controller joysticks. These lights will give you an indication of how much charging is already complete.
DJI does not recommend charging both the battery and the controller simultaneously. The best method is to first charge the battery and then the controller. However, if you are simply topping up the charge from a previous day’s flight, then charging the controller and battery simultaneously should not be a problem.
Step 3 – Download the app and register
Besides all the components that the DJI Phantom 3 box has in it, there is one more thing that you need to fly the Phantom 3 drone. That important thing is your mobile or tablet device. The mobile/tablet device can have either Android or iOS operating systems.
This device will allow you to control the settings of your drone as well as see the live camera view. From your mobile/tablet device, you need to visit the Play Store or the App Store and search for the DJI Pilot app (or DJI Go app). You will then download this app and then set up a DJI account (unless you already have one).
If you really want to save time, then you can download the app and set up the account while the drone battery charges. Alternatively, you can set up your account even before your drone reaches you. After you order your drone, you can simply go to DJI’s website and open an account online.
Sometimes, you may be required to upgrade the firmware on the drone body, especially if the manufacturing date of your product is old. In order to upgrade correctly, first download the firmware upgrade from DJI’s website onto your mobile device. Then, connect your device to the drone and transfer the firmware upgrade to the drone body. This process might take a few extra minutes, but it will ensure that your drone has all the latest features working correctly.
Step 4 – Mount the mobile device on the controller

After you have set up your DJI account and the app is up and running, you need to mount your phone/tablet onto the remote controller. The remote controller has a dedicated mounting bracket on which you can mount your device. The bracket can be altered in width depending on whether you use a tablet or a narrower phone.
You will then connect your mobile/tablet device directly to the remote controller using a USB cable. The Phantom 3 box normally has a cable with a micro USB connector on one end and a USB connector on the other. This cable is good for Android devices. However, if you are using an Apple device, then you will need an Apple lightning cable which you may need to purchase separately.
Step 5 – Set up the drone body
The drone body is made up of four rotor arms, four motors, a camera, a landing gear, and a gimbal. Before powering up your drone, make sure you remove the plastic guard securing the camera gimbal. This step is absolutely critical because when you power on the drone, the gimbal will move slightly as part of the booting-up routine. If the guard isn’t removed, then it will forcefully restrict the movement of the gimbal and that may lead to internal motor damage.
The next step is to mount to propellers. Each propeller will either have a black mark or a silver mark on it. Each motor will also have a black or silver spot on its top. These colors help you match the propellers with the correct motors. Each propeller has a clockwise or anticlockwise direction arrow engraved on it. So, mount each propeller on the correct motor top and then spin it in the denoted direction to lock and secure the propellers onto the motor.
Always mount the propellers when you are outdoors. Mounting them indoors is not a good practice because if the motors start for whatever reason, it could damage the drone or any items located indoors.
Step 6 – Power up the drone
After the battery is charged completely, disconnect it from the charging cable. Then, slide the battery pack into the drone body from where you had initially removed it. If you get confused on which way to slide the battery in, simply look for connector pins inside the area where the battery pack fits. The pins will be on the left side. Hold the battery pack such that those power pins align to fit with the charging port located on the side face of the battery pack.
The battery pack should go all the way in and then make a click sound. You can also refer to the user manual to know more about how to remove and slide in the battery pack.
Next, you want to turn on the power of the drone by pushing on the power button. You need to first tap the power button once and then push it again and hold. You hold it for about 2 seconds till the blinking lights stay on. About two seconds after you release the button, you will hear a sound. This sound basically means that your drone is booting up. You will also see some flashing lights on the underside of the arms as the drone powers up.
Step 7 – Power up the controller
To power up your controller, follow the same procedure as the drone. Tap the power button on the controller once. Then, push the button down again and hold for a couple of seconds till the lights on the controller stay on. As was the case with the drone, you will hear a beeping sound from the controller. This sound indicates that the controller has booted up.
Step 8 – Activate the drone
Before you fly your drone, you need to activate it. When you first power up the drone and launch the DJI Pilot app (or DJI Go app), you will be asked to enter a drone name. Most people will enter either their own name followed by numbers or enter something unique.
It is actually recommended not to enter your own name. If you want to sell the drone a couple of years down the line and get a new one, then you will not be able to change the drone name at that point. So, try to name your drone something generic like “Phantom 3” rather than “TonyTechMan”.
Next, the app will ask you to choose a control mode. Control mode basically allows you to choose the functions that each button/stick on the controller performs. The default option is mode 2 and you should select that if you are a first-time user.
You also have to select the measurement system (imperial or metric) and video output format (PAL or NTSC). Lastly, the app will ask you if you want to enable the beginner mode. The beginner mode is a recommended setting for new users. It will ensure that the drone does not fly above 100 feet and takes off only when a GPS signal is available. Advanced users or users who have owned a Phantom 2 previously may choose to opt out of this setting.
One more thing worth mentioning is the tutorial feature that you can find in the general settings page of the app. It walks you through all the different buttons that you see on any particular screen. The tutorial mode is a great way to acquaint yourself with all the functions and features of the drone.
Step 9 – Check the functionality and sensors
In the DJI app, hit the mode P-Opti button on the top left. Then, tap on the sensors option. You should see the readings from all the sensors of your DJI Phantom 3. Scroll down and you will find two buttons related to IMU.
First, tap the check IMU button. It will pop up a window asking you to keep the drone steady and level when using IMU buttons. Find a level surface and keep the drone there without moving it at all. You might get a message saying that the calibration is not required. But, you can still go ahead and calibrate the IMU anyways. This function basically calibrates the sensors in your Phantom 3. Calibrating sensors can take 5 to 10 minutes.
If you need to check the status of your drone at any time, simply hit the “Safe to Fly” button on the top center of the live camera view page. You can even check your firmware status through this button.
Step 10 – Calibrate the Compass
All DJI drones with a GPS have a digital compass. The compass communicates the orientation and directional information to the drone. It works together with the GPS and is the basis for accurate navigation of the drone. It goes without saying that the compass needs to be calibrated correctly in order for you to successfully fly and bring back your Phantom 3.
Compass calibration is not a one-time activity that you would do once after unboxing and then forget about it. Rather, it is something that should be done before every new flight session. The digital compass used in drones is very sensitive to magnetic interference. It can lose its calibration if the drone comes too close to metal objects. Even the remote controller of the DJI Phantom 3 has magnetic components which can throw off the compass’s calibration. Keep the controller and the drone at least 2 feet apart when you are calibrating the compass.
Always calibrate your drone outdoors as the presence of metallic objects indoors (or walls made of reinforced bars) can interfere with the calibration process. To calibrate the compass, tap the “Safe to Fly” button on the top center of the live camera view page. A menu called Aircraft Status will open up. Under this menu, there will be a section called Compass with a calibrate button next to it. You need to tap on this calibrate button.
Two lights on the drone body will turn yellow while the other two will remain red. Rotate the drone 360 degrees horizontally. The two yellow lights will then turn green. Now, tilt the drone sideways and rotate 360 degrees as before. The solid green lights will start to pulse.
Step 11 – Fly away
When you are outdoors, the drone’s GPS will be able to get the necessary signals from the satellites. The live camera view page will show a green “Safe to Fly” button on the top center. This means that the drone is ready to fly.
The first thing you have to do is arm the motors of the drone. You can do this by pushing both the stick-buttons on your controller down and inwards such that the two sticks come closest to each other. You need to hold the sticks into this position for a second or two till the motors go into the armed state where they rotate at a low speed.
Next, you can explore the left stick. Pushing it up makes the drone move up. Pushing it down makes the drone move down. You can also take off using the take-off button in the DJI app. This will make the drone take off and hover at around 1.2 meters in height. We personally do not recommend the automatic take-off as you can check if the controls are working properly when manually taking off.
Now try pushing the left stick-button left and right. It will make the drone rotate in the left and right directions respectively. This is how you can get a rotating shot or a 360-degree view.
Now, turn your attention to the right stick button. Pushing it up makes the drone go forward. Pushing it down makes the drone go backward. Pushing the right stick to the left makes the drone move laterally towards the left. Pushing the right stick to the right makes the drone move laterally towards the right side.
Perform all of these functions slowly and get a feel for the controls. You will need to practice a bit and get comfortable with the various directional movements before you can start getting quality footage from your camera.
Step 12 – Landing
Landing the DJI Phantom 3 is pretty easy. You can either use the stick-buttons or the landing button on the app. To land manually, push the left stick-button downward. This will move the drone down. Bring the drone down slowly until it is close to the ground. Then, push the left stick-button down all the way and hold it in this position till the drone makes contact with the ground and motor turns off.