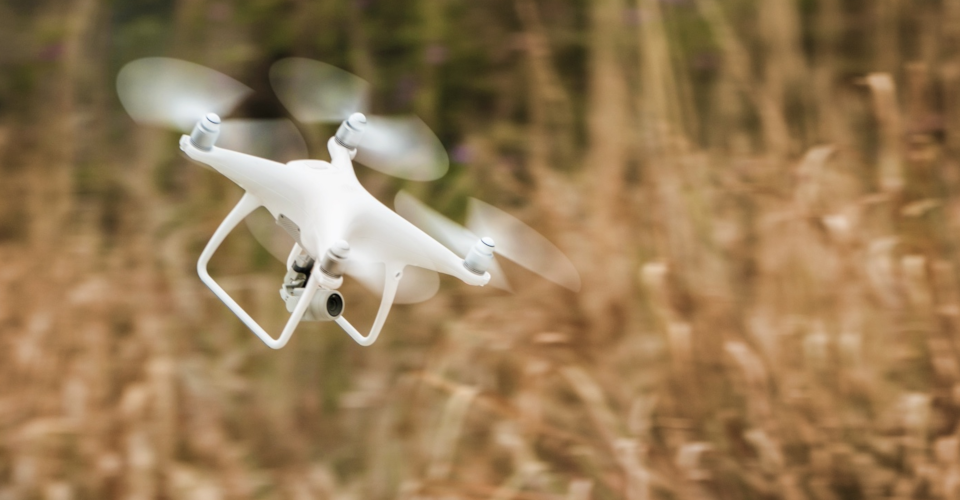
Getting Started DJI Phantom 4

DJI’s Phantom series of drones are the most popular drone series of the company. It is a great drone model for aerial cinematography and other photography jobs. It can be used for commercial and well as recreational purposes. Since the launch of the Phantom series of drones, 4 generations of products have been released to the market.
The DJI Phantom 4 is the 4th generation and the first drone in the Phantom 4 range. It was released in March 2016. The Phantom 4 has quite a few similarities with its predecessor, the Phantom 3 Pro. So, if you are used to flying drones, then the Phantom 4 is pretty easy to master. However, if you are new to drones, then there are some basics which you need to get acquainted with. Regardless of your experience flying drones, the following guide will help you get ready for flying your DJI Phantom 4 drone.
Step 1 – Unbox the Phantom 4 drone
When you unbox your Phantom 4 drone, you should first have a good look at all the components that are in the box.
Step 2 – Charge the batteries and the controller
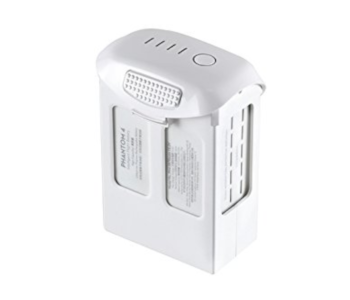
Then the first thing you would want to do is charge the battery. The battery will normally have 50% charge on it when you remove it from the box. That is how DJI ships the batteries with the rest of the drone components. But, it is always highly recommended that you charge the batteries to 100%. In fact, the best practice is to fly the drone only on a full charge. If you used the drone the previous day at the battery is at 60%, charge it up to 100% before commencing the next flying session.
The battery may be inside the body of the drone. Pull it out. Then, the power supply module should be plugged into the wall port and the large connector should connect to the battery pack. When the indicator light on the battery turns off, then the charging is complete.
The remote controller also needs to be charged. The small connector on the power supply cable is meant for charging the controller. As with the battery pack, the indicator light on the remote controller will turn off when it has reached full charge.
You can charge both the controller and the battery simultaneously. However, bear in mind that the charger can get quite hot if you do so. If the charger gets too hot, then charge the battery first.
Step 3 – Download the app and register
The DJI Phantom 4 box will have everything that you need to fly your new drone except one thing, the mobile device. The device that you plan to use to view your drone footage or to control drone settings has to be either your smartphone or your tablet.
Whatever device you plan to use, go to the App Store or Play Store (depending on whether your device uses Android or iOS) and download the DJI Phantom 4 app. Once the app is downloaded, launch it and open your account. If you do not have a DJI account, then create one. You can set up the app and your DJI account while the drone battery and controller are both charging up.
It is highly recommended that you create a DJI account on your computer even before your drone arrives. You can simply visit the DJI website and create an account. Doing this beforehand can save up valuable time later on.
Sometimes, you may be asked to upgrade the firmware as well. In such a scenario, you will have to first download the update on your mobile device and then connect your device to the drone body. That will allow the firmware upgrade files to get transferred onto the drone. These additional steps will add an extra few minutes to the whole process.
Step 4 – Mount the mobile device on the controller
After you have set everything up on your mobile device and after your remote controller has been charged, mount the mobile device on the remote controller. There will be a dedicated slot to mount your device. Adjust the mounting brackets if you need to, depending on the size of your mobile device. You will have to electronically then connect the mobile device to the remote control using either a micro USB cable or an Apple lightning cable depending on the device that you are using.
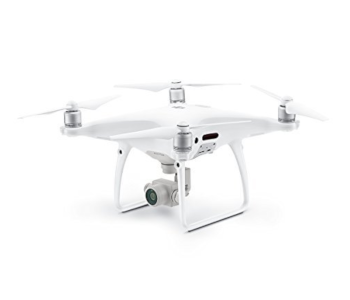
Step 5 – Set up the drone body
The drone body has the motors, the camera, and the gimbal on it. Remove the plastic guard securing the camera gimbal. The guard will be next to the landing gear. This step is super important. You want to absolutely make sure that you remove the gimbal guard before you power up your drone.
As you power up the drone, the gimbal will move a little bit as part of the default start-up routine. If that movement gets obstructed by the gimbal guard, then it may damage internal motors.
Also, insert the memory card in its slot which is located near the camera on the underside of the body of the drone. Do not mount the propellers yet, as that step comes at the end. In fact, you should not mount propellers when you are setting up the drone, connecting everything, or updating the firmware. Propellers can cause unnecessary damage to your mobile device or injury to you. You should only put on the propellers just before you fly.
Step 6 – Power up the drone
Disconnect the battery pack from the charging cable after it is charged fully and slide it into the drone body from where it was removed initially. If you are unsure which way to slide it in, refer to the connector on the battery or simply flip through the manual that came in the box.
Then, power up the drone by pushing on the power button. To power up, you need to tap the power button once and then push again and hold. The green light indicator near the power button should light up. You will hear 3 beeps of sound from the motors of the drone as it boots up.
Step 7 – Power up the controller
After powering up the drone, the next step is to power up the controller by tapping the power button once. Then, hold the button down. This procedure will turn on the remote controller.
Step 8 – Activate the drone
After you power up the drone and log in to your DJI account, you will be asked to activate your drone. First, you will have to enter a drone name. It is suggested that you enter something generic as this name cannot be changed later. If you try and sell your drone a few years down the line, then a name like “Phantom 4” will be better than something like “Mike1234”.
Then you have to choose a control more and set your customizable buttons which are at the bottom of your controller. You also have to select the measurement system and video output format. Lastly, you can opt for the beginner mode if you like.
After activation of the drone, you can then check out the flight simulator option where you can control a drone in a video game-like program with your controller. This is a great way to get a feel for the controls. Additionally, you can also go through a tutorial section for getting acquainted with drone flying.
Step 9 – Check the functionality and sensors
In the DJI app, hit the blue camera button and check if you can see the live video feed from the drone camera onto your mobile device. Then look for the “Aircraft Status” menu. Go into the status option and check if all the sensor data is showing up.
You can go into an option labeled as “IMU” which is where the sensor data will show. In IMU, you can even calibrate the sensors. Calibrating sensors can take 10 to 20 minutes.
Basically, you want to make sure if everything is up and running. The only thing that will not be functional at this point is the compass, which will be set up in the next step.
Step 10 – Calibrate the Compass
All current drones which use GPS have a digital compass. The compass tells the drone which way it is facing. It works in conjunction with a GPS and is absolutely critical to the navigation of the drone. If the compass is not calibrated properly, then even a fully functional GPS cannot guide the drone accurately. Hence, the compass needs to be calibrated before you fly the drone.
You have to calibrate the compass not just after unboxing your new drone, but rather before every new flight session. This is because the digital compass is very sensitive to magnetic interference. If the drone gets too close to metal objects, then the calibration can be thrown off. Interestingly, even the remote controller of the DJI Phantom 4 has magnetic components in it and they can mess around with the compass’s calibration. While calibrating and thereafter, leave a gap of at least 2 feet between the drone and the controller.
Always calibrate your drone outdoors as the presence of metallic objects indoors (or walls made of reinforced bars) can interfere with the calibration process. To calibrate the compass, open the DJI app and open the Aircraft Status menu which you can find at the top of the screen. There will be a Calibrate option which you need to select. The lights on the drone body will turn yellow. After they do, rotate the drone horizontally for 360 degrees. The lights will then turn green. Now rotate the drone vertically for 360 degrees. The solid green lights will start to pulse.
If you did not calibrate properly, then instead of green lights, you will see a red light. A red light essentially means that you have to re-calibrate the drone by following the procedure as explained above. You can perform the entire calibration process outdoors.
Step 11 – Mount the propellers on the drone
You are almost ready to fly your drone now. There is just one more step left. Along with the body and the other components of the drone, you will also see a pouch of propellers. These are to be mounted on the motors. Two motors of the Phantom 4 will rotate in the clockwise direction while two motors will rotate in the counter-clockwise direction.
You might be wondering how to figure out which propeller mounts on each motor. Two propellers will have black rings marked on them. Those propellers should match the motors with black dots on the motor mounts. To mount the propellers, simply push them down on the motor mounts and twist them 45 degrees. That should lock and secure the propellers on the mount.
Once you mount the propellers, remember to keep your mobile device away from the drone. Sometimes, when users try to arm the motors the very first time, the propellers start unexpectedly and damage the screen of the device if the remote controller with the mounted device is too close to the drone.
Step 12 – Fly away
If you see green pulsing lights on the drone and if the DJI app on your mobile device says “Safe to Fly”, then you are ready to send your drone in the air! The first thing you have to do is arm the motors of the drone. You can do this by pushing both the stick-buttons on your controller to the lower corners such that the two sticks come closest to each other. This action will make the motors go into the arm state where they rotate at a low speed.
You can then push the left stick-button up to make the drone go up and take-off. If your motor is in the arm state and you do not push any button, then it will automatically turn off after a few seconds. You can also use the DJI app and push the take-off button located on the left side of the screen. This will make the drone automatically take-off and hover at a specific height. For the first flight, it may be better to use manual controls so that you can check if the motors are working properly.
Step 13 – Explore air controls
If you are an experienced drone user, then this step probably does not apply to you as much. However, whether you are a new user or an experienced user, it always helps to get a feel of the drone movement before you begin to start filming seriously. The left and right stick-buttons are used to control the drone and they both have 4 main functions: up, down, left, and right.
Once the drone is in the air and hovering, push the left stick-buttons up and down to make the drone move up and down. Then, push the left stick-button right and left to make the drone rotate to the right and left accordingly.
Now try playing with the right stick-button. Push the right stick-button up and down to make the drone go forward and backward. Then push the right stick-button left and right to make the drone fly to the leftwards and rightwards respectively.
Perform all of these functions slowly and get a feel for the controls. You will need to practice a bit and get comfortable with the various directional movements before you can start getting quality footage from your camera.
Step 14 – Landing
Landing the DJI Phantom 4 is pretty easy. You can either use the stick-buttons or the landing button on the app. Use the left stick-button to move the drone down. Push the stick-button downward slowly to lower the drone. Once the drone makes contact with the ground, push the left stick-button down all the way and the motor will turn off.
Follow the simple steps above and you will find the entire onboarding process for your new DJI Phantom 4 drone an absolute breeze.