How to Get Started with Drone Photography

For most people, the products of drone technology that they encounter most frequently are aerial images and videos. Nowadays, these drone photos and videos are a perennial feature of anyone’s social network feed and have become an essential element of modern filmmaking.
Drone photography is a perfect gateway to getting into the hobby of drone flight. It’s also a viable business if that’s your thing. If you’re into getting started with drone photography, then read on as we list down all the areas you should cover.
Know the drone features you need
A good camera drone can cost a lot but shouldn’t be any more expensive than a high-end DSLR camera or lens kit. More than the amount you are paying, what’s more important is for you to discriminate between features that are essential for drone photography and those that are a better fit for other uses. When you’re shopping for your first camera drone, then these are the features you should keep a look out for:
1. Camera quality and features
Naturally, you would want to focus on the quality of the camera that comes with your drone. The past years have seen a dramatic improvement in the quality of drone cameras. This has brought us to a point where 4K cameras are considered the norm. Most drones can record 4K video at 30 fps. If you need to record videos of a fast-moving subject, you can always take the option of downgrading the resolution to 1080p so you can record at a higher framerate. When it comes to capturing stills, professional-grade drones nowadays can capture between 12 MP to 12 MP resolution.
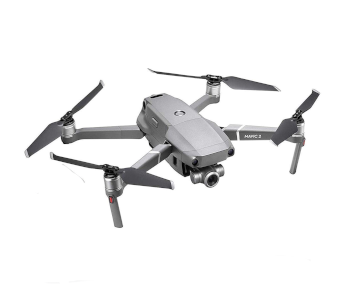
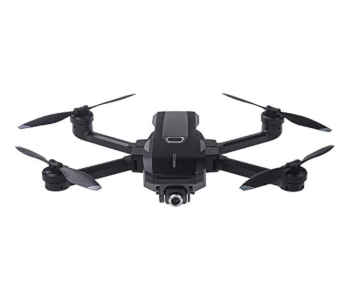
As any experienced photographer knows, capturing great shots isn’t just about resolution. Taking shots from drones means being able to adjust to circumstances that are far from ideal. You may want to consider a camera with a wide ISO range, such as the DJI Mavic 2 Pro, so you can still capture shots with challenging lighting. There are also models that specialize in providing optical and digital zoom functions, such as the DJI Mavic 2 Zoom and the Walkera Voyager 4.
2. Mechanical or digital stabilization
As you can probably imagine, one of the challenges of capturing drone photos or videos is that they can come out shaky or jittery because of the erratic movements of a drone. After all, having a drone hover without the slightest bit of drifting is virtually impossible.
Due to this inherent limitation, any camera drone worth its salt should have at least digital stabilization. With digital stabilization, pre-programmed algorithms reduce the jitter in the final video to create an ‘enhanced’ version. Although digital stabilization has become so much better in the last few years, it still doesn’t hold a candle to true stabilization provided by a gimbal.
A gimbal is a mechanism that provides stabilization by using gyroscope technology and a series of motors. By mounting the camera on a gimbal, the system of mechanical stabilization ensures that the camera is always at the desired orientation. Not all gimbals are made equal. Some models can stabilize in all three axes, while others are limited to only two.
Since the movements of a gimbal are motorized, they also provide a range of motion for the camera. Thus, it’s possible for a drone pilot to tilt the camera upwards and downwards and pan it along the horizon. Advanced drone models, such as the DJI Inspire 2, even allow for independent control of the gimbal should you want to fly the drone in dual operator mode.
In any case, there is just no way for you to capture professional-grade drone videos without reliable stabilization technology. No amount of drone piloting skills can make up for the absence of this feature.
3. Autonomous flight or camera modes
If you’ve ever wondered how a drone photographer manages to keep a subject in focus while continuing to fly around it, the key is that it’s not solely the flight skill of the pilot in play. Most mid to high-quality drones come with an array of autonomous flight modes or camera modes that can help in crafting unique footage from your drone.
The most common autonomous mode you’ll find in many drones is “follow me” or more generally known as subject tracking. In this mode, the pilot identifies a specific feature using the drone camera’s live feed, which the camera ‘locks on’ using the contrast between the subject and the background. There are several variations in how drone use this basic concept. You can command a drone to follow the subject while it moves or have the drone fly in an orbit while keeping the subject in focus.
Another common feature allows the drone to move to a certain location by a simple tap on the controller’s screen, or to command a drone to fly along a path using a few simple gestures. As the drone flies autonomously, the drone pilot has the opportunity to control the movement of the camera gimbal. Not having to worry about how the drone moves can allow you to create well-composed shots.
In more recent drones, one of the more interesting camera modes is the Dolly Zoom feature of the DJI Mavic 2 Zoom. In this mode, the drone’s camera continues to focus on a subject while it flies away. The result is a unique, disorienting effect reminiscent of the old movies of Alfred Hitchcock.
Whatever drone model you choose, you should start thinking of ways to maximize your drone’s set of autonomous modes. Keep in mind that many of these autonomous modes are common across several drone models – it’s how you use them that will make you stand out as a drone photographer.
4. Portability
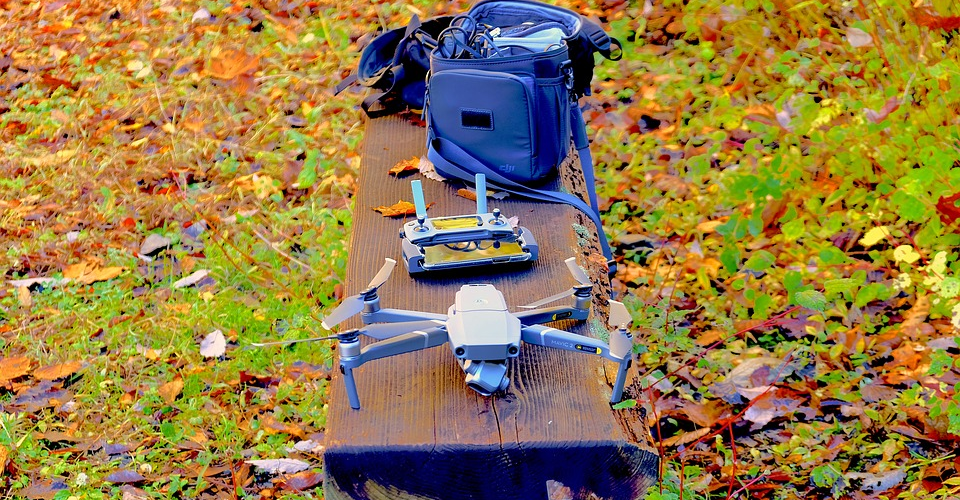
We live in the age of ultra-portable drones. Ever since the release of the Mavic Pro by DJI, the drone market has become flooded with highly compact and portable drone models. They have also become very popular and it’s not hard to see why: they are very light, easy to use, and can be folded so small that they can fit into any regular backpack or shoulder bag. If you’re planning to take your drone with you on rugged adventures – nature walks, trail hikes, beach trips – then you might want to include the convenience of traveling with an ultra-portable drone as one of your considerations.
This doesn’t mean that you should discount the larger drones, such as the ever-reliable Phantom 4 Pro or the Yuneec Typhoon Q500 4K. These larger drones usually come with more advanced features, although the latest ultra-portable drones have started to muddle this distinction. The extra heft of a larger drone keeps it more stable while in flight, which could be important if you’re a beginner drone pilot. A larger drone also feels more robust and looks more professional. If you’re aiming to build a career as a commercial drone pilot, a great-looking drone can give you a slight leg up.
5. Battery life
Flying your drone to the best spot and figuring out the best angle can take some time. It would be a bummer if you’ve found just the perfect spot only to have your battery run out in the middle of composing your shot. The fact that you will constantly be taking photos and videos is even more taxing in your drone’s battery, so you can expect it to run out faster than normal.
Most drones nowadays are capably of flying between 25 to 30 minutes on a single battery cycle. This should be good enough for most cases, even for commercial drone photography gigs.
Some ultra-portable drones that have very good cameras, such as the Mavic Air and the Parrot ANAFI, have flight times that are closer to 20 minutes. While you can definitely live with those numbers, you will have to replace the batteries a lot even on a single shoot. Better have extra batteries on hand.
Get the essential accessories
It doesn’t stop with just the drone! If you really want to get the best out of your brand-new camera drone, you are going to have to load up on the most important accessories. These are especially important if you’re a commercial drone pilot, as they make you much more reliable out in the field. Trust us – without these accessories, flying around your new drone just won’t be as fun.
1. Extra batteries
As we’ve mentioned above, the battery of your drone can only give you up to 30 minutes of flight time at best. If you’ve had any photography experience, then you’ll know that a good photoshoot can’t be finished in just 30 minutes. Of course, if you’re on video coverage duties for an event, then your measly 30-minute flight time just won’t do.
Because if this limitation, it would be great to have a couple of extra fully-charged batteries. Two or three extra batteries should suffice if you’re just doing drone photography for fun, but you’ll need more if you’re going to do this to earn a living.
2. Extra propellers
If you’re still new to flying drones, then let us give you a warning: your drone will crash sooner or later. It only takes a moment of taking your eyes off your drone to have it crash to a wall or to the branch of a tree. In these cases, the parts of the drone that usually fall apart before anything else are propellers. These propellers are, after all, very thin and light pieces of plastic.
When you go out for a shoot, it won’t hurt to have a few extra pairs of propellers in hand. These propellers can usually be removed and installed without having to use tools. There are even a few propeller models that are self-tightening, so there’s no danger of them coming off mid-air because of poor installation. The best thing about propellers is that they are very cheap, so there really shouldn’t be any reason for you not to have any.
3. Extra SD cards
Long shoots mean lots and lots of photos and videos. The worst thing would be to get caught in the middle of a shoot and find out that you have nowhere to store more files, prompting you to cut your day short. To avoid such a situation, we advise having at least four or five extra microSD cards on hand, preferably with 64GB capacities.
If you tend to bring your drone to rugged adventures, make sure that your SD cards are also stored in suitably rugged, waterproof container. You wouldn’t want to arrive at home and find that your SD cards were damaged during the trip.
4. Landing mat
A standard drone design has the camera and gimbal setup hanging somewhere on the underside of the drone. Their position makes them especially prone to getting damaged when the drone is taking off or landing from an uneven or unpaved surface. Contact with sharp rocks or blades of grass would be enough to damage the highly-sensitive gimbal setup. Even small particles such as dust or sand can get lodged into the small spaces of a gimbal, preventing from functioning as intended.
Fortunately, you can turn any flat surface into an appropriate landing area with a portable landing mat. These landing mats are easy to bring along since they are very light and can be folded. Using them is just a matter of laying them down on any surface and securing them with pegs.
5. Anti-collision lighting
While most modern drones come with their own lighting implements, third-party lights are usually brighter and can be installed in a variety of ways. Anti-collision lights aren’t really a necessity unless you plan on flying at night or during twilight (defined as 30 minutes after sunset or 30 minutes before sunrise). This is a requirement for both recreational and commercial drone flight, so you’d better get this accessory if you don’t’ want to miss out on those sweet city lights and skyline photos.
Practice flying
When you get your drone for the first time, take the time to read the manual to know exactly what your drone is capable of, how the controls work, and the precautions you should take. This is good preparation for your first day of flight, which we’re sure you’ll be very eager to start.
When you fly your drone for the first time, we suggest looking for a wide area that’s free of obstacles and any water hazards. Depending on the drone you have, the take-off process may involve different commands or button combinations. In any case, you should be flying in ‘Beginner’ mode if your drone provides it. In Beginner mode, a virtual geofence is implemented a short distance from the remote controller, usually only about 30 meters. This keeps the drone close to the pilot so that untoward accidents can be avoided and so the pilot becomes familiar with how the drone responds to their commands.
Aside from the distance restriction, flying in Beginner mode also slows down the movement of the drone and reduces the sensitivity of the controls. This gives beginners a chance to have a feel of how the drone responds to their commands without the risk of losing control and giving them room to make mistakes.
Don’t worry about the learning curve, though. It’s unlikely for you to spend more than two hours or between two and three battery cycles in Beginner mode. As we’ve said, today’s drones are designed with ease-of-use in mind. Give it a few more days, and you’ll be flying your drone like a real pro.
Make sure you don’t violate local or federal laws
Drones are pretty much everywhere nowadays, which has made it necessary for the government to regulate their use. These regulations aren’t meant to restrict that you can do with your drone but are merely put in place to keep the airspace – which drones share with commercial airlines and other manned aircraft – safe for everyone. Before you go around flying your drone to your heart’s content, spend some time reading up on the following regulations:
1. Get the proper certification
If you’re planning to take up drone photography as a business or a career, then there’s an extra layer of bureaucracy that you’ll have to go through. As of 2016, all commercial drone pilots need to get a Part 107 remote pilot certificate. The certificate ensures commercial drone pilots pass a certain proficiency level, as determined by their performance in a Part 107 knowledge test. The test consists of 60 multiple choice items, 70% of which you need to answer correctly to pass.
Being a Part 107 licensed pilot means that you need to follow all Part 107 rules and flight restriction whenever you fly your drone commercially. We’ll touch on these flight restrictions in more detail later on, but just to give you a preview: Part 107-licensed drone pilots cannot fly their drones at night, over crowds, or from a moving vehicle. There are several more, as you’ll see in a bit.
PART 107 Made Easy
- 161 Question and Answer Study Guide
- 105 pages of illustrated content
- Covers all parts of the Part 107 test
- $97 of value for free
2. Know where you can or can’t fly
The FAA has divided national airspace into a few different classifications according to their proximity to airports, and the amount of air traffic that these airports normally facilitate. Drones are not allowed to fly in these areas of controlled airspace unless they have been permitted to do so by air traffic control (ATC). Fortunately, you can still fly your drone over uncontrolled airspace without having to bother asking for permission.
Take note that there are also areas that are considered permanent no-fly zones. These are typically the areas surrounding critical or security-sensitive infrastructure. These include communication towers, government buildings, and military camps. Steer clear of these areas at all costs. National parks are also considered no-fly zones, but there’s a way to get around this restriction if you are flying for educational or research purposes.
Making sure that you’re not flying over restricted or controlled airspace is as simple as checking your location in a sectional chart. If looking at a map the old-fashioned way sounds too cumbersome, then you can also use mobile apps such as B4UFLY or Hover. Aside from a GPS-based feature that lets you know if you are flying in restricted airspace, these apps can even provide timely weather reports and automatic flight logging.
Aside from FAA regulations, there may be local laws in your state or city that dictate where you can or can’t fly your drone. These laws are usually made to address security and privacy concerns with drone flight, a problem which seems to be getting more and more common as more drones take to the air. You might only be allowed to take off and land your drone within your own property, or you might not be allowed to hover your drone over your neighbor’s backyard. When in doubt, it’s best to ask local law enforcement.
3. Read up on other restrictions
Whether you intend to be a recreational or commercial drone pilot, there are a couple of regulations that you’ll still need to follow. One of the most important is the restriction on altitude – you can only fly your drone up to 400 feet. Any higher than this and you’ll be running the risk of getting into close encounters with manned aircraft. Should you run into such an encounter, then you are also legally required to give way.
Drone pilots are also limited to flying their drone within visual line-of-sight. There is no exception to this, even if you are flying using FPV technology or with a visual observer. How far you can fly while still maintaining visual line-of-sight can vary based on a lot of factors, but the limit will be somewhere between half a mile to two miles. That’s not very far, so you’ll have to choose your take-off spot carefully.
Don’t forget photography fundamentals
Drones might give you a new perspective on an interesting subject, but the basic rules and principles of photography still apply. Take the time to compose your shots, keep them simple, and you should be golden.
1. Use basic composition principles
Composing your shots might take some getting used to since you’ll be shooting them from an unfamiliar angle. However, you can always rely on the tried and tested rules of composition such as the rule of thirds, the golden ratio, maintaining symmetry, leading lines, and looking for patterns. Be careful not to clutter up your shots or make them overly complicated. As always, good photos let the subjects speak for themselves.
2. Use natural light to your advantage
The unique thing about drone photography is that you will almost always be relying on natural light. This is practically a given for commercial drone pilots, as they can only fly their drones during daytime or twilight. With the right conditions or accessories, natural light is something you can leverage to make your drone photos truly captivating.
If you want to make full use of natural light, then we suggest using the Sun Surveyor mobile app. The app allows you to see the trajectory of the sun throughout the day, allowing you to plan when and where to get the best shots of your subject. You can also use the app to play around with where and how far shadows will fall if that’s an important element in your photography. Most importantly, the app can tell you what time the golden hour will be so you can capture the perfect sunrise or sunset photos.
However, relying solely on natural light can also be a bit inconvenient considering that most drone cameras have no aperture adjustment option. If you find that natural light gets too harsh to capture good photos, then you can buy a set of neutral-density (ND) filters for your camera. These clip-on filters limit how much light goes into your lenses, giving you more flexibility to use longer shutter speeds without your shots getting overexposed. There are lots of options for ND filters out there, with some sets even including polarized filters.
3. Shoot in Automatic mode at first
A drone camera does not offer as many adjustment options as a standard DSLR camera. Photographers who are used to shooting in manual mode might find this lack of options is underwhelming. However – and this might sound crazy to experienced photographers – we actually recommend shooting in Automatic mode when you take up drone photography.
Not having the camera in your hands make it much harder to adjust ISO settings and shutter speeds when you’re shooting photos with a drone. There’s also the added complexity of having to fly the drone while you’re adjusting camera settings and composing the shot. Simply put, there are way too many things going on and making things simple is the best way to go. In any case, a high-end drone camera usually does a good job of automatically adjusting exposure settings.
We’re not saying that there’s no value in shooting in manual mode. However, it’s something you’ll have to build up to as you become more familiar with handling your drone and composing shots from an aerial perspective. With a bit of practice, you’ll be manipulating your drone camera like a regular DSLR in no time.
Practice post-processing
Even the best photographers have to do some post-production to really make their photos pop out. For some photographers, the skill to post-process photos is almost as important as the skill of capturing them. However, drone photographers will have to develop a different level of post-production skills, as the unique and angle and lighting of aerial photos will require a new approach.
There’s nothing complicated about post-production of drone photos. You will still rely on the usual software such as Adobe Photoshop or Adobe Lightroom. These editing software platforms are highly reliable and full of features dedicated to post-processing of photos. It will take some time to learn as it’s a naturally tedious process, but you can’t be considered a good drone photographer without being a good photo editor.
Final thoughts
Drone photography is one of the most exciting and appealing uses of drone technology. Even though drone photos show up everywhere nowadays, it still feels like we have only barely scratched the surface of the possibilities of drone photography. There are still so many natural scenes and skylines yet to be captured in photos, and so many unique perspectives to capture them from.
If you’re a long-time photographer, the good news is that you’ll probably be a natural to drone photography. Modern drones are very easy to fly even for beginners. Drones have also become quite affordable – even a high-end model costs just as much as a good DSLR camera.
Aside from having to learn how to fly a drone, all the basic photography principles and rules still apply to drone photography. You just need to take things a few levels higher, both literally and figuratively.