Complete Guide to GoPro Protune: Adjust Your Video Settings

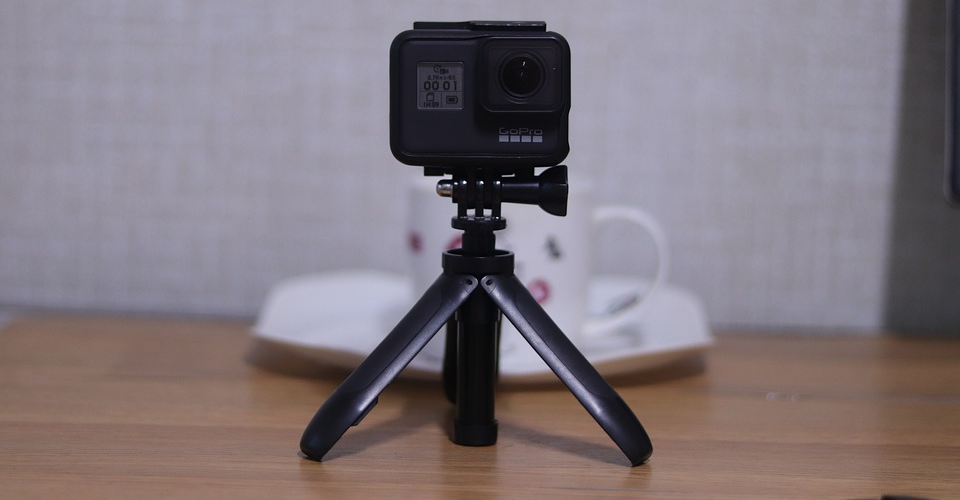
The best thing about GoPros is how easy they are to use. Attach one to your board, bike, or body, and turn it on when something awesome is about to happen. You don’t need to fiddle with complicated menus either. The camera cleverly balances exposure, image stabilization, and many other factors to create media that’s instantly ready for sharing.
While using a GoPro is a breeze, its default settings might not always cut it. Action cameras are notoriously bad when shooting in low light, for example. They sometimes miscalculate white balance or overexpose the scene. The results are still usable, but they could be so much better with a little manual input.
In this guide, we talk about the effective use of GoPro Protune. It’s a suite of advanced yet straightforward settings you can use to adjust the way pictures and videos look without needing video editing software. We explain what Protune is, what it can do, and when to take advantage of its various options. Familiarize yourself with each, and your content will instantly start to look much more professional.
What is Protune?

You can think of Protune as GoPro’s umbrella of advanced photo and video settings. It was first introduced on third-generation GoPros and has been a staple ever since. Initially, Protune could only alter video settings as photo editing became available on fourth-gen cameras. It’s become a premium feature starting with the GoPro HERO 5 and has since been available only on flagship Black models.
Protune is becoming better and supports more photo & video modes with each new release. For example, it didn’t work in Time Lapse Video, Timewarp, and Looping modes on the GoPro HERO 7 Black. With the introduction of the newest HERO model, it isn’t available only in Looping and the new LiveBurst mode.
Your GoPro comes with Protune turned off by default. You’ll need to access the camera’s settings and turn it on manually. Once you do, the Protune menu will expand and let you tinker with options in a much more involved way. Feel free to experiment and see what each setting does since there’s a handy Reset to Defaults command that resets al the changes you’ve made.
Protune settings and what each one does
The following are all the Protune settings available on newer GoPro models. Their impact on the final result varies, and the benefits of some don’t become apparent until you start editing the footage. Keep in mind that the camera stores separate Protune settings for each supported mode, so you’ll have to change them individually.
Bitrate
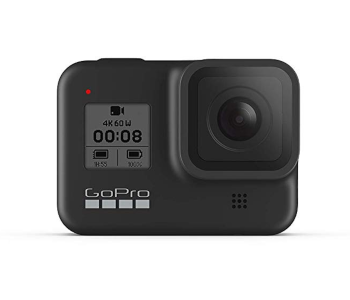
Bitrate is the newest Protune setting and available exclusively on the GoPro HERO 8 Black. Think of bitrate as the amount of data per second needed to capture a video. The higher the bitrate, the more detail is preserved, and you get better video quality as a result. The drawback is that the video takes up more space.
Bitrate is set to Low by default. This doesn’t mean default videos are of poor quality, just that less space is being used for optimized storage. Turning this setting to high uses the maximum bitrate for each resolution. The highest overall bitrate is 100Mbps or megabits per second and applies to videos shot in either 4K or 2.7K.
Color
The Color setting is where you determine which color profile the GoPro uses. A color profile is a set of standards that governs what an image will look like on devices that capture it as well as on ones that display it, like a monitor. GoPro has two profiles. The default GoPro profile produces punchy images with vibrant colors and pronounced contrast. It’s great for content you want to put out as soon as possible.
Flat is a more versatile profile you should switch to if you know how to bring the color out in post. As its name suggests, Flat produces footage that looks dull and uniform. However, it stores more information on a scene’s color and contrast, allowing you to tinker with both much more extensively. Since there’s more information to go on, you can manipulate Flat footage to make the colors pop or stay true to life. Flat produces softer shadows, allowing you to recover more detail without having to change other options.
You should also go with Flat if the GoPro is one of many cameras you’re using for the same project. That way, you can later settle on an overall look and ensure that footage shot with different camera types has the same aesthetic.
White Balance
White Balance is the setting you use to maintain natural-looking images and videos regardless of lighting conditions and sources. If the white balance is incorrect, you’ll end up with tinted footage that looks out of place. You might want to use that kind of white balance intentionally to emphasize a particular atmosphere. However, you’ll want it to compensate for lighting that isn’t under your control most of the time.
The simplest way to check if you’ve selected the correct white balance is to look at objects that are supposed to be white on your GoPro’s screen. You’re okay if they remain white but will need to go for a higher value if they’re bluish or a lower one if there’s an orange tint. Lower values correspond to warm light emitted by a fireplace or an incandescent lightbulb. Higher ones reflect cooler conditions like overcast skies or fluorescent light. White balance is expressed in degrees Kelvin.
Your GoPro can compensate for light values between 2,300K and 6,500K. Most of the time, it’s best to leave white balance on Auto since the camera does an excellent job on its own. Auto mode isn’t always accurate, so you’ll want to step in and select a fixed value instead. Choosing one manually is also a good idea when you want to sync the color balance between multiple cameras. Finally, there’s Native. This setting doesn’t apply color correction, so it’s perfect for when you want to do that during the editing stage.
Minimum and Maximum ISO
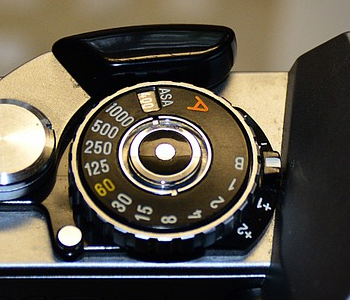
ISO is the amount of digital brightness correction applied to an image. It is independent of shutter speeds and exposure times, so choosing the right ISO is crucial when you want to maintain an optimal balance of brightness and sharpness. Older GoPro models could only assign an upper ISO limit while newer ones let you change the minimum too. While it sounds good on paper, using higher ISO values has the disadvantage of making the picture grainy. Colors get washed out as well.
You can control ISO directly to a limited degree because the GoPro handles ISO levels automatically. What you can do is set the upper and lower limit. These can be the same, which forces the camera to use a single setting. For example, shooting in bright sunlight doesn’t require ISO correction. You can set both values to 100 in that case and get the best results with minimal noise. The minimum ISO is 100, while the maximum is 6,400.
Adjusting ISO options comes in handy in specific situations. You might be tempted to increase the ISO in low light but can get cleaner results by specifying a lower max ISO value instead. That will force the camera to slow the shutter speed down to make up the difference.
Shutter
The Shutter setting determines how long the camera shutter remains open. It is different for videos and photos, but keeping the shutter open longer results in more light and brighter footage in both cases. Shutter speed is expressed in seconds and fractions of seconds.
Like ISO, shutter speed comes with a catch. High shutter speeds result in images that look like they’ve been shot in slow motion. Everything on them is standing still, which makes high shutter speeds ideal for when you’re playing a sport, filming a race, or recording animals. The downside is that that the photos and videos created with high shutter speeds are darker since there’s little time for exposure. You need a higher ISO to balance this out, which has its own problems we explained earlier.
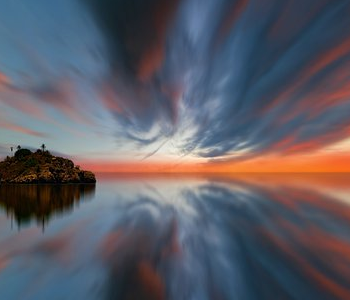
Lowering the shutter speed increases the brightness and is useful when you’re filming the night sky or working in low light. The trouble with low shutter speeds is that your subjects have to be still, else you’ll end up with blurry footage. That might also be a good thing if you’re going for a time-lapse or want to create the illusion of movement.
Shutter speeds in photo modes range from 1/125 to 1/2,000 seconds. It’s different for video since the sped values are always multiples of the current framerate. The maximum speed when shooting at 30fps is 1/480 seconds or sixteen times the framerate. That value is double for 60fps, 1/400 for 25fps, and so on.
Exposure Value Compensation (EV Comp)
You’re bound to encounter situations where the light you have to work with is too bright, or there’s a lot of interplay between light and shadow. Videos and photos you create in such conditions may appear too dark or washed out, which is why EV Comp is there to salvage your work.
Exposure Value Compensation adjusts the scene’s brightness. Its default value is 0, and you can make the scene brighter or darker in intervals of 0.5, the maximum and minimum being +2 and -2, respectively. The feature comes in handy when you’re trying to prevent detail loss.
For example, filming yourself biking in a city on a sunny day might result in a video that’s too bright on the one hand and dull on the other because subtle color changes are lost. In that case,lowering the exposure rating would reduce the amount of light the sensor is exposed to and restore the scene’s natural look.
EV Comp is tied to the maximum ISO setting. You won’t be able to increase the image’s brightness if you’ve already reached the current max ISO. Increasing it will help, but there will be no change if you’re already at the GoPro’s maximum supported value. Another limitation is applied to EV Comp in video mode – you can’t use it unless Shutter is set to Auto.
Sharpness
Sharpness is an internal processing feature that adds localized contrast to what the GoPro recognizes as edges. That results in crisper shots and pronounced textures. High is the default and gives the best result. Medium and Low make the image look softer. Low is particularly useful if you plan on adding sharpness effects in post yourself.
Raw Audio
The GoPro ordinarily records audio as part of its .MP4 video files. Turning Raw Audio on will create an additional .WAV file with varying degrees of post-processing. You can choose between Low, Medium, and High. Low produces the separate audio file in its raw form. Select this setting if you’re going to tinker with the gain and noise reduction later. Medium applies Wind-Noise Reduction settings to the track. If these are set to Auto or On, the .WAV file will be affected too. High utilizes GoPro’s full array of audio enhancement features.
Wind-Noise Reduction
Introduced with the HERO7 Black as Microphone Settings, Wind-Noise Reduction tries to minimize the effect wind has on audio quality. Putting it to Auto will filter out wind and water noises when necessary. Switching to On will keep noise reduction active all the time while Off is recommended when there’s no wind to spoil the audio.
Should you use Protune?
The answer to that is another question. Are you content to let your GoPro determine the results automatically, or do you want to spend some time and bring out the best in your content? You don’t need Protune if your goal is to capture intense experiences in a presentable way at a moment’s notice. The camera’s processor is adept at compensating for contrast, lighting, and motion. Pictures and videos will turn out fine as long as you aren’t shaking the camera violently or shooting in low light.
That being said, there’s much Protune can do to enhance your content further. It can compensate for overexposure or artificial light. It can also dramatically increase the fidelity and detail, provided you’re willing to spend extra time on post-processing. Protune brings out the best of your GoPro and gives you more control as well as artistic freedom.
There are some drawbacks you need to keep in mind when using Protune. Turning it on will increase both photo and video file sizes. This happens because more data needs to be recorded. On the one hand, this lets you fine-tune footage better during post. On the other, files take up more space and require a fast SD card. Protune also drains the GoPro’s lackluster battery quicker, so it’s a good idea to bring a spare if you plan on using it.
Win the round if you have the highest roll following everybody has taken a flip. Every position is marked by a button and it is rotated clockwise to let the vendor know the purchase of betting.