GoPro Tricks – How to Make Amazing Videos

GoPro cameras are one of the biggest names in the action and vlogging camera world. They are a go-to choice for many because they are tough, durable, and full of useful features. The first GoPro camera came to the market back in 2005. Since then, several new products have been released and the technology on those products has also improved vastly.
GoPro can be used for simple applications like capturing a baby play or something extreme like a skydiving experience. You can mount it on your dirt bike or dive into the sea while you snorkel. You may have seen plenty of videos on YouTube that were shot using a GoPro camera.
However, a lot of the really famous GoPro users tend to have videos that look very professional. The videos are so well-made, that you would sometimes wonder if there is any difference between watching a YouTube vlog or a television show.
While it is true that those snazzy-looking videos have been heavily edited and have quite a significant amount of post-production work done on them, it is important to also note that those videos have been shot well. The creators of those videos have used certain tricks and settings on their GoPro cameras to capture their action very effectively.
Using your GoPro camera’s capabilities to its full potential will allow you to turn your average-looking videos into a memorable piece of work. We will discuss some of those tricks and tips in this article. You do not need to attend a professional camera course to master these tricks. Simple read the helpful information below and start putting those ideas into practice.
Capture different angles on the same shot
If you are going to shoot an action which will be repeated multiple times during your outing or filming session, then try to re-position the camera on each take. For example, if you are going to film your surfing session, then try and get different angles during each wave that you ride. The same goes for kayaking. Get different angles every few minutes or every rowing session in any one direction.
With multiple angles of the same action or the same footage, you can get really creative when you edit your videos. With the newer GoPro models, you can even use different crop modes on each take. You can get one shot in a 170-degree viewing angle and then another shot in a narrow 79-degree angle. You should even capture one shot in the ultra-wide angle mode.
The ultra-wide-angle is the safest shooting option. Narrow angles can cut out certain important parts of the footage. So, when you are unsure about the angles, use an ultra-wide angle.
A mount can give you a variety of perspectives
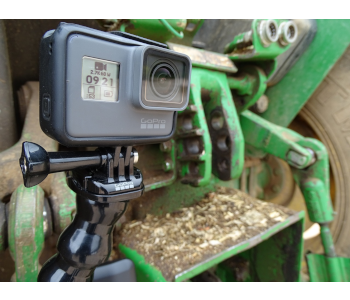
Using a mount with your GoPro camera will allow you to gain different perspectives. For example, if you use a mount, you could stick your camera on your helmet or on the hood of your car. If you mount the same camera on your shoulder, chest, or head, then the perspective changes completely.
Certain footage is best captured by mounting your GoPro on your body. Imagine going on a skydiving adventure or capturing a road trip on your motorbike. In those cases, a head mount or shoulder mount would be perfect.
However, if you are going to the Alps for a snowboarding session, then mounting the camera on your snowboard will give you a dramatic action-packed view. The closer your GoPro is to the ground, the faster will be the perceived speed of movement on the video.
Mounting your camera on the chest will make the speed seem a lot quicker than mounting the camera on your helmet. It is advised that you try a few point-of-view options before deciding the best possible place to mount your GoPro.
Most of the examples discussed above are for a first-party view. You can mount your camera in such a way that you get a third-party view or a view of yourself performing an activity. Mounts can give you multiple possibilities.
Stabilize those shaky videos
Use a Karma Grip or a gimbal to get smoother videos. There is nothing more annoying than spending time carefully capturing video only to find out later on that watching the video gives you a headache. Too much shakiness will put off not only your eyes but also your viewers.
The new GoPro Hero7 has some cutting edge image stabilization features which make it possible for you to use the Hero7 without any gimbal or stabilizing accessory. However, not everyone owns a Hero7. For older generation GoPro models, it is a good idea to use some sort of gimbal.
If you take photographs or use your camera in a stationary position, then investing in a tripod is a good strategy. If you don’t like the gimbals that third-party providers offer, then you can check out GoPro’s own Karma Grip gimbal.
If you happen to be out filming and you do not have your gimbal on you, or if you simply do not have the cash to buy a gimbal right away, then the last resort option is to use your chin. That’s right, you can press your Gro Pro camera against your chin and then film.
The head of the human body is the most stable part when you are walking, running, or moving. Hence, tethering your camera to that stable portion will make your videos stable as well. This strategy works well when you don’t have to keep your hands free. If you need to be hands-free, then the best non-gimbal option would be to wear a headband and mount the camera on your forehead.
Post-processing on Apple Final Cut or Adobe Premiere can also help reduce the shakiness in your video.
Use Protune
Speaking of software-based editing, one excellent built-in option for GoPro cameras is Protune. Protune is a bunch of video-enhancing features that GoPro users can use for making professional-looking videos. Once you turn on Protune, the memory card will capture video files that are larger than normal.
However, with Protune, you can control a whole range of settings. Depending on your GoPro model, you can tinker with settings like ISO, White Balance, Shutter Speed, and much more. You can set your exposure compensation level low if you are filming outdoors and are going from a shaded area to an area under full sunlight. Locking the daylight white balance is also a great idea.
As the file size of the Protune-enabled video is larger, you can do more editing during post-production as well. The stored video has lower compression levels.
Use lens filters
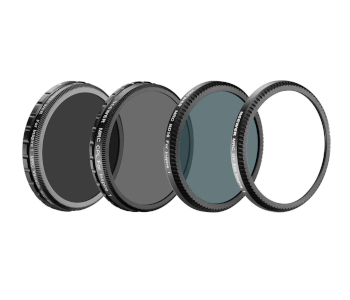
You may have heard of filters that cover the lens of a DSLR camera for optimal contrast/color balance. The same concept also applies to GoPro cameras. You can choose from a host of different filters. For example, an ND (neutral density) filter is used when the environment is too bright. If you are filming against intense sunlight, then the ND filter will work perfectly to give you a smooth and natural video.
Similarly, if you plan to take your GoPro camera underwater, then you can use a red or magenta filter. The environment underwater usually has a greenish-blue tinge and that color imbalance shows up in your videos too. Using a red filter will balance out the colors. The type of environment and the color of the water will determine whether you need to use this filter or not.
Another example is a polarizing filter which is meant to block out reflections. Let us assume that you are filming from inside a car. The reflection from the windshield or the glass window can spoil your video footage. Using a polarizing filter can be of great help in such situations.
Use the video settings wisely
You can choose to shoot 720p, 1080p, and even 4K. 4K is great if you are making videos for a large TV or projection environment. If your goal is to share videos on YouTube and get them out as quickly as possible, then lower resolutions may work just fine.
Another setting worth paying attention to is the frame rate. Some GoPro cameras allow you to go to 60 fps and even 120 fps. The standard professional filming frame rate is 24 fps. At this lower setting, you will get a cinematic feel to your video. At 60 fps, your footage might look more like a reality TV video.
If you are going to be including slow and ultra slow-motion segments, then choosing the highest frame rates is the way to go. However, remember that higher frame rates will require good lighting. If the lighting is not great, then use 24 fps. A lower fps setting will allow more light to reach your GoPro camera’s sensor.
Lastly, the aspect ratio is also an important setting to be aware of. Older TVs used to have an aspect ratio of 4:3. The newer monitors and screens generally use 16:9. Sticking with 16:9 is a safe bet. However, if you want to be able to reframe your videos during post-processing, then go with the 4:3 setting. This aspect ratio gives you a slightly taller video as the full height of the sensor is utilized. With 16:9, the height is a little bit shorter.
Extending battery life
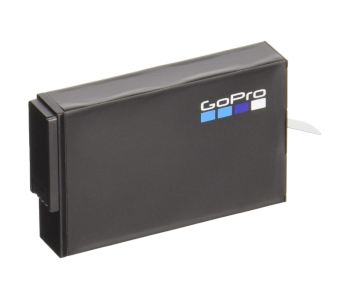
When you are on long treks or occupied with marathon filming sessions, you will want your batteries to last as long as possible. There are a few things that you can do to elongate your battery pack’s life.
Firstly, it is a good idea to turn off the Wi-Fi when you are not using it. Wi-Fi takes up a lot of battery juice and turning it off can give you substantial savings in terms of battery life.
Secondly, carry an external USB charger or a power bank with you. You can keep the power bank in your backpack and hook it up to your GoPro while you walk/trek/bike. You can film while simultaneously charge your batteries as well.
Lastly, carry an extra set of batteries. That way, you can swap out the discharged pack with a new one and continue filming.
Lose that fog
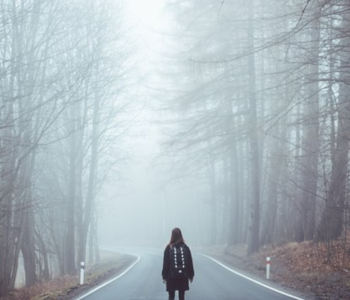
When you use your GoPro in humid areas or in cold climates, the camera body tends to build up fog which can cover the lens. It can totally ruin your videos. The same thing can also happen in cases where you put on the waterproof casing, film underwater and then pull the camera out in humid air.
Luckily, there is a solution to this fogging problem. You can purchase anti-fog inserts which are like little strips. Place these inside your waterproof casing and they will absorb all the moisture that gets built up.
GoPro sells its own anti-fog inserts. You can also buy third-party inserts from Amazon. They are quite inexpensive and worth the money.
Time-lapse using a rotating timer
If you like creating time-lapse videos, then you can add some creativity to your work by creating rotating videos. A regular time-lapse video is taken from a stationary camera that is mounted on a tripod. However, you can use something as simple as a kitchen timer to create a rotating time-lapse.
Simple set the time on a kitchen timer and then place your GoPro on top of the timer. As the clock runs, the timer rotates, rotating the camera with itself. What you have is a simple yet beautiful rotating time-lapse video.
Keep your shots to 10 seconds
Do you know why news studios have multiple cameras? Or why ESPN (or other sports broadcasters) have 40 different cameras at a stadium? Capturing different angles is one reason. But an even bigger reason is the way professional videos are shot.
You will notice with any movie or TV show that 99% of the shots do not last more than 10 seconds. Filming using your GoPro should also follow the same principle. Capture something for a few seconds and then move on to another shot. You can even capture the same thing over two or three short shots. When you edit your videos, you will probably notice that you end up stitching together clips which are only a few seconds long.
Using one shot for five minutes just makes your videos look less professional and more amateurish. So, use a thumb rule of not using shots that are more than 10 seconds in duration. You can verify this observation by watching any YouTube vlog from a well-known blogger or by watching your favorite TV show.
Use a mic if you must
While the newer GoPro models have decent microphones, there is nothing quite like hearing a crisp audio-feed captured via a dedicated microphone. If your video has sounds that are of high importance or if you happen to make a vlog where you speak a lot, then using an external microphone is a must.
You may have to spend a few bucks and get a good microphone. But, after you edit your video and see the results, you will be glad that you invested in a microphone.
Conclusion
We hope that you find the above tricks useful and that they help you take your GoPro filming experience to the next level. GoPro cameras are so small and versatile that you can pretty much experiment as much as you want. And it is by experimenting and trying out new things that you will improve your video quality constantly. So, do not be afraid to try new things and get creative. Good luck and happy filming!