Best High-Resolution 3D Printers

Some people are happy just being able to successfully print stuff on their 3D printer, regardless of the shape, size, or color of the object. It’s a joy watching a machine produce solid objects seemingly out of nowhere.
But others are harder to please and won’t settle for anything less than an incredibly smooth high-resolution 3D model. If that sounds a lot like you, then you’ve come to the right place. In this guide, we’ll help you shop for the best high-resolution FDM/FFF 3D printers on the market. This guide includes the best 3D printers that boast a layer resolution of 50 microns or higher (or lower, depending on your perspective) including some that can do 10 or 20 microns.
| Budget |
|---|
 |
| Original Prusa i3 MK3 |
| 4.7/5.0 |
| 14 lb |
| USB, SD card Connectivity |
| Can detect shifted layers and a jammed extruder. |
| Check Amazon |
| Best Value |
|---|
 |
| MakerGear M2 |
| 4.6/5.0 |
| 26.5 lb |
| USB, SD card Connectivity |
| Good cable management and excellent print quality. |
| Check Amazon |
| Top Pick |
|---|
 |
| Ultimaker 3 |
| 4.8/5.0 |
| 23.4 lb |
| Wi-Fi, USB Connectivity |
| Reliable Wi-Fi connection and outstanding print quality. |
| Check Amazon |
Before you buy one of these products, make sure you understand the pros and cons of printing in high resolutions. The pros are obvious. What people often fail to take into account are the cons. There are two major hurdles when it comes to high-resolution printing.
First, a 3D printer needs to be perfectly calibrated in order to print consistently in high resolutions. Everything needs to be perfect, from the temperatures to the build platform adhesion. And second, it takes forever for a 3D printer to finish a high-resolution print, especially the large ones. When printing in high resolutions, a 20-hour print is normal. Again, make sure you understand the pros and cons before committing to high-resolution 3D printers, which are not exactly the most affordable.
Best High-Resolution 3D Printers Comparison Table
| Make and Model | Rating | Resolution | Build Volume | Diameter | Material Type | Weight | Connectivity | Price |
|---|---|---|---|---|---|---|---|---|
| Ultimaker 3 | 4.8 | 20 microns | 8.5 x 8.5 x 7.9 in | 2.85 mm | ABS, PLA, PVA, and others | 23.4 lb | Wi-Fi, USB | Check Price |
| Original Prusa i3 MK3 | 4.7 | 50 microns | 9.8 x 8.3 x 8.3 in | 1.75 mm | ABS, PLA, TPU, and others | 14 lb | USB, SD card | Check Price |
| MakerGear M2 | 4.6 | 50 microns | 8 x 10 x 8 in | 1.75 mm | ABS, PLA, TPU, and others | 26.5 lb | USB, SD card | Check Price |
| Robo 3D R2 | 4.2 | 20 microns | 8 x 8 x 10 in | 1.75 mm | ABS, PLA, PETG, and others | 30.2 lb | Wi-Fi, USB | Check Price |
| LulzBot TAZ 6 | 4.6 | 50 microns | 11 x 11 x 9.8 in | 3 mm | ABS, PLA, Nylon, and others | 33 lb | USB, SD card | Check Price |
| Raise3D N2 | 4.5 | 10 microns | 12 x 12 x 12 in | 1.75 mm | ABS, PLA, PETG, and others | 116.8 lb | Wi-Fi, USB, SD card | Check Price |
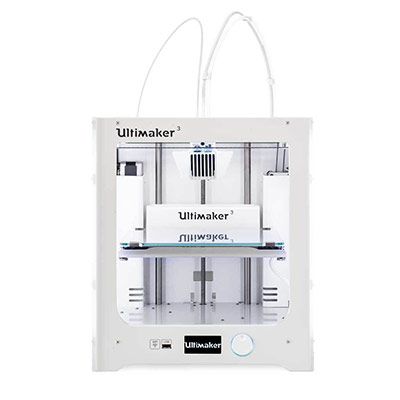
1. Ultimaker 3
Editor’s Rating: 4.8/5
When rounding up the best high-resolution 3D printers, it’s a sin not to include the Ultimaker 3. It’s one of the best 3D printers on the market, capable of producing incredibly detailed and smooth 3D models. Only a select few desktop 3D printers can go head-to-head with the Ultimaker 3 in a convincing manner.
On the surface, the Ultimaker 3 doesn’t seem any different from its predecessor, the Ultimaker 2. It has the same semi-enclosed frame and dial-operated LCD interface. If not for the model name on the frame, you won’t be able to tell which is which unless you know what to look for.
The easiest way to differentiate the Ultimaker 3 from the Ultimaker 2 is to look at the extruder setup. The older model has a single extruder while the newer Ultimaker has dual extruders. Another way is to look at the input slot right next to the LCD interface: Instead of an SD card slot, the Ultimaker 3 has a USB port.
Inside, the Ultimaker 3 is equipped with a heated print bed and an integrated camera. On top of the USB connection, it can also connect via Wi-Fi, allowing you to start prints and monitor your print progress remotely. Unlike with other wireless-enabled 3D printers, the Ultimaker 3 has a reliable Wi-Fi connection.
It’s easy to set up the Ultimaker 3 out of the box. It comes mostly assembled, with only a few important parts that need to be installed. It has an assisted bed leveling system, which makes the initial bed calibration easier for beginners. In all, the initial setup takes about 30 minutes to one hour.
With the dual extruder setup, you can print geometrically complex 3D models that require a water-soluble support material. Also, you can print with two colors without having to pause the print in order to change the filament, which is the case with single extruder 3D printers. In addition, the Ultimaker 3 has a good build volume, so you’re not limited to small-scale high-resolution prints.
Overall, the Ultimaker 3 is an outstanding 3D printer. It comes with a dual extruder setup, is easy to use, and has a large community. When properly tuned-up, it’ll blow you away with its ability to print high-resolution 3D models. If money is not an issue for you, get the Ultimaker 3. In case its build volume is still too limited for you, you can go for the Ultimaker 3 Extended instead.
If you don’t really need a dual extruder setup and would be perfectly happy with a single extruder 3D printer, then getting the Ultimaker 2+ makes more sense. It has the same maximum layer resolution. But more importantly, the Ultimaker 2+ is relatively more affordable.

| Tech Specs |
|---|
| Resolution: 20 microns |
| Volume: 8.5 x 8.5 x 7.9 in |
| Filament: 2.85 mm |
| Type: ABS, PLA, PVA, and others |
| Weight: 23.4 lb |
| Connect: Wi-Fi, USB |
| The Pros |
|---|
| Open-source |
| Dual extruders |
| Outstanding print quality |
| Good build volume |
| Sturdy frame |
| Integrated camera |
| Reliable Wi-Fi connection |
| Good customer support |
| Large community |
| The Cons |
|---|
| Expensive |
| No full enclosure++ |
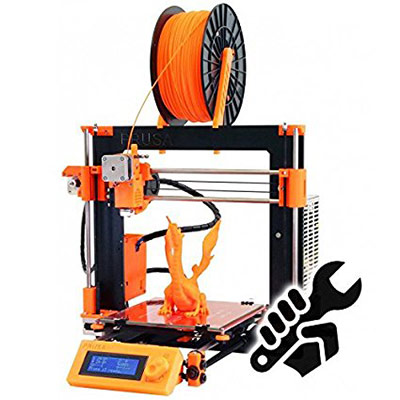
2. Original Prusa i3 MK3
Editor’s Rating: 4.7/5
The Original Prusa i3 MK3 isn’t normally what you would consider a “budget” 3D printer – the kit sells for $750, which is expensive for a DIY kit. However, compared to the other products here, the MK3 is easily the most affordable, with the second-cheapest going for double the price. If DIY kits are not your cup of tea, you can go for the pre-assembled MK3 instead, but that would cost you another $250.
An open-source 3D printer, the MK3 is similar to the Ultimaker 3 in that it resembles its predecessor, which is the Original Prusa i3 MK2. It has the same open-framed design with a top-mounted spool holder and an integrated LCD interface. But remove the surface level similarities and the MK3 comes out as a very different machine.
The MK3 has a reworked Y-axis and boasts a new motherboard that allows it to run quieter and detect shifted layers. It comes with the same E3D V6 hotend, but the extruder setup has been improved, with the new Bondtech extruder making the MK3 more reliable when printing with flexible filaments.
The MK3 is more feature-rich than the MK2. In addition to its auto bed leveling system, it has a filament sensor, a power panic function, and a removable magnetic build platform, which makes it a lot easier to remove completed 3D models and move on to the next print. The MK3 can also detect a jammed extruder, with the print head automatically pausing as soon as it senses it is being compromised.
When it comes to print quality, the MK3 gets top marks. With the right settings, it can produce highly detailed 3D models with ABS and PLA. As with other 3D printers, it takes a fair amount of tinkering before you can produce consistent results with a high-resolution configuration. But all your efforts will be worth it in the end once you see what the MK3 is capable of when perfectly calibrated.
Whether you go for the kit or the pre-assembled package, buying the MK3 is going to be an excellent investment for you. It’s a top-class 3D printer packed with convenient features and capable of producing fantastic results. It has an active community, too, which means it’s easy to find solutions to some of the most common problems.
It’s a good experience to assemble a 3D printer from scratch, especially for beginners. So if you have the time, we recommend that you go for the cheaper MK3 kit instead of the pre-assembled one. It’s actually easy to assemble the MK3 compared to other DIY kits, due in part to the comprehensive instruction manual it comes with.
| Tech Specs |
|---|
| Resolution: 50 microns |
| Volume: 9.8 x 8.3 x 8.3 in |
| Filament: 1.75 mm |
| Type: ABS, PLA, TPU, and others |
| Weight: 14 lb |
| Connect: USB, SD card |
| The Pros |
|---|
| Open-source |
| Sturdy aluminum frame |
| Superb print quality |
| Auto bed leveling technology |
| Removable build platform |
| Filament sensor |
| Can detect shifted layers and a jammed extruder |
| Good customer support |
| The Cons |
|---|
| Ships out in batches; takes months to arrive |
| Filament sensor is easily fooled by clear filaments |
3. MakerGear M2
Editor’s Rating: 4.6/5
The MakerGear M2 is considered one of the most reliable workhorse 3D printers on the market. When set to optimum settings, it can pump out print after print with little to no issues. That said, the first major tweak you should do after getting your hands on the M2 is to pair it with Simplify3D. It’s going to make a big difference both at the onset and in the long run.
The M2 is an open-framed 3D printer. It has a well-built metal frame with an all-black finish, giving it a very appealing all-business profile. It comes with a built-in spool holder and has good cable management, which is important for a 3D printer with an open structure. MakerGear, an American company based in Ohio, offers a single extruder M2 and a dual extruder M2.
It’s relatively easy to set up the M2, which comes assembled out of the box. Although the included instruction manual is not exactly the most comprehensive, the initial setup shouldn’t take more than a couple of hours. If you already have experience with 3D printers, then it should be a cakewalk for you. The M2 has been around for several years, so you can easily find videos on the internet in case you’re having trouble with the initial setup.
Instead of an aluminum heated print bed, the M2 is equipped with a glass build plate, which helps a lot with the adhesion. It has an open material system, accepting filaments from different brands as long as the filament diameter is a match (1.75 millimeters), and can connect via USB and SD card.
With the heated print bed, you can print with high-temperature materials such ABS, but keep in mind the M2 has no enclosure whatsoever, which is necessary for certain materials. So, for more advanced materials, you will have to create your own enclosure for more consistent temperatures in the print chamber. But you don’t have to be fancy with the enclosure. As long as it has a see-through window in at least one side, which will allow you to easily check on the print progress, a simple box-like enclosure should suffice.
The M2 is more than capable of producing high-resolution 3D models, but a lot of adjustments are necessary before it can consistently print in the best resolution. When it comes to overall print quality, the M2 is in the same neighborhood as the LulzBot TAZ 6, which is also from an American company. If you know what the TAZ 6 is capable of, then you know that comparison is a compliment.
In all, the M2 is a solid 3D printer that brings excellent value to the table. It’s an absolute workhorse once tuned-up and is easy to tinker with, due in part to its open structure. If you want a reliable 3D printer that can print non-stop for days, the M2 is one of the best options on the market.
| Tech Specs |
|---|
| Resolution: 50 microns |
| Volume: 8 x 10 x 8 in |
| Filament: 1.75 mm |
| Type: ABS, PLA, TPU, and others |
| Weight: 26.5 lb |
| Connect: USB, SD card |
| The Pros |
|---|
| Comes assembled |
| Straightforward initial setup |
| Rigid metal frame |
| Good cable management |
| Excellent print quality |
| Glass print bed |
| Good build volume |
| Large community |
| The Cons |
|---|
| Instruction manual could use some polishing |
| Can be really noisy |
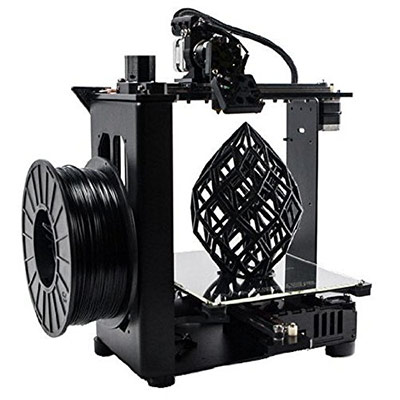
4. Robo 3D R2
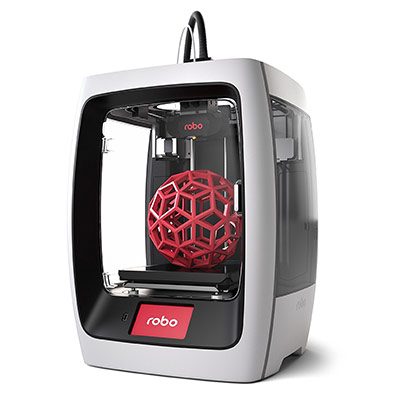
Editor’s Rating: 4.2/5
The Robo 3D R2 is a Kickstarter-backed 3D printer. It’s a medium-sized 3D printer that comes with a number of convenient features, making it a good option as a starter machine for beginners. Out of all the 3D printers with Kickstarter origins, the R2 easily makes the top 10.
When you look at the promotional images, the R2 appears to be a fully enclosed 3D printer. Its sides are covered, and it has a front door. The top, however, is uncovered. But even with the uncovered top, the R2 is still great at printing with high-temperature materials.
Unlike all the other 3D printers listed here, the R2 has an acrylic frame, which is no doubt an immediate turn-off for a lot of people. Although solidly constructed, the frame is not as durable as metal frames. The R2 has a built-in spool holder at the back. There are actually two spool holders. The other one is used when the R2 is in a dual extruder setup, which is an optional upgrade.
Inside, the R2 has a well-covered extruder setup and a heated print bed. The build platform has a BuildTak print surface and is removable. With the removable build plate, it’s easy to remove completed 3D models and clean the print surface after heavy use. Also, the R2 is equipped with a camera inside the print chamber, allowing you to monitor your print progress from afar, courtesy of the Wi-Fi connection.
Out front, the R2 has a touchscreen interface, with a USB port right next to it. Although it can be unresponsive sometimes, the touchscreen interface includes a couple of neat features that you may find convenient. The first is in the form of the onboard slicer. With the onboard slicer, you can do basic slicing tasks without a connected computer. The second is the built-in memory, which can store up to 500 3D models.
Although it lacks the ability to print from an SD card, which is the preferred method for most people, the R2 offers multiple ways for you to start your prints. Aside from the USB method and the print-from-memory method, you can also send prints via Wi-Fi with the Robo 3D app.
It’s not that hard to set up the R2. It comes assembled and has a straightforward bed calibration process, thanks to the automatic bed leveling system. You should be able to finish up the initial setup in an hour or two, depending on your experience with electronics. Getting the R2 to produce good results, on the other hand, takes a lot more than just a couple of hours.
A significant amount of tinkering is required in order for the R2 to print in high resolutions. Of all the products here, the R2 is probably the most difficult to tinker with. So, needless to say, make sure you’re prepared to encounter a lot of failed prints when trying to get the R2 to top form. Once tuned-up, the R2 prints really well, although it has issues maintaining a high-resolution print quality.
If you want a high-resolution 3D printer that comes with some form of enclosure out of the box, the R2 is for you. It has a good build volume, packs a number of convenient features, and is compatible with third-party filaments.
| Tech Specs |
|---|
| Resolution: 20 microns |
| Volume: 8 x 8 x 10 in |
| Filament: 1.75 mm |
| Type: ABS, PLA, PETG, and others |
| Weight: 30.2 lb |
| Connect: Wi-Fi, USB |
| The Pros |
|---|
| Easy to set up |
| Good build size |
| Auto bed leveling system |
| Filament sensor |
| Onboard camera |
| Removable build platform |
| Touchscreen interface with onboard slicer |
| Built-in storage |
| The Cons |
|---|
| Acrylic frame |
| No SD card connectivity |
| Very noisy |
5. LulzBot TAZ 6
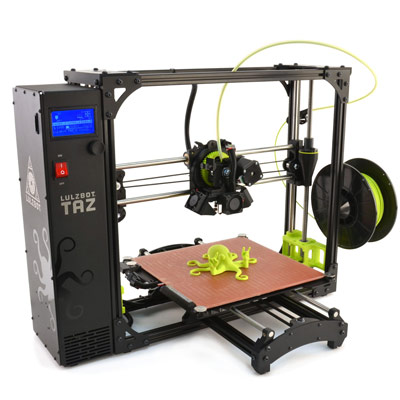
Editor’s Rating: 4.6/5
Being able to print high-resolution 3D models is nice. Being able to print large-scale, high-resolution 3D models is even better. For that, your first, second, and third option should be the LulzBot TAZ 6, an open-source 3D printer from an American company.
The TAZ 6 is one of the most reliable and sturdiest 3D printers on the market. It’s an open-framed 3D printer housed in a rigid aluminum frame, which allows it to laugh off vibrations. Instead of a separate controller box, it has an integrated controller box, translating to a smaller footprint. On the controller box, there’s an LCD interface, a USB port, and an SD card slot, along with a power switch.
With the LCD interface and the SD card connectivity, you can start prints without a computer, which is more convenient than printing via USB. Although the USB connection is also reliable, there are several things on the computer side that can break up the connection, such as an automatic update or a forced shutdown. Sadly, the TAZ 6 can’t connect via Wi-Fi out of the box, which is disappointing considering the price, but you can make a few upgrades to be able to print over the network.
Setting up the TAZ 6 is as easy as setting up the pre-assembled Original Prusa i3 MK3. It comes mostly assembled and ships with a comprehensive instruction manual. The TAZ 6 has an automatic bed leveling system, so calibrating the build platform is a breeze. Installing the software and loading the filament are also straightforward processes. In all, the initial setup should only take less than one hour.
The TAZ 6 is capable of printing high-resolution 3D models with different materials, including more advanced materials such as TPU and Nylon. When perfectly calibrated, the TAZ 6 is a total workhorse that can print non-stop with minimal maintenance after each print. And with the massive build volume, you can go big and print large-scale 3D models.
Here’s the caveat: Even though the TAZ 6 has a relatively fast print speed, printing a large-scale, high-resolution 3D model is going to take a while, and by which we mean you should expect a minimum print time of 20 hours. So don’t expect to be able to print a lot of 3D models per week if you want to go in that direction.
Overall, the TAZ 6 is one of the best 3D printers under $3,000. It’s easy to use, features a large build volume, and can print in high resolutions in a consistent manner. Its tank-like frame is also a highlight. If you want a reliable workhorse 3D printer that can also print large-scale, high-resolution 3D models, get the TAZ 6.
If you want a relatively more portable LulzBot 3D printer, you can check out the LulzBot Mini, which sells for half the price of the TAZ 6. The LulzBot Mini has the same 50-micron maximum layer resolution and is one of the best 3D printers under $2,000.
| Tech Specs |
|---|
| Resolution: 50 microns |
| Volume: 11 x 11 x 9.8 in |
| Filament: 3 mm |
| Type: ABS, PLA, Nylon, and others |
| Weight: 33 lb |
| Connect: USB, SD card |
| The Pros |
|---|
| Open-source |
| Large build volume |
| Superb print quality |
| Automatic bed leveling system |
| Rigid metal frame |
| Relatively fast print speed |
| Easy to upgrade |
| Good customer support |
| The Cons |
|---|
| Limited LCD interface |
| Expensive |
6. Raise3D N2
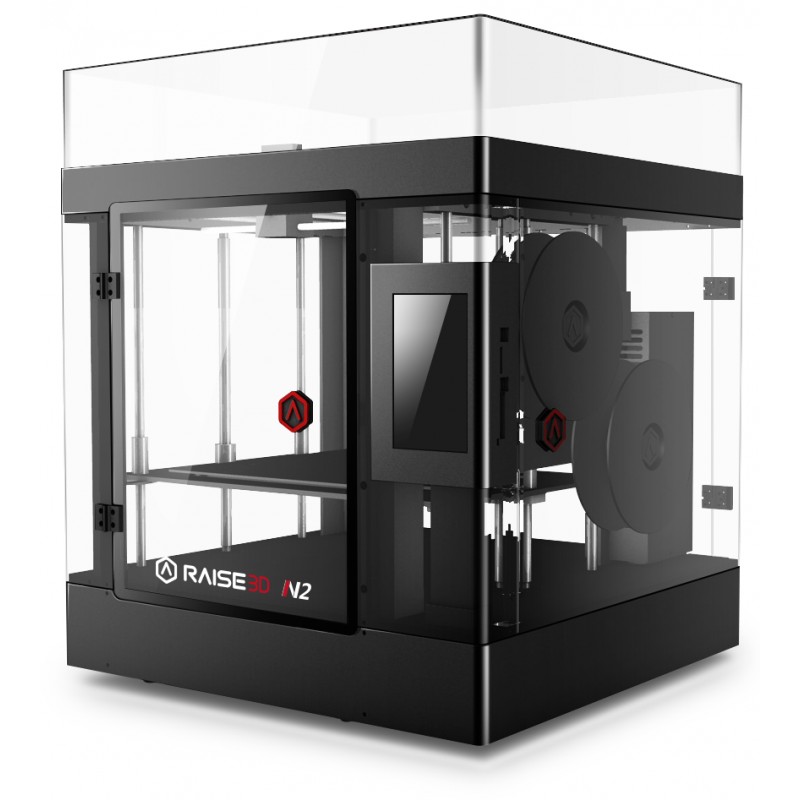
Editor’s Rating: 4.5/5
For large-scale, high-resolution prints, the LulzBot TAZ 6, as mentioned above, is the best 3D printer for the job. But we understand that not everyone is a fan of open-framed 3D printers, which are not the best when it comes to maintaining high temperatures and are more exposed to dust and other particles.
If you want a large-scale, high-resolution 3D printer that comes with a full enclosure out of the box, the Raise3D N2 is for you. It’s a massive 3D printer with a slightly more generous maximum build volume than the TAZ 6. If the Robo 3D R2 is one of the top 10 Kickstarter-backed 3D printers, then the N2 is in the top 5.
The N2 comes mostly assembled. It’s housed in a tank-like frame with a see-through enclosure, which makes it easy to check the print progress. Like with the MakerGear M2, you can get the N2 in either a single extruder setup or a dual extruder setup, with the latter being the more expensive option. It has a heated print bed and comes with a touchscreen interface right next to the door.
The touchscreen interface has clear icons and is easy to use. At 7 inches, the display is one of the largest you’ll ever see on a consumer-level 3D printer. With it, you no longer have to squint really hard just to be able to see the numbers on the screen, such as the temperature of the heated components and the print progress. In a market where the common display size is less than 5 inches, the N2 stands out.
Because of its size, you’re probably thinking the N2 is a pain to set up. It’s actually the opposite. Setting up the N2 will only take about one hour, and that includes the initial bed calibration and software installation. For connectivity, the N2 can connect via USB, SD card, and Wi-Fi, so you have multiple options when starting prints. The Wi-Fi connection is sort of wasted, though. The N2 lacks an onboard camera, so being able to watch your print progress from afar is off the table.
With a maximum layer resolution of 10 microns, the N2 is tops on this list in that department. However, when it comes to overall performance, the N2 falls behind the Ultimaker 3, which is why the Dutch-made 3D printer took home the crown as our top pick here. Also, getting the N2 to print consistently in the highest resolution possible takes a lot of tinkering with the settings.
In all, the N2 is a solid 3D printer that can produce excellent results when configured correctly. It has an intuitive touchscreen interface, comes with a full enclosure, and is built like a tank. It’s easily the largest 3D printer in this guide. In case you need more space, you can go for the even more expensive Raise3D N2 Plus.
| Tech Specs |
|---|
| Resolution: 10 microns |
| Volume: 12 x 12 x 12 in |
| Filament: 1.75 mm |
| Type: ABS, PLA, PETG, and others |
| Weight: 116.8 lb |
| Connect: Wi-Fi, USB, SD card |
| The Pros |
|---|
| Massive build volume |
| Built like a tank |
| Fully enclosed |
| Easy to set up |
| Intuitive touchscreen interface |
| Excellent print quality |
| Open filament system |
| Good customer support |
| The Cons |
|---|
| Expensive |
| Relatively small community |
| Slow print speed |
Contents
Isn’t it strange to put the Raise3D, which has the highest level of precision, on the bottom of a list for “high resolution 3D printers”?