How to Clean Your 3D Printing Nozzle

If you own an FDM 3D printer, then you already understand that a lot of time and energy goes towards the printer’s maintenance. One of the most important housekeeping activities you need to do regularly is to clean the hot end nozzle.
Both the exterior and interior of a nozzle must be cleaned regularly to avoid any extrusion or clogging issues. Cleaning the inside of the nozzle is considerably harder, especially if some residue or debris has become burnt and hardened. There are several cleaning methods, but the ‘cold pull’ method is considered the most reliable.
Cleaning a 3D printer nozzle does take a bit of effort, but it’s something you will need to do regularly. In this article, we will be going through the tried-and-true methods and provide you some tips to make nozzle cleaning easier and more effective.
How often do you need to clean the nozzle?

At this point, it is worth mentioning that nozzle cleaning is unavoidable if you 3D print with plastic filaments. No amount of precaution or pre-cleaning of your filaments can completely prevent residue buildup inside the nozzle.
The frequency of nozzle cleaning depends entirely on how frequently you use your 3D printer. If you use it almost daily, then cleaning the nozzle once a week is good practice. If your 3D printer has been idle for a long time, it is also a good idea to clean the nozzle to get rid of any dust buildup in the nozzle before using it again.
If you’re having a hard time deciding if it’s already time to clean your 3D printing nozzle, there are certain signs to watch out for that may indicate that cleaning is due.
Under-extrusion
Any form of under-extrusion is a sign that there is probably an obstruction in the nozzle. Under-extrusion can manifest in several ways. You may notice some layers that have gaps or holes in them. You may also notice the nozzle extruding layers that are thinner than expected. In some cases, entire layers could be missing because of under-extrusion.
When under-extrusion is observed, the final product will inevitably end up lacking visual appeal and mechanical integrity. You may still be able to finish the project, but the finished quality will be well below expectations.
Extruder skipping
If you notice any clicking or skipping sounds in the extruder gear, then this is another sign that there is a clog somewhere in the nozzle or hot end. Extruder skipping happens because the extruder gear is having difficulty pushing the filament forward.
A skipping extruder gear rarely occurs without under-extrusion. It can be caused by other factors, but a clogged nozzle is one of the more likely. If you can notice both issues, then it’s certainly time to clean your nozzle.
Clogged nozzle
When the obstruction gets really bad, then the nozzle can get so clogged that extrusion just no longer pushes through. You will likely notice this when the entire first layer of your print does not show up. At this point, you have no choice but to do a general cleanup of your nozzle and perhaps your entire extruder assembly.
The best time to clean your nozzle is when you start noticing the early signs of under-extrusion. The cleanup process is a lot easier if you can intervene early.
Methods for 3D printer nozzle cleaning
There are several options for cleaning a 3D printer nozzle depending on the severity of the situation. We will go through these methods in sequence from the easiest ones to the most difficult and time-consuming.
Cleaning the exterior
It’s a trivial task but doing a quick cleanup of the exterior of your nozzle can help avoid 3D printing failures. The typical residue found outside of the nozzle is filament that has been picked up by the nozzle during while traveling.
Residual filament on the outside of the nozzle is not as serious a problem as material clogging the nozzle opening. The biggest concern here would be the residual filament sticking to the rest of the print, causing the layers to shift or deform.
The easiest way to clean the nozzle exterior is with some water or isopropyl alcohol. If some residue cannot be removed this way, then gentle removal using a small blade or spatula can also be done. The debris on this side of the nozzle are typically easy to remove.
Cleaning with a pin
If you suspect minor blockage in the nozzle, the least intrusive way to clean it is with a small pin or needle. Be careful to use a pin or needle that will not scratch the surface of the nozzle – acupuncture needles or guitar strings have been recommended by many people for this step. If you have neither of those, a standard needle can work as long as you are very careful to avoid any internal abrasion.
Heat the nozzle up to a temperature between 80 to 90 °C. This will help soften up any leftover filament in the nozzle. Using the wire, needle, or pin, prod into the nozzle and try to scrape off any debris or residue. This method is effective for breaking up partial clogs but may not be enough to fully remove any residue inside the nozzle.
The cold pull method
The cold pull method yields the best results-to-effort ratio out of any other nozzle cleaning method. With multiple runts of this technique, you can completely clean out a 3D printer nozzle without having to take apart the extruder assembly. It’s not incredibly difficult but will take some time to complete.
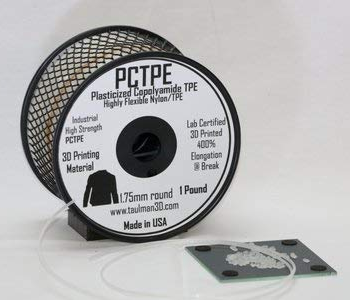
First off, you will need to use a high-temperature 3D printing filament. The most common recommendation is Nylon, but ABS or PETG can also work.
Heat up the nozzle to the printing temperature of your filament. Push the filament through the nozzle, allowing some of it to extrude through the nozzle. Once an ample amount has extruded, cool down the hot end to around 90 °C. This will partially solidify the filament inside the nozzle but still make it pliable enough to be pulled out.
Once the set temperature has been reached, pull out the filament forcefully from the feeding point. You should end up with a plastic plug that is in the shape of the nozzle. If successful, any burnt residue in the nozzle should come out with the plastic plug. You can repeat the cold pull method several times until no observable residue comes out with each pull.
Soaking in acetone
If all else fails, you can clean your nozzle by removing it from the hot end and soaking it in some acetone. This is typically only necessary if the residue inside the nozzle has been heavily burnt and hardened to the point where it cannot be removed via the cold pull method.
Removal of the nozzle is best done at high temperatures (about 150 °C) to loosen up the threads and avoid damage. Once the nozzle has been removed and cooled down, soak it in some acetone for about 15 to 20 minutes. This should loosen up the residue inside the nozzle.
If the residue does not come away on its own, you can try prodding it off with a needle or wire. You can also try the to heat the nozzle with a heat gun to further soften up any debris. Since you’ve already bothered to remove the nozzle, you might as well give it a deep cleaning.
Nozzle replacement
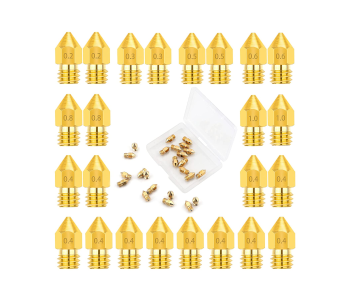
It’s entirely possible for residue buildup in your nozzle to reach a point where cleaning it is no longer possible. If you’ve already tried the acetone deep cleaning method to no avail, then a replacement might be in order. This isn’t too costly if you’re just using brass nozzles for your 3D printer. These nozzles cost less than 50 cents each when bought in bundles.
Your goal in 3D printer nozzle maintenance is to not have to resort to cleaning your nozzle via the acetone method. Doing a cold pull frequently is fine and has become a regular activity for those who use their 3D printers heavily.
How to avoid nozzle clogging

The best fix is prevention – this applies to your 3D printer as well. Frequent removal of clogs in your nozzle can cause it to deteriorate a lot faster. If you don’t want to have to replace your nozzle all the time, the best solution would be to avoid nozzle clogs from happening in the first place. Yes, nozzle clogging is unavoidable, but there are measures you can take to make them less frequent.
Use clean and good-quality filament
The most common culprit in frequent nozzle clogging is the use of cheap, poor-quality filaments. These filaments can come with dyes and additives that more easily burn, resulting in hardened residue getting deposited in the nozzle and in other parts of the hot end. To avoid this problem, make sure to get your filaments from trusted brands that have been vouched for by multiple 3D printing professionals.
It’s also possible that dust in the filament is getting burned in the melt zone and causing obstructions. This can be easily addressed by placing a filament filter right before the extruder that wipes off dust from the filament.