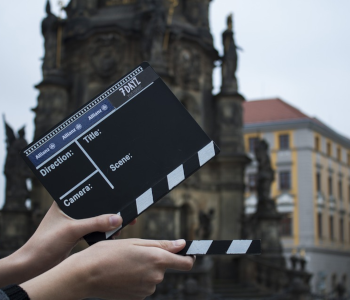
How to Film a Movie – Essential Tips for First-time Filmmakers

Have you always wanted to film a movie but didn’t know where to start? If you are serious about turning movie-making into a hobby or even a career, you’ll need more than a half-baked idea.
This guide introduces you to the basics of filmmaking. It goes over the process from conception to distribution and provides helpful tips for each step. By the time you’re through with it, you’ll have a healthy grasp of what it takes to create a movie and can start making your silver screen dreams into reality.
What you’ll need before you can make any movie
Contrary to what Hollywood would have you believe, making movies isn’t a glamorous process. It involves hours upon hours of hard work in shifting conditions, managing a set & crew, and worrying over hundreds of details. However, it’s also an immensely rewarding creative process with the potential to impact people worldwide. You’ll want to start small though, and need a coherent idea as well as the tools to bring it to life first.
Coming up with an idea
Every movie needs to have a plot. It has to tell a story your audience will become invested in and want to see played out to a logical conclusion. The first thing you’ll need to do is to come up with that story. Your movie’s plot doesn’t need to be convoluted and grandiose. It’s best to stick to simple ideas anyone can understand until you’ve gained experience and confidence.
Finding inspiration can be a challenge, but the world around you is an inexhaustible source of ideas. Take a look around your city, observe people as they go about their business, or unwind at a local bar. Come up with something your target audience can relate to. It’s a good idea to rewatch movies from your favorite genre. You should also step out of your comfort zone and examine movies you hadn’t considered before to get a broader perspective and new insights.
Once you’ve formed an idea, write it down. The movie’s initial concept should consist of a few written sentences no longer than a single paragraph. If you can condense the scope of your film into fifty words or less and make it clear to anyone who reads the idea, you’ll be well on your way.
Gear
While you could technically create an award-winning movie with a smartphone, professionals use dedicated equipment. The good news is you don’t need to spend thousands of dollars to get everything together. Here’s what you’ll need:
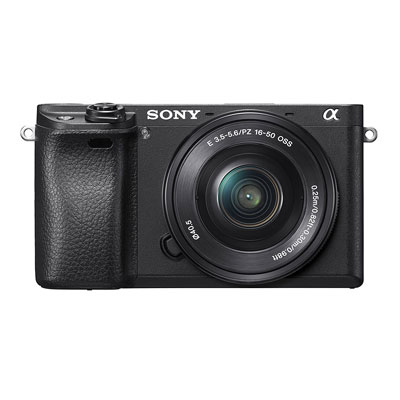
Camera – a modern mid-range DSLR or mirrorless camera is more than enough to start your movie-making journey. Take the Sony Alpha a6300, for example. This sub-$800 camera can record in full HD at 120 frames per second, meaning you can use it to shoot slow-motion sequences. It has a robust body and logical control layout complete with a dedicated record video button. Best of all, the camera performs exceptionally well in low light conditions and produces videos with a distinctly cinematic feel.
Lens – The lens determines the field of view your camera can capture. There are different types of lenses depending on their focal length and zoom capabilities, so you may need to buy more than one to cover all your bases. If you have the money to buy a single lens, your best bet is to go for a prime lens like the Canon EF 50mm f/1.8 STM.
Prime lenses have a fixed focal length so you can’t use them to zoom in. However, they’re versatile as they allow you to make master shots or film indoors and capture an entire room. You’ll need a telephoto lens if your movie has lots of close-ups. These have varying focal lengths and can focus on the subject while blurring out its surroundings.
Tripods & gimbals – Shaky shots are OK if you’re going for the home video look; for everything else, there’s image stabilization. Tripods keep the camera from moving when it’s stationary while gimbals keep it stable during movement. You’ll want a tall, lightweight tripod you can easily adjust and transport, like the K&F Concept TC2534. The gimbal needs to be light but able to support a weighty DSLR and have good battery life. Laing’s Handheld Stabilizer P-4S is an excellent example.
Microphones – Cameras are not known for their exceptional audio quality, which is why you’ll need a dedicated mic. The Rode VideoMic GO is an excellent all-around shotgun mic that only records sound coming in front of it without picking up unwanted noise. It eliminates wind noises has a flexible mount that nullifies the camera’s mechanical sounds. Consider Rode’s SmartLav lavalier microphone if you’re making a documentary and wish to interview people.
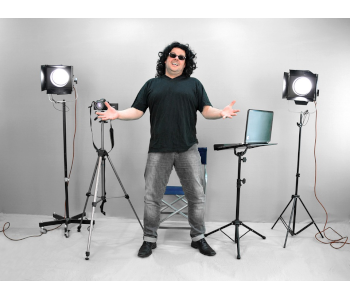
Lights – No amount of editing can fix a poor choice of lighting. Investing in at least one of three types of lighting is a must. Diffusers are the easiest to work with and most straightforward light source. They take light that’s already present and focus it so that the scene is illuminated better or that harsh shadows get softer. If you’re mostly shooting close-ups or in confined spaces, you might be able to get away with an on-camera LED light.
You’ll need to buy a complete lighting setup for any other situation which doesn’t involve shooting in daylight. Limo Studio is our manufacturer of choice as they offer everything you need to create a three-light setup. They sell umbrella lights, softboxes, and all accompanying accessories at excellent prices.
Sometimes you’ll have to deal with too much light either as the result of an unfortunate camera angle or a large aperture. That’s when you’ll be glad you bought neutral density filters. Getting a kit ensures you’ve always got the right filter at hand. Since the Rangers kit comes with multiple adapters, it’s sure to fit your camera of choice.
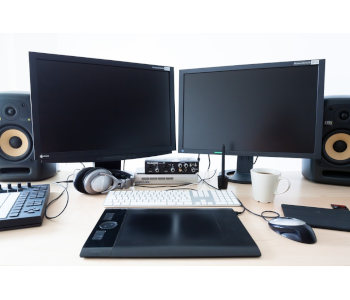
Computer – You’ll need a computer to edit your movie’s raw footage into a presentable story. It doesn’t matter whether you use a PC or a Mac as long as it has decent specs. Any computer bought in the last five years will service your basic video editing needs. If you’re buying a new one specifically for video editing, make sure it has 16GB of RAM or more, a fast SSD with plenty of storage, and a video card with at least 4GB of RAM if you plan on including lots of special effects.
Editing software – choosing the right editing program is the last big gear decision you have to make. Some like iMovie are beginner-friendly and guide you through every editing stage. Others such as Adobe Premiere Pro or DaVinci Resolve have steep learning curves but offer unlimited creative freedom once you master them.
Miscellaneous – You can have the finest movie-making equipment in the world and still flop because you forgot to charge the battery. Always bring spares for every piece of equipment that needs them! Also make sure you’ve got high-capacity SD cards to store all your footage on, spare bulbs for your lighting setup, and a robust backpack to carry all of your equipment to and from location.
Pre-production
Pre-production is the planning stage of filmmaking where you make everything ready for the actual shoot. Execute it well, and you’ll save yourself a lot of hassle down the line.
Fleshing out the story
First, you’ll need to expand your idea into a fleshed-out story. That involves introducing characters, creating their personalities & motivations, and explaining why they’ve come to be in the story. The characters need challenges to work through and move the plot forward.
Even though you could experiment with different approaches, it’s best to have your first movies follow the setup – development – resolution formula. Setup establishes the characters and the events that surround them. Development follows the characters as they overcome the plot’s obstacles, and the resolution brings things to an end. Don’t leave your audience hanging! Have the story progress logically from start to finish.
You can write the story down in different ways depending on its depth and the number of people involved in filming. A mind map with a structure of critical events and characters may do for a small project. More complex films are better served with a detailed write-up of the story known as the treatment.
Screenplays & storyboards
Now it’s time to shape your story into manageable, and more importantly, filmable segments. That’s where the screenplay comes in. It is a document that details the flow of the movie – how each scene should be set up, how your actors will be positioned, what special effects the audience might see, and the actors’ dialogue. The screenplay is your primary reference document. It’s also an excellent tool for reevaluating the movie’s pacing, spotting plot holes, and making other changes so that the result is more consistent.
Next comes the storyboard, a document that outlines how the scenes you’ll shoot should look. It consists of sketches or still images of the scenes along with a few lines of text for notes on each. The storyboard is the first step to bringing your vision to life and adapting it to real-world constraints. It helps you, determine where the camera will be in relation to the characters, which feelings each scene should convey, and how to make transitions from one scene to another smooth.
Actors, crew & locations
Once your idea has shaped up into a filmable story, it’s time to choose your cast. Friends, family, or interested volunteers will do for beginner projects. However, you’ll want to put some thought into how suited a person is for a role if you’re going to share the movie with the world. Organize an audition and have your prospects read from the script, a simpler version of the screenplay that focuses on the actors’ dialogue and delivery. Be upfront about your budget, especially if you don’t have one. The interest might not be as high as for a paying gig. That’s alright since there are always film lovers and acting students who’d relish the chance at being in a movie or getting experience.
Low-budget and amateur movies can do without a large crew, but you can’t do everything on your own on larger projects. As the creator of the movie, you assume the role of the director, which involves coordinating the actors and crew. The cinematographer handles lighting and filming, while the sound engineer makes sure audio is recorded correctly. A set designer is there to create or augment the set to comply with your vision. Finally, you’ll need someone to handle costumes & makeup so your actors look the part.
At this point you probably already have specific locations for your movie in mind, so you should make sure that you’re allowed to use them. Scope out the sites beforehand to see if they can accommodate your gear and crew. Determine how long you’ll be on location and negotiate terms with the owners before shooting starts to avoid misunderstandings or legal troubles down the line.
Production
Production is the stage in which your movie gets filmed. It involves gathering all the material necessary to make a coherent movie in editing and is the most involved stage. However, you can do much to streamline production if you spend enough time on the storyboard.
Ensure everything is ready before starting to shoot
You need to go over a checklist every time you’re shooting a new scene.
- Is the camera positioned so that the shot doesn’t cut away any essential details or include confusing ones?
- Are you using the right lens for the shot and are your subjects in focus?
- Does the lighting fit the scene?
- Is there a chance that an unexpected sound might ruin the shot?
- Is everyone on their assigned position and ready to begin?
If the answers to all these questions are satisfactory, you can start filming.
Compose your shots
Composition in filmmaking refers to the way you arrange characters, props, and backgrounds in a shot. Unless you’re intentionally trying to scare or confuse the audience, the composition should look natural. That means the audience should feel comfortable and spend most of their time engaged in the story rather than trying to make sense of weird angles or claustrophobic scenery.
The rule of thirds is the basic principle to follow. Draw an imaginary grid onto the camera’s viewfinder. The grid divides it into nine same-sized segments using vertical and horizontal lines. The rule of thirds states that the viewer’s attention is drawn naturally to where the lines intersect. Following this rule ensures your shots will look pleasing but may leave the central portion of the frame bland.
You can mix things up by introducing static, symmetric, and dynamic compositions from time to time. Static compositions rely on lots of vertical and horizontal lines. A dynamic composition adds suspense and action through diagonals. In a symmetrical composition, the focal point is at the center of the shot while the sides are harmonious.
A shot’s background provides context to the action and can contain subtle hints only careful viewers will notice. However, vibrant settings and horizontal lines which intersect with your characters can be distracting. If the background doesn’t enhance the current scene, it’s best to make it subdued or blur it out with a telephoto lens.
You also have to plan a shot’s composition so that transitioning to the next one makes sense. Let’s say you’re filming a scene where a man and woman are talking. If you’re alternating between close-ups and the man is sitting down, it’s logical to have him look up and towards the woman. The next shot should be of her looking down and in the opposite direction. Not following such conventions needlessly confuses the audience.
Use camera movement for dynamic shots
While characters are responsible for most of a movie’s action, creative use of your camera(s) can further enhance the result. The most impact you can make in that regard is by moving the camera or adjusting lens settings.
Moving the camera lets you do tracking hots. There are three types of these depending on the direction. Backward tracking shots shoot the characters from the front while the camera moves backward. They’re useful when shooting a chase that shows a character and her pursuers, and are famous for portraying life in army boot camps. Forward tracking is the opposite and useful when you want to switch to first-person view or have the character show someone around. Crab or sideways tracking is excellent when showing the character is headed on a journey.
Other techniques you can try once you’re more experienced are the arc shot and continuous shot. Arc shots involve rotating the camera around a character for an overview of their surroundings. Continuous shots are the trickiest to pull off since the camera keeps rolling as it moves and you have to film a long sequence without edits and cuts.
Pick the right shot size
One of the core principles of movie-making is to always show the audience what you want them to see. That involves tailoring how much of the scene is visible by using shot sizes. There are two main types of shots in relation to size – long shots and close-ups.
Long shots include both the setting and the subject. Wide shots are the exception as they produce an expansive view of the scenery and often don’t include subjects. They set the stage for the action and give the viewer a broader picture of the characters’ surroundings. If characters are in the shot, they’re small and insignificant.
Conventional long shots show people in their entirety. They’re great for dialogues and scenes with a lot of movement. Medium long shots are similar but only include three-quarters of a person’s body starting at the knees. They’re used when filming a group, or to convey abstract emotions. Medium shots capture a person from the waist up. They concentrate on the subject but still capture some of their surroundings. That makes medium shots ideal for action-packed scenes like brawls or chases.
Close-ups focus entirely on the subject. They let the audience focus on the character and see their emotions or expressions clearly. The medium close-up captures a person’s head and shoulders. It is centered on the face but leaves some room for upper body expression. You see examples of medium close-ups every time you watch the news.
The standard close-up features the subject’s entire head and neck while a big close-up hones in on their face to capture subtle expressions or strong emotions. Finally, the extreme close-up zooms in onto a part of the face like the eye or mouth. It’s a powerful tool for emphasizing something that has a profound impact on a character like irises widening in shock, or subtle details like a coy smile.
Shoot for continuity
We’ve already said that your movie needs to tell a story. It’s important to stress that it needs to do so without jarring or confusing the audience. You’ll accomplish that by paying attention to the continuity of your shots. In other words, you need to film the story so that it flows from one shot into the other naturally. You’ll do a lot of work on this during the editing stage, but production is when you need to get your shots right. Here are a few rules to follow to ensure continuity.
Never show a scene from a similar angle back to back. Using jump cuts to skip time or moving the camera minimally to get a 2nd close-up shot might work for vlogs, but it’s bad practice when making movies. You should always break the monotony by separating two similar shots with a different one. For example, you could place a close-up of a character’s face between scenes of him conversing with a friend at a bar.
Mix things up. Sticking to the above technique for too long would become boring quickly, which is why you need to put some pep into your shots. You can do this by changing the shot size, positioning the camera at a different angle, or changing the perspective.
The easiest and most common way to introduce an intriguing dynamic this is with a technique called shot reverse shot. It starts with one shot, quickly switches to a 180-degree reversed shot, and then back again. The method is useful when you want to introduce a character’s point of view or capture a confrontation between two rivals.
Don’t jump between shot sizes that are too far apart. Shifting from a wide shot of a beach to a close-up is as unsettling as making minimal changes between cuts. The most elegant way to resolve such situations is with a buffer, i.e., a shot filmed at a size that’s between the two extremes.
Follow the 180 degree rule. Imagine that two characters are facing each other in a straight line. If you were to move the camera to one side of the line, one character would be looking to the left and the other to the right. The 180 degree rule states that you should never cross that imaginary line once you pick which side of it to use.
Breaking the rule results in shots where the characters look towards the same spot even though they shouldn’t be. It’s even worse if you’re shooting a single character as they’ll suddenly appear to be on the opposite side for no reason.
Get enough coverage
You must always film more material than you think you need.
You won’t be sure how much footage you need for smooth transitions during the editing phase, so be sure there’s an abundance of material to choose from. This is known as coverage. You get coverage by shooting the same scene from different angles, either with two or more cameras or multiple times if you only have one. Each shot should have five to ten seconds of lead-in and lead-out footage too so you can make precise cuts later during editing. You should also record master shots to have a shot to fall back to during transitions and do cutaways of items that are important to the scene.
Get the lighting right
Lighting is a crucial part of your movie’s atmosphere. Your goal is to get the lighting right during production since correcting it during editing is painstaking and doesn’t always produce optimum results. Make sure that the lighting for similar shots is consistent and that you’re satisfied with it before committing to a scene.
You need to be aware of the interplay between light & shadow and how it affects a scene’s mood. Harsh shadows suggest tension or fear and can be used for great effect when filming horrors or thrillers. Soft lights like you’d get on cloudy days light up the scene evenly but lack character. If you’re shooting indoors, the best thing to do is create a three-light setup and experiment with light positioning & shadow harshness until you get the desired effect. Sunny days offer the most natural light, but the sun also creates harsh shadows. That’s when diffusers and black flags that restrict the light come in handy.
You need to take into account how the amount of light and its source affect exposure & color balance. Exposure determines how long light hits your camera’s photosensitive sensor. The longer it is, the brighter the video. Too much or too little exposure causes parts of the frame to lose detail since they become uniformly white or black, respectively. White balance refers to the sensor’s interpretation of and correction for ambient light temperature. If you get white balance wrong, your shot will have a blue or orange tint. You can leave exposure and white balance up to the camera, but sometimes you’ll need to adjust them manually.
Record ambient sounds
Even though your movie might focus on dialogue and you’ll add in audio effects later, you need to prepare a recording of ambient sound. The easiest way to do this is to ensure everyone is quiet and capture ambient sounds for at least half a minute. The resulting track will help set the scene and serve as a realistic backdrop for the action.
Post-production
Once you’ve wrapped up the shooting stage of your movie, it’s time to arrange the results in a way audiences will find engaging. The process involves preliminary organization, editing, and sharing your work.
Get organized
The best bit of preparation you can do before starting to edit is organizing all of your assets. Make an inventory of all the files you’ll need for the movie, label them, and arrange them into folders corresponding to their media type. Name your shots so that they’re easy to search for and group them together by scene. Doing this will drastically speed up the process of locating that one file you desperately need but can’t find.
We can’t stress this next part enough. Back. Up. Your. Work.
Keep in mind that some editing programs like DaVinci Resolve don’t make backups of videos on your camera’s SD card, so transfer everything over to your computer first. Make at least one copy of all of your movie’s files onto a separate disk drive so you can recover them if the originals get lost or the drive they’re on malfunctions. Also make multiple copies of project files as you’re working. That way you’ll have access to the movie at various editing stages.
Editing
We’ve covered editing extensively in a previous article, so we’ll just go over the short version here. Editing is the process of assembling and putting the final touches on your movie. Newcomers assume that it boils down to cutting up clips and arranging them in a way that makes sense. While trimming is an integral part of the process, it’s only one of a handful of equally impactful steps. Others include adding special effects to your movie, ensuring that audio is balanced & mixed correctly, and making adjustments to color. The finishing touches involve adding an intro and credits to the film as well as any other graphic & text elements like location info, the names of interviewed persons, and so on.
Sharing your movie with others
It might look like a masterpiece to you, but you won’t know whether the movie is good or not until you get fresh pairs of eyes to look at it. You should do this as you approach the final stages of editing. Get some friends together and show them what you’ve been working on. Ask your audience for their honest opinions. Take any valid criticism in stride and try to correct the things you can.
When you’ve addressed all the issues and are happy with the result, it’s time to put the film into distribution. This can be as simple as burning a few DVDs for family & friends or as ambitious as entering your movie into selection for an independent film festival. Sharing it online is an excellent way to gain exposure and draw the attention of professionals who might want to collaborate with you in the future. All video editing programs make it easy to export your movies to YouTube, Vimeo, and other online platforms. Follow their instructions, and your movie will soon be online for billions to appreciate.