How to Glue Metal to Plastic – Different Methods

On their own, both metal and plastic are excellent and versatile materials. They are both fairly durable and easily accessible. While plastic is the cheaper and more weather-resistant option, metal is a lot stronger and has a characteristic luster that enhances visual appeal. Combining the two may seem like a good idea. In practice, this combination isn’t quite as simple as it sounds.
Bonding metal to plastic is complicated because they involve two materials that are both difficult to glue. This isn’t an insurmountable problem, though. If you’re having trouble getting wood to stick to metal (or vice-versa), then here are some useful tips.
Prepare the surface
A perfectly smooth surface is the bane of any adhesive. Unlike wood, paper, or fabric, the surface of metal or plastic is non-porous. Thus, there is no way for the glue to be absorbed into the material to form a strong bond. The next best thing you can do is increase the surface area to which the glue can adhere to. This can be done simply by sanding the surface of both the plastic and metal to which the glue will be applied to.
Technically, the term for this process is “scuffing.” By scuffing a smooth surface, the penetration of any liquid compound can be greatly enhanced. In plastics, standard low-grit sandpaper is good enough to create a rough surface. For hard metals, some steel wool may be the most effective tool. Take note that it doesn’t take much to create a suitably rough surface – just a few seconds of treatment by either sandpaper or steel wool will do.
Decide how strong you need the bond to be
Before we move on to the step where we pick a glue for your project, you need to decide just how strong you need the connection between the metal and plastic parts to be. This can depend on what the project is intended for.
A lot of people ask this question posed by this article’s title related to building models and action figures. In this case, the strength is not as important as how good the bonded parts look when the adhesive dries. These models also aren’t likely to be moved around much or be subjected to extremes in pressure and temperature.
On the far end of the spectrum are metal and plastic parts meant to be bonded for commercial or industrial use. A few worthwhile examples are urethane seals in steel pipes and polypropylene panels in aluminum vehicle parts. In these types of applications, you will need to consider how the movement of the parts relative to each other can introduce stress to the layer of adhesive. You will also need to consider the difference in elasticities of each material and how plastic and metal react differently when exposed to temperature changes.
Choose a suitable adhesive
Once you have established the objectives for your project, it becomes much easier to choose an appropriate adhesive. There are basically two options to choose from: a cyanoacrylate-based super glue, and an epoxy-based glue. Each approach has pros and cons, which we shall discuss in detail.
Cyanoacrylate glue
Cyanoacrylate glue, more commonly known as super glue, is the easiest option when dealing with metal and plastics. Unlike “plastic glue”, cyanoacrylate glue does not melt the plastic of the surface but only creates a strong layer of hardened adhesive once it dries.
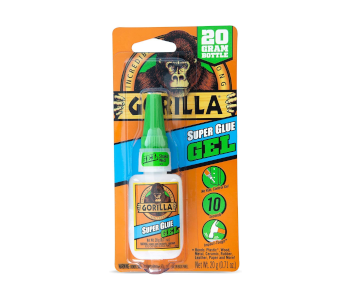
The biggest advantage of super glue is that it’s very easy to apply. Most super glue products (such as Gorilla Super Glue Gel and Loctite Super Glue) come in small plastic bottles with easy-to-use applicators. This makes it easy to apply the glue exactly where you want to and minimizes waste.
Super glue is a relatively less viscous adhesive with good penetrating power. To leverage this advantage, it’s absolutely essential that you scuff the surface of the plastic and metal parts. It also cures fairly quickly and can even be accelerated by moisture. What this means is that blowing on glue to help it dry faster actually works.
On the downside, super glue tends to get everywhere when you use it. If you’re working with very small and delicate parts, it may be tough to keep super glue from coming into contact with parts that aren’t meant to be glued on. The results can range from hilarious to frustrating.
In terms of bond strength, super glue leaves a lot to be desired. This makes super glue more suitable for action figures and models – objects that are meant to be looked at but not touched. The great thing about super glue is that it’s very clear when it dries up, so it won’t reduce the aesthetic appeal of your projects.
Epoxy-based glue
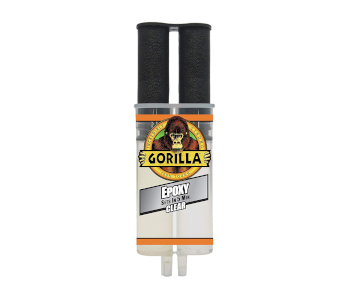
For more challenging projects, we recommend a two-part epoxy adhesive. You can either get an epoxy adhesive with components that come in separate tubes or an epoxy putty. We recommend tube-based epoxy because they are much easier to use and reduce the need to handle the adhesive with your hands. Excellent products include the Gorilla 2-Part Epoxy and the J-B Weld ClearWeld Epoxy.
The great thing about epoxy is that it can stick to just about anything (although this does not discount the need to scuff the surfaces of your parts). They also create bonds that are much stronger than super glue could ever produce. If you’re working on parts mean for functional use, then two-part epoxy is undoubtedly the more reliable option.
Epoxy is a viscous adhesive with poor penetration power. This poses a few problems in terms of handling and application of the adhesive. Scuffing the surface of the metal and plastic parts is even more crucial when using epoxy as it creates more surface area for the epoxy adhesive to latch onto.
During curing, you will also need to clamp the parts together to force the adhesive to get into those tiny spaces on the surfaces of the parts. You’ll have to plan ahead for this requirement, as the curing process for epoxy can take several hours to be completed. Take note that some adhesive can squirt out when the parts are clamped – wipe these away to ensure that your finished parts look clean.
Be wary of plastics with low surface energy
Plastics may be an incredibly common group of materials, but they can be deceptively hard to work with as far as adhesion is concerned. This is because some plastics exhibit low surface energy (LSE). What this means is that adhesives have a hard time “wetting” the surface of such plastics, preventing them from forming a reliable bond.
The list of LSE plastics includes some of the most common plastics used in everyday life – polypropylene (PP), polyethylene (PE), polystyrene (PS), Teflon (PTFE) and polyvinyl alcohol (PVA). LSE plastics are typically cheaper, softer, easier to manufacture, and have lower densities than high surface energy (HSE) plastics
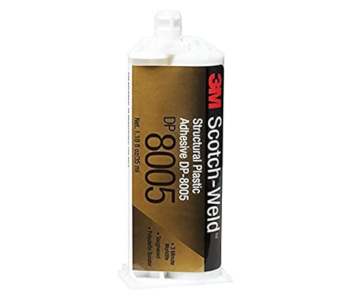
If you need to work with any of these plastics, then the choice of the proper adhesive is a highly critical step. Fortunately, adhesive manufacturers recognize this challenge and offer products that have been formulated to work with LSE plastics. Notable examples include the 3M Scotch-Weld Instant Adhesive and the 3M Scotch-Weld Structural Plastic Adhesive.
Even with the right tools, working with LSE plastics can be a huge headache. Another option you should consider is pivoting to HSE plastics instead. Common examples of HSE plastics include polyester, nylon, acrylic, PVC, and ABS. Any of the adhesives we have mentioned in this article should work perfectly fine with ABS.
Test a glue if you’re unsure (but ask first!)
If you’re unsure about how suitable your glue is for bonding metal to plastic, the first step you should take is to ask the manufacturer for their recommendations. If you bought your glue from a crafts store, they may even have recommendations on how you should use your glue or if other glues are more suitable.
If your uncertainly lies on the effectivity of such recommendations, then the best option is to take matters into your own hands and do a test run. Before you work on your actual project, try applying the glue to small pieces of scrap metal and plastic that you have lying around. Take note of how long the glue takes to completely harden, how strong the bond is, and if it has any elasticity. If the part you’re working on is meant to be exposed to the outdoor elements of extreme temperatures and humidity, then you can try and simulate those conditions.
Final thoughts
DIY projects are usually fun, but they can quickly become frustrating when you’re faced with a situation you have underestimated. Gluing metal to plastic is one such scenario. After all, how hard can it be? As it turns out, gluing metal to plastic is a little more complex than one would expect.
The good news is that this is a problem that possibly thousands of people have faced before. You don’t need to reinvent the wheel on this one – just get an adhesive that has already been proven to work. By preparing the surface of your parts and selecting the proper adhesive, you should have no problems getting your plastic and metal parts to stick together.
I need to bond 2 very small plastic and metal surfaces of the 5 mmsq total area 1x5mm and super glue is not going to work. Metal is the magnetic one and can’t be roughed much as it breaks easily, the plastic is hardened urethane and you cannot rough it as it’s not possible to reach by any roughing material (it’s inside a panel). I don’t need a tube of glue, but literally a drop of it and it’s hard for me to find another usage for it later, so I don’t want to buy 10ml of it and leave it opened for a another few months until I’ll find another thing to bond. Any ideas what to do?