How to Glue PLA: Tips and Best Products

Gluing is a skill that is often overlooked in the field of 3D printing. It may seem simple, but gluing can save you in a pinch if you end up damaging your finished prints during post-processing, Gluing together separate parts will also be crucial in creating large builds when your 3D printer has a limited build capacity.
Contrary to common belief, gluing together 3D printed parts is not as easy as it appears. You need to use the proper adhesives based on the filament you used. Just as critical is applying these adhesives using the proper techniques. If you’re working with PLA, then check out some of the gluing tips that would be nice to have in your back pocket.
Factor to consider when gluing PLA
The first thing you need to know when gluing PLA is that not all adhesives are suitable for the purpose. Some compounds can react with PLA, resulting in unsightly white marks or burning right through the entire wall of your finished print. This isn’t necessarily a bad thing – with careful application, you can use the solubility of PLA in some glues to your advantage.
Glues that set by curing are often used because of how easy they are to apply and the bond strength that they developed. However, some curing processes are exothermic in nature, which means that they generate heat as the adhesive cures. This is particularly important when working with PLA because it doesn’t take a huge temperature increase for PLA to start deforming.
Even if you do succeed in gluing pieces of PLA together, different adhesives can exhibit different properties that limit their suitability. Standard cyanoacrylate glues (or superglues) have very good tensile strength when dry but cannot handle heavy shear stress. Adhesives that melt a very small amount of PLA allow for bonding at the molecular level, creating fusion with more isotropic properties.
Suitable methods for gluing PLA
Cyanoacrylate glue
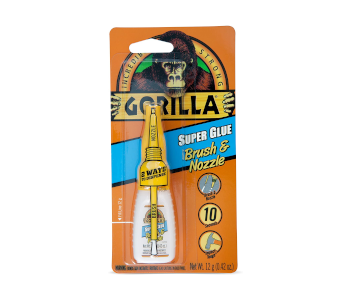
The standard cyanoacrylate of “super glue” is one of the easiest ways to bond PLA on account of how easily available and inexpensive it is. This 12-gram bottle of Gorilla Super Glue costs less than $10 and should last a couple of 3D printing projects.
Cyanoacrylate glue is best applied on a rough surface for optimal penetration. For this reason, it would be a good idea to glue your 3D printed parts together before sanding them smooth. In some cases, it might even be necessary to sand the surfaces to be glued to introduce an element of roughness. Make sure to clamp pieces together while super glue is still drying to further help penetration and to spread the glue more evenly.
Take note that some brands of super glue tend to leave white burn marks on PLA. This isn’t always a problem, but it would be good practice to be careful where you apply the super glue so that these marks aren’t visible in the final product.
As we’ve mentioned, super glue creates a very strong bond that can resist a good deal of compression, impact, and tensile forces. However, it does not have excellent shear strength. If the bond you’re creating needs to withstand rugged conditions, you may have to look for more heavy-duty alternatives to super glue.
Urethane glue

A urethane glue is a single-component glue similar to cyanoacrylate that creates similarly strong but more flexible bonds. It is usually used as an adhesive for construction projects and can withstand most indoor and outdoor conditions. It’s also quite cheap at less than $10 for a small tube, such as this 4-Ounce Polyurethane Adhesive from Loctite.
The flexible nature of a urethane bond makes it more suitable for heavy-duty applications where load across different directions is expected. Urethane adhesive works best when applied to rough surfaces for better penetration. A key drawback of using urethane glue is that it cures very slowly – at a magnitude of a few millimeters per day. For best results, we advise waiting at least a week for a urethane bond to set.
Curing of urethane glue is an exothermic process that can raise temperatures up to 40 degrees Celsius. To avoid structural problems, we do not recommend using urethane glue for very small or thin sections of a PLA print.
Epoxy resin

Two-part epoxy resin is another good all-around option for gluing PLA prints. While the typical curing process of an epoxy resin is also exothermic, heat buildup can be more easily managed by going with a slow curing alternative. This clear epoxy resin from VTurboWay is a viable option that does not release any toxic fumes.
Working with a two-part resin isn’t necessarily difficult but can be daunting if you’ve never done it before. Once the two components have been mixed according to the prescribed ratio, you will need to work quite quickly as the curing process will start right away. The good thing about a slow-setting resin is that the adhesive remains workable for longer. According to the product specs, the VTurboWay epoxy resin has a working time of about 30 minutes.
When used as an adhesive, an epoxy resin is best applied in very thin and consistent layers. One unique advantage of resin is that it is also thick enough to fill in any gaps in your 3D printed parts. This can be useful for creating clear and seamless connections between the parts. These can then be painted over later on. The full curing of this resin will take approximately 72 hours.
Bonds created by epoxy resin are extremely tough. When applied to PLA, the PLA parts are more likely to break apart before the epoxy resin bond will break. For decidedly permanent assemblies, bonding the parts with an epoxy resin is one of the best ways to ensure durability.
Acrylic glue
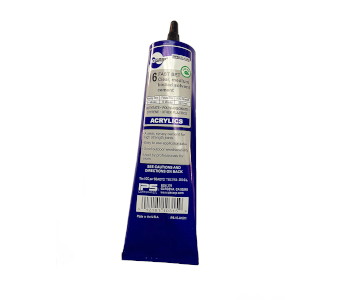
Acrylic glue is often used to glue together Plexiglass parts, but it can also be used for PLA under highly controlled conditions. The bonds created by acrylic glue are tough enough to be used in heavy-duty industries such as construction, maritime, and product assembly. Despite the high-end characteristics, acrylic glue is not expensive – this 5 oz. tube of SCIGRIP Acrylic Plastic Cement costs less than $10.
The most unique thing about using acrylic glue with PLA is that it actually dissolves the PLA material. Although this is dangerous for PLA parts that are extremely small or fragile, the structural integrity of a “welded” joint is second to none when it comes to durability. Apply the acrylic glue in very thin layers – you can use a brush for better control – and you should not have any problems.
An alternative approach is to mix a small amount of cut-up PLA filament with the acrylic glue. The glue itself is rather thin, so dissolving some PLA will give it a bit of volume. This is very similar to how ABS glue is made by mixing acetone with a small amount of ABS. The actual viscosity of the acrylic PLA glue may vary depending on the glue that you use, so it’s best to start with a small amount of PLA and add more to get the viscosity you need.
When working with acrylic glue, take note that it emits very irritating fumes at room temperature. Make sure that you are working in a room with good ventilation and that you have eye protection and breathing protection.
Using a PLA 3D pen
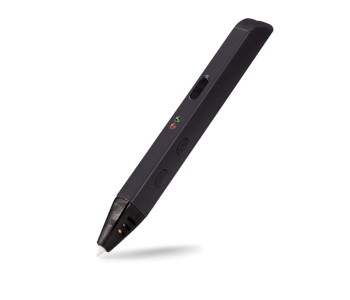
This is quite an unconventional solution, but if you have a 3D pen, you may use it to bind together PLA parts much like a soldering iron. Any 3D pen will do – this 3D Printing Pen from 3Doodler is a good, high-quality option that you can also use to work on other projects.
If you don’t see yourself making projects with 3D pens in the future, then the more budget-friendly MYNYT Super 3D Pen should also work perfectly fine. Make sure to use a PLA filament with the 3D pen to benefit from the inherently stronger bonding between similar materials.
Molten PLA from a 3D pen is very viscous, which can be either a benefit or a liability depending on the applications. It is very useful for filling in gaps between separate parts, especially if these gaps are quite shallow. However, applying PLA filament in a very thin layer is almost impossible – attempting to do so may end up with some of the PLA oozing out and ruining the aesthetics of your finished print.
In terms of strength, bonding using an application of molten PLA is just as reliable as cold welding two pieces of PLA together. In the absence of a 3D pen, some people have even tried to simulate this phenomenon by melting some PLA filament with an actual soldering iron. The molten plastic can be very hard to control under this method, but the quality of the results should be similar.
Another drawback of this option is that it’s not as foolproof as simply applying some adhesive to your PLA parts. If you’ve never used a 3D pen before, then finishing up your 3D printed parts would probably be a bad time to practice. Getting into those tight spaces, controlling the temperature and volume of the filament, and maintaining a steady hand are all skills that take practice.
Final thoughts
The ability to glue together 3D printed parts is an underrated skill. Choosing which glue is compatible with which type of filament requires an understanding of chemistry – or at least, accounts of people who have done the trial and error themselves. Otherwise, you may end up with flimsy bonds. Even worse, you might end up using an adhesive that will dissolve right through that part that your 3D printer spent hours on.
PLA being one of the most common materials used in 3D printing, it’s worth the time to understand how to glue PLA parts together and which method works best for you. Each of the options we have listed down here is viable, but the actual performance may vary based on your specific filament and the brand of the adhesive you use. There will still be an element of trial and error, but we hope you get good results without too many of those errors.