How to Paint PLA Prints – Easy to Follow Guide

3D printers are great for reproducing the 3D models that you can see on your screen. Depending on your printer settings, you can capture a lot of very fine details in your 3D print. However, 3D prints are far from perfect when they come out of the 3D printer. If you want to come up with a high-quality 3D print that is sure to stand out, then there will still be a lot of work to be done after the printing process.
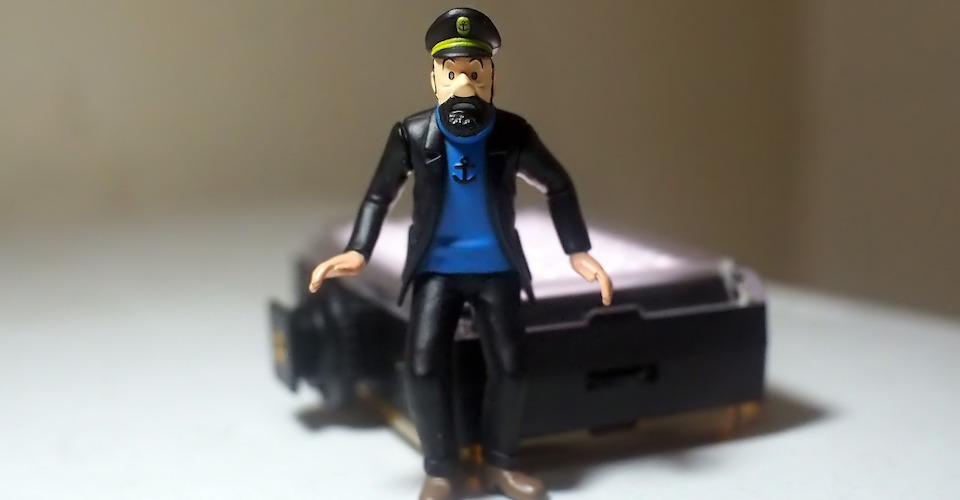
PLA is one of the most common materials used in 3D printing today and is quickly becoming the most popular. It’s one of the easiest materials to work with, but maximizing its potential requires that you apply a few finishing and painting techniques. In this article, we detail how you can paint your PLA print to come up with something you proudly show off.
PLA finishing and why you need to finish your PLA print
Before you even think about painting your PLA print, it needs to be finished and smoothed first. All FDM prints naturally come out with layer lines. Regardless of how small you set your layer thickness, these layer lines are unavoidable, resulting in prints that have inherently uneven surfaces.
Aside from being unsightly, these uneven surfaces are poor media for painting. Any type of paint will find it hard to adhere to an uneven surface, and any painting job will come out with an equally uneven treatment. If you are aiming to get a professional-grade quality, there is simply no way to achieve it in a PLA print without doing some finishing or smoothing.
You may also encounter a design that will require support structures when printed. These support structures can be easily cut off but will often leave small nubs that need to be smoothed out if you want to preserve the aesthetic value of your print.
How to finish a PLA print
PLA is a unique filament material in that it is not made from a petroleum-based compound. This means that it does not readily dissolve in organic solvents like acetone, which is widely used to smooth ABS prints. With solubility out of the equation, finishing techniques using chemical treatment are not so common when working with PLA. Although smoothing using ethyl acetate and tetrahydrofuran (THF) have been done in the past, these techniques have waned in popularity due to the hazards involved in handling these chemicals.
Nowadays, most people use a combination of sanding and polishing to finish PLA prints. Sanding is done using standard sandpaper. For best results, sanding should be started using coarse-grit sandpaper to eliminate as many of the rough edges as quickly as possible. As the PLA prints gets smoother, you may gradually move up to finer-grit sandpaper until the print is smoother out in the 2000-grit range.
After sanding, you simply need to apply a layer of liquid metal polish on the PLA print. The metal polish will fill in any gaps on the surface of the print that were left over from the sanding process. You can also use a solid wax-based polishing compound. Aside from filling in the gaps on the print’s surface, the wax also forms a very thin layer on the surface which can be polished and buffed to give your PLA print a smooth, mirror-like finish.
Painting a PLA print
Once you have a perfectly smooth surface on your PLA print, then it’s time to start painting. How detailed your painted part is going to come out is all up to you. It takes a lot of time and skill to come up with a high-quality painted 3D print. We recommend you read through this whole procedure first so you can prepare all the supplies and equipment that you will be needing before getting down to business.
1. Mask the parts you don’t want to paint
Just like in painting the walls of your house, you’ll need to cover areas in your print that you don’t want to be painted. This can be easily done using painter’s tape, which should already be in your arsenal of 3D printing tools. Painter’s tape can be cut and torn as easily as masking tape but does not leave a residue of its adhesive when removed. Masking specific parts can be especially challenging for smaller and highly-detailed prints, but the effort is well worth it.
2. Apply a primer
Having masked the details of the print you want to keep untouched, it’s time to start treating your 3D print with a primer. Why do you need to put a primer? Primers provide a suitable surface for the paint to stick on while serving to cover up small imperfections in the exterior of the print.
When choosing a primer, make sure to pick one that is labeled “plastic-compatible.” Primers can either be light or heavy. Light primers produce a thin coat, making them more appropriate for small and highly detailed parts. If you’re working with a huge PLA print, then a heavy primer would be more practical as it spreads thicker and covers up scratches and other imperfections in your print quite well.
Primers can also be either sprayed or painted on the surface of your print. The choice of which delivery system works best depends on your application, but it’s widely recommended to use a combination of both. Spray-on primers can be applied quickly and evenly, while brush-on primers can be used to fill in the fine details that the spray-on primers are likely to miss.
NOTE: Before applying the primer, give your PLA print a last wipe-down using a piece of tack cloth. This will remove all the remaining dust on the surface of the print, which could get embedded into the painted surface.
When spraying your primer, take care to hold the can about 6 inches away from your printed object to help you apply an even coat. Keep the nozzle moving and move quickly across the surface of the object, rotating it around if necessary. Avoid spraying too long in one spot, as an accumulation of the primer may fill in the details of your print and effectively make them disappear. After the first application, allow the primer coating to dry according to the product’s instructions.
After the first coat has dried, inspect the quality of your work. If there are spots in the print that were not coated by the primer, then this is your chance to move in with the brush-on primer. Once you are satisfied with the primer coverage, give the surface a quick buff with your tack cloth.
3. Apply the base coat
If your goal is to color your print with a high level of detail, you’ll need to start with a base coat. A base coat covers large portions of the subject in a single color, providing a canvass to which finer details will be added to.
When working with PLA prints, you can use either acrylic or enamel paint. The main difference between these two is that enamel paints are solvent-based and result in glossy finishes, while acrylic paints are water-based and are more versatile in terms of the types of finishes it can produce. The choice of which one to use will depend on the look you are going for. If you are painting an object that might end up as a toy for a young kid, then you might need to look for a child-friendly non-toxic paint.
Round or flat brushes with wide tips are the appropriate tools for applying a base coat. You might want to invest in a brush set that also contains fine-tipped brushes, as these can be used for detail work.
After the base coat has dried, inspect your project first to check if you are satisfied with the coat’s quality and coverage. Nothing is stopping you from filling in some of the gaps or applying another base coat layer. Once you are satisfied, take your tack cloth and give your print another quick wipe and buff session.
4. Add some details
Using a fine-tipped brush, add in small details on your print such as subtle shades and highlights. There’s no hard and fast rule when doing this step, as it depends on how you’re envisioning the final product will look like.
If you need to add extremely fine details, most painters prefer using a dry brushing method. By using a dry and stiff brush with a very small amount of paint, thin lines and other small details can be accurately added to the print surface. Remember to take it slow and use extremely light brush strokes.
Washing is a great technique to add highlights to hard-to-reach areas in your print. This is done by diluting a portion of your paint in the appropriate solvent: water for acrylic paint, and acetone for enamel paint. The diluted paint is then painted on the surface of the print with brush strokes, after which it is quickly wiped away using a cloth or towel. The result is highlighting of hard to reach nooks and crannies – or what is called the “negative space” – on the surface of the print.
When you’re finished adding the details, allow the coat to dry and inspect the painted print closely. Again, this is a chance for you to add to or revise your work. Once you’re satisfied, give your print the good old wipe-and-buff treatment before proceeding to the final step.
5. Finish with a clear coat
To protect the painted layers of your print, you need to apply a layer of clear coat on it. This step also enhances the visual appeal of your print, as a clear coat can convey either a glossy or matte finish. Keep the clear coat layer very thin so it does not detract from the bright colors of your painted layer.
More tips on painting your PLA prints
1. Paint in a well-ventilated place
No matter what type of paint you decide to use, you should always do your painting in a room with good ventilation. Spray-on paints release a lot of aerosol particles which you can inhale if you don’t have protection. Solvent-based enamel paints also release a lot of solvent fumes. Aside from protecting you from respiratory diseases, good ventilation also speeds up the drying process.
2. Don’t rush
This applies to all steps of the finishing and painting process. You must be patient while sanding your print to make sure that you smooth out all parts of your print evenly. Don’t forget to wipe off excess dust just before you apply any coat of paint. Wait for the coat you previously applied to dry before mucking around with your print again. By taking it slow and allowing each step to finish, you keep yourself from ruining your work and letting your effort go to waste.
3. Practice
As with any form of art, painting a 3D print will take a lot of time to master. Don’t feel bad if your first painted piece does not turn out as well as you had hoped. In addition to practicing the craft regularly, there are a lot of ways to learn: attend classes, watch videos, read books, or ask painters with more experience. The mere act of flicking a paintbrush ever so lightly or moving a can of spray paint to get an even coat takes a lot of practice to master.
Final thoughts
Creating a fully-customized 3D print out of a spool of filament material is an impressive enough act on its own. However, finishing, polishing, and painting a 3D print elevates it to the level of a genuine piece of art. If you have hopes of turning your 3D printing hobby into a profitable career, then painting is a skill that you’ll need to master.
If you’ve taken a look online at some of the master-crafted 3D prints that amazing people have come up, it’s easy to feel overwhelmed at such a massive skill upgrade that you’ll need to earn. However, if you work on something you’re truly passionate about, then there’s no reason that you won’t get there with a little bit (or a lot) of practice. We look forward to seeing the wonderful stuff you come up with!
Thanks for this useful post. 🙂
If I want to come up with beatiful brass surface in 3D print should I use brass color filament or paint 3D print with brass colored paint or use brass metal filament? I’m wondering which one of these gives the best result. My work is mainly solid surface without any details.