
How to Print on Transfer Paper

Heat presses are one of the best ways to transfer a graphic design or logo onto fabrics, garments, bags, glass, and a variety of other substrates. One of the most important components of that graphic transfer process is the transfer paper.
The transfer paper is the medium which facilitates the transference of a design from the computer (digital form) to a substrate. There are many types of transfer paper available in the market. For someone who has never used them or wants to select the best transfer paper for his/her application, understanding the process of printing on the transfer paper is very important.
The following guide will help you understand the complete process of printing your digital image on your transfer paper and then preparing the paper for the heat press.
Does the type of ink decide the success of your heat press operation?
Many people, including beginners, might think that the selection of ink is what determines the success in transferring an image onto the substrate using the heat press. They might believe that the type of ink used to print the design onto the transfer paper is of prime importance.
However, as long as one uses an inkjet printer, the type of ink used on the transfer paper makes no difference at all to the heat press procedure. The key to the success of the heat press transfer is the transfer paper itself.
The types of transfer paper
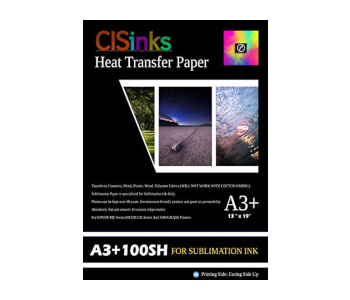
Any transfer paper material can be classified into two main types: dark-colored paper and light-colored paper. The selection of a dark or light transfer paper will depend on the color of the substrate on which the image is to be printed.
Generally speaking, when a light-colored transfer paper is used, then the colors and the image look are more vibrant when the substrate is also light colored. The ink that gets transferred from a light-colored transfer paper tends to be translucent and not clearly visible unless it is laid on light-colored backgrounds.
When a dark-colored transfer paper is used, the ink that gets transferred tends to be quite strong. It does not allow the color of the fabric to reveal itself on the inked surface. Even the white background of the computer-generated design gets transferred onto the fabric. Hence, a dark-colored transfer paper is recommended for use with dark-colored fabrics.
When using a dark transfer paper, the white background spaces are normally cut out for aesthetic reasons and for preventing them from getting transferred onto the fabric after the heat pressing process.
Printing on the transfer paper
Orientation
Once you have your design ready and have chosen the transfer paper depending on your substrate specifications, the next step is to print the image on the transfer paper.
The first thing that you should remember before you hit the print button is that you have to reverse your image. This step is critical because your image will be facing down onto your substrate. Hence, for the design to show up in the correct orientation, it has to print as a mirror-image on the transfer paper.
You will be amazed to know how often people forget to reverse their image orientation before printing it. The results for not reversing are quite obvious and it will lead to the wastage of transfer paper, printer ink, and the substrate material as well.
The only time you won’t need to reverse your image before printing it on the transfer paper is when you are using a dark transfer paper. In the case of a dark transfer paper, the image is placed facing up on the substrate. Hence, no reversing or mirror-imaging is necessary for such an orientation.
Image reversing can be done in two simple ways. Either your printer settings will have an option for reverse image printing or you can use any image editing software to reverse the image and send that file for printing.
Placement
Besides adjusting the orientation of the image, the other thing that one must be careful about when printing an image on a transfer process is the placement of the image on the page.
You would want to make sure that the image does not get cut or any of its sections left out because of side or top-bottom margins. The best practice is to print the final image on a regular piece of paper first before printing on the actual transfer paper.
Printing a “dummy” copy on a regular paper allows you to check if the image has been placed correctly and if it is straight and in its intended position. It should basically appear in the same way as it would on your desktop or computer screen.
If you are unsatisfied with the image’s placement, then you still have a chance to correct any errors and re-print a dummy version to get things right. After you are fully satisfied with your image’s orientation and placement, you can finally go ahead and print the image on a transfer paper.
Printing on the correct side of the transfer paper
One more thing that you need to be careful about is to print the image on the correct side of the transfer paper. Every transfer paper will have two sides, a coated side and a non-coated side. The image should be printed on the coated side. Sometimes, this side will be marked to assist you.
Regardless of whether there is any guidance mark, you will have to place your transfer paper in the printer in such a way that the image gets printed on the correct side. Again, if you are unsure about how your printer prints, then grab a regular paper and make a pen or pencil mark on one side. Print something for testing and see on what side of the paper the printer prints. In fact, you can combine this step with your dummy print, when you print your design for checking the placement and margins.
Some points to remember
If you are going to use a laser printer to print your design, then you need to make sure that your transfer paper is meant for use with laser printers. Yes, there are different transfer papers for inkjet printers and laser printers. You need to purchase the correct type.
If you do not want the white background of your image to be printed onto your substrate, then trim the transfer paper using scissors before you heat press the substrate with your transfer paper. A small border can be left around your design outline.
If you use a light-colored transfer paper on a light-colored t-shirt, then any white-colored regions on the design will simply take up the color of the t-shirt. This is because there is no white ink. Similarly, if you use a dark-colored transfer paper, then the area surrounding the design will appear as white on the t-shirt. This is because a dark-colored transfer paper has a built-in white background.
If you use a light-colored transfer paper on a black or very dark-colored t-shirt, then it is highly likely that the image will be invisible or only faintly visible. The reason is that the ink on a light-colored transfer paper is translucent.
If your design starts to peel off or fall off after a few days, then it is highly likely that your heat press machine was not set at a high enough temperature or the pressure exerted by the heat press was not high enough.