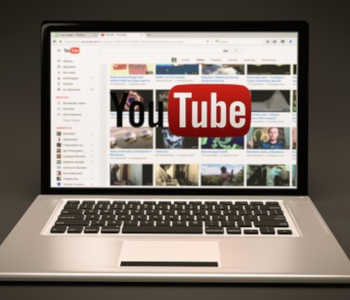
How to Stream on Youtube: Easy Steps to Get Started Right Now

YouTube has become a popular alternative to some of the major streaming platforms, offering the ability to stream in higher resolution formats and connect with a wider audience. This has made YouTube an attractive prospect for streamers, as it means they can make better use of their expensive streaming equipment, while also keeping both their live content and recorded content in one place.
In this guide, we will be discussing the benefits and drawbacks to streaming on Youtube as well as the steps you need to take to get up and running. You will also get an idea of some of the equipment you will need, as well as how complex certain streaming setups can be.
Why Stream on YouTube?
We have already touched on a few of the main reasons you would want to consider streaming on YouTube. However, we will now explore these in more detail along with a few others.
As mentioned, YouTube currently allows you to stream in higher resolutions than the other major streaming platforms. This is important, as it not only allows you to make better use of your camera equipment but also provide a better quality stream to your audience.
The maximum resolution on YouTube is currently 2160p or 4K. This is significantly higher than Twitch, for example, which tops out at 1080p or Full HD. Mixer, another big streaming platform also has a max resolution of 1080p, while Facebook Live only offers 720p.
If you are a gamer, this isn’t a huge issue, as most gamers stream in 1080p due to the demands required to run a game at higher resolutions. For other content, however, streaming at 4K might be a better alternative, especially if the activity isn’t too graphics intensive.
Thanks to YouTube’s dominance as a video content provider, you are also given access to a potentially wider audience by using YouTube to stream. The reason for this is because far more people use YouTube compared to dedicated streaming platforms such as Twitch and Mixer, meaning you could bring in viewers that wouldn’t have otherwise discovered you.
You may also choose to upload your own video content to YouTube while also streaming to further grow your channel. Having a separate YouTube channel while streaming on Twitch or Mixer is also an option. However, having all of your content on one channel should make it easier for that channel to grow. It is also far easier to manage one channel rather than multiple channels, meaning you can dedicate yourself to it more easily, allowing you to avoid spreading yourself too thin.
How to Stream on YouTube
Create a YouTube Account
To stream on YouTube, you will first need to create a YouTube account. Doing so is a pretty easy process. However, you will need to create a Google account if you don’t already have one that you wish to use.
To do this, head over to the YouTube homepage and click the ‘Sign In’ button in the top right-hand corner. You will then be presented with a sign-in page. Click ‘Create account’ in the bottom left-hand corner and choose whether you are creating an account for yourself or a business.
Once you have selected your preferred option, you will be presented with a new page where you can begin filling in all of the necessary information to create your account. You can also use the link on the page to create a new Gmail address if you haven’t already.
Once, you have filled in all your information, you will then be asked to agree to Google’s Terms of Service. If you do, you can then click ‘Create Account’ and your account will be created.
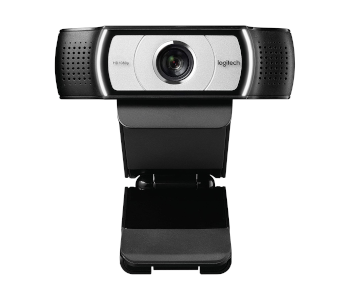
Choose Your Streaming Device
To stream on YouTube, you are going to need a device with a camera. This can be either a computer with a connected webcam or camera, a smartphone, or a tablet. Your choice of device will largely depend on the type of content you are streaming and the setting you are in. However, there are a few other factors to consider as well.
Firstly, to stream on mobile, you will need to have at least 1,000 subscribers. The reason for this is unclear but it does mean that if you are just starting on YouTube, mobile streaming is probably not an option at this stage.
Secondly, if you are streaming via a PC, you probably aren’t going to be able to stream at a public event, as you won’t have the same level of portability that you would if you were using a mobile device. This essentially means streaming that sort of content is off-limits if you have below 1,000 subscribers unless you are somehow able to use a laptop or another computing device that doesn’t get affected by this requirement.
You may also choose to stream using an encoder. However, this is usually reserved for more advanced streaming setups, such as those that make use of multiple cameras and audio sources. Encoders are especially popular with gamers due to this functionality, as they not only allow them to stream gameplay but also create overlays.
Starting a stream (Browser & Mobile)
Once you have your equipment set up, you can then prepare yourself to start your steam. To do this, there are a number of steps to follow. However, the majority of them are very straightforward, meaning it shouldn’t take you very long to remember the process.
1. Click the Camera Icon
This is the ‘Create’ button. By clicking on it, YouTube will provide you with a drop-down menu, where you can select ‘Go Live’. On mobile, this step will also involve giving any permissions to YouTube required for streaming if you haven’t done so already.
2. Click ‘Stream’
Be sure to give your stream a title so that viewers can find it. You can also use this step to set any privacy settings, add a description, as well as specify whether or not the stream will be age-appropriate for children. You can also upload a custom thumbnail and even set a schedule for when you will go live, giving people a chance to plan around your stream.
3. Choose Camera
Once you have specified the basic settings for your stream, you can then set up your webcam. On mobile, this will involve deciding whether or not to use your camera, or what is being displayed on the screen of your device. In a browser, however, this step is a little different, as it serves as an alternative to using an encoder. You can also choose a specific camera and microphone by clicking ‘More Options’.
4. Click ‘Go Live’
Once you have configured all of your devices and settings, you can then click ‘Go Live’ to start your stream. Be sure to check all of your settings are correct before doing so, as you don’t want to have to stop and start the stream partway through.
Ending the stream via a browser can be done using the ‘End Stream’ option. On mobile devices, hit ‘Finish and then ‘Ok’ to achieve the same result. A recording of the stream will then be uploaded to your channel.
Starting a stream (Encoders)
To stream using an encoder many of the steps above still apply. However, there are a few others involved which we will now touch upon.
1. Choose your Encoder

Encoders can be both software-based or hardware-based and choosing the best option for your setup will largely depend on the equipment you have. Software encoders tend to take the form of streaming software such as OBS Studio or Streamlabs, while hardware encoders are physical devices used to connect other equipment to your PC. Popular choices for hardware encoders include TriCaster and TeraDek.
2. Download and/or Install your Encoder
Once you have chosen your preferred encoder it is time to install it. For software-based solutions, this will most likely involve downloading the application from the internet. For hardware encoders, you will, of course, need to purchase the device either in-store or online and then connect all of your equipment to it by following its instructions.
3. Click the Camera Icon
Once everything is installed it is time to head to YouTube and click the ‘Create’ button. Then, choose ‘Go Live’ from the dropdown menu, which will take you to YouTube’s Live Control Room.
4. Click ‘Stream’
From inside the Live Control Room, click ‘Stream’ which should be located on the left-hand side of the page. Next, fill in all of the necessary details such as the stream title, description, privacy settings, etc, as we discussed in the above steps.
5. Click ‘Create Stream’
Once you are satisfied with all of the details you have entered, click ‘Create Stream’. This will then take you to a page where you will be given a ‘Stream Key’. If you are using a software encoder, copy and paste this key into the application where necessary, as well as the ‘Stream URL’ if it is required.
If you are using a hardware encoder, this step should be somewhat similar, as the device should provide you with some sort of user interface to interact with. However, without knowledge of your equipment, we cannot guide you completely through this step.
6. Start Stream
Once you have copied the ‘Stream Key’ and ‘Stream URL’, you can then proceed to start your stream. For scheduled streams, simply delay this process until the time is right.
To end your stream, there should be an option to do so inside your software. YouTube will then upload a recording of your stream to your channel for viewers to watch on-demand.