
Hydro Dipping- What It Is and How It Works

Customization is now the biggest trend in manufacturing. It’s no longer enough for manufactured parts to look like they came straight out of a production line. Today’s customers want products that look unique and that show off a bit of their personalities.
A trend for part customization that has become quite popular is hydro dipping. You have probably seen videos of this process at work – various objects being dipped in water and taking on a pattern once it has been lifted. How exactly does hydro dipping work? What are the best uses of this new technique?
What is hydro dipping?
Hydro dipping, also known as water transfer printing, is a technique for applying customized designs to three-dimensional objects. One of its biggest advantages is that its designs can be printed from a digital file. This means that designs can be easily replicated, edited as needed, and have virtually unlimited design freedom.
Although the technology for hydro dipping was first patented back in the 1960s, it was only in the last decade or so that it has caught on. Its versatility has been one of its most distinct benefits. Prints made via hydro dipping are highly detailed, permanent, and very durable.
Nowadays, hydro dipping has become widely used in products that we commonly use including automobile components, phone cases, and gaming controllers. It has also started to become popular in the 3D printing community as an alternative post-processing technique.
How does hydro dipping work?
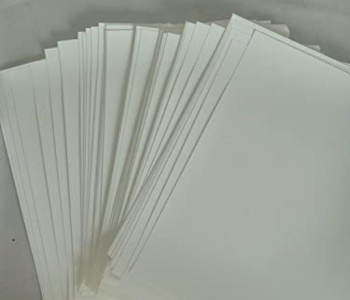
In a typical hydro dipping process, the digital design is printed on a piece of PVA paper. This PVA (Polyvinyl Alcohol) is the same material used in 3D printing dissolvable supports. An inkjet printer works fine if you’re doing this at home. In industrial applications, rotary printers for large-scale printing are more common.
Once the design has been printed, the piece of PVA paper is placed on a vat of water. This vat needs to be just deep enough for the entire piece to be submerged. Depending on the type of PVA paper, the vat may need to be heated to a certain temperature. Some waiting time may also be necessary to allow for complete hydration of the PVA layer.
When the PVA layer has melted, you will be left with a replication of the printed design floating on top of the water surface. This will naturally expand along the surface of the water. To control the expansion, the best option would be to do the hydro dipping process in a vat with movable borders. You can also use strips of masking tape as makeshift borders.
Once the PVA layer has hydrated, the layer of ink is sprayed with an activator. This makes the transparent film holding the ink together dissolve, finally liquefying the ink. The activator needs to be applied sparingly with a very fine mist – using too much can cause the design to be ruined.
Finally, it is time for the workpiece to be dipped into the hydro dipping solution. As the piece is being very gently lowered into the water vat, surface tension will allow the design to be pressed against the surface of the piece. The water-based medium will also the design to permeate into the smallest spaces on your workpiece.
The angle at which the piece is dipped, as well as the rate at which it is lowered, significantly affect how the finished product will look like. This is something you need to plan for and learn through experience.
Once the entire piece has been submerged, the remaining film on top of the water is pushed away before raising the piece again. There will be some sticky residue on the surface of the piece. This can be washed with water, preferably using a shower head or water hose. Gently rubbing can help remove the residue but be careful not to rub too hard, as this may damage the design.
The final step of hydro dipping is coating the surface of the workpiece with a coat of polyurethane. This protects the design from mechanical damage and gives it a nice, glossy finish.
Applications of hydro dipping
Coming up with a list of hydro dipping applications is tough because just about anything can be customized with this technology. Anything that can be dipped in water without damaging it is a great candidate for hydro dipping. Here are some examples of items that we have seen improved via hydro dipping:
Electronics and computers
The video game industry is a small but growing market for hydro dipping. This mostly consists of gamers who want to customize the shells of their peripherals such as controllers, keyboards, and mouse. There have also been cases when console shells and computer cases were hydro dipped.
Outside of gaming, there has been no shortage of customers wanting to buy hydro dipped phone cases and shells. This is a tough market to cater to, as not many people are comfortable taking apart their devices so that the shells can be isolated.
Home furniture
Homeowners who want to add a bit of flair to their furniture can also consider the hydro dipping route. This can be done to give a fresh new look to cabinet doors, curtain rods, towel hooks, lamp bases, and picture frames. This is ideal for those who want their homes to have a more coherent look.
Automotive parts
Most examples of hydro dipping you will see online often involve automobile components. This can range from car trims to window visors, bicycle fenders, helmets, or even handles for tools. The automobile industry has gone absolutely crazy for hydro dipping. If you want to customize the exterior of your car or bike anytime soon, then you might want to try to look for hydro dipping services near you.
Tactical gear
Hydro dipping has become popular for tactical gear because of how evenly it can apply a durable camo coating. Commons items include paintball guns, pistol grips, bow quivers, fiberglass axe handles, and ammo cases.
A few tips when doing hydro dipping
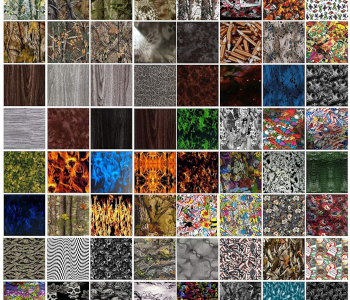
If you’re interested in trying out hydro dipping, then you can just buy a DIY kit online. There’s a DIY kit that contains blank water transfer films that you can print on if you want to use your own designs. If you don’t want to bother with the designing step, you can also get pre-printed water transfer films with a huge selection of interesting designs.
Sounds interesting? Here are a few tips for you to help you get started:
1. Repeating patterns
In professional settings, hydro dipping is typically accompanied by a computer simulation that predicts exactly how a design will wrap around the workpiece. You probably won’t have this technology at home.
To leave room for error, it’s best to use water transfer film printed with repeating patterns. This means that it won’t make a huge difference if you submerge your piece at a less than ideal angle or rate. As you start to get a feel for the proper technique, you can then try to experiment with designs that aren’t as dependent on repeating patterns.
2. Clean surfaces of pieces
As with any surface treatment, a clean surface is essential in hydro dripping. Make sure that there are no traces of dirt, dust, or oils on the workpiece. This includes your own fingerprints, so it’s best to handle your piece with gloves. Small items can be mounted on sticks or wire while submerging in the water vat.
3. Apply a base coat if needed
Just like in painting, the results of hydro dripping might not be as prominent when done on an incompatible substrate. To make sure that your hydro dipped layer pops out, you will want to apply a base coat with a lighter color. In most cases, a pure white or light tan base coat will work excellently.
4. Try spray paint hydro dipping
There’s another way to do hydro dipping if you don’t have some water transfer paper on hand. If you have a stash of acrylic spray paint cans somewhere in your garage, then you just might be able to use those to give new life to your workpieces.
For this method, you will just need a large water vat and spray paint cans in your color of choice. The idea would be to spray the pint into the water vat and allow them to form ripples naturally. With this behavior, you can come up with a virtually endless range of designs using different colors and patterns. It’s going to turn out psychedelic and unpredictable, but that’s the appeal of this technique.
If you’re satisfied with how the pattern looks, go ahead and dip your piece into the vat using the usual technique. The layer of paint on the top of the water should now be very sticky and readily adhere to the surface of your workpiece.
The charm of this technique is that it’s bound to turn out differently every time you do it. This makes it a great project for the weekend or if you’re just tired of your stuff looking way too plain.
Final thoughts
Nowadays, hydro dipping is no longer just this cool thing that you watch on YouTube. It’s common enough that a lot of companies have started offering hydro dipping services. And why not? The method is pretty simple and does not need fancy equipment. You can even buy a DIY hydro dipping kit if you want to try it out at home.
If you’re into 3D printing, then hydro dipping is a great post-processing option that you should consider. Think of it as an alternate way of applying paint to your 3D printed project. This means that you’ll still need to do sanding and polishing before hydro dipping.