How to Improve Bridging Performance in 3D Printing
Reducing print speed, increasing the cooling rate, decreasing the flowrate, and adding supports are some of the most common ways to address poor bridging. If you are still unsure about how your printer settings will translate to bridging performance, then it is recommended to print a bridging test print.
Poor bridging is one of the more common issues encountered in 3D printing. It’s also fairly easy to resolve, although failing on a bridge will almost certainly mean having to redo an entire 3D print from scratch. Check out this guide on how to make your bridges less likely to fail.
What is bridging?

Just like overhangs, bridges are features that need to be printed without any direct supports underneath them. What makes them unique is that they connect two raised points horizontally. This presents a different set of challenges and perhaps a few design restrictions.
It’s tough to predict exactly how well a bridge performs, especially if you’re working with a new filament or 3D printer. Fortunately, bridging performance can be improved by just making a few changes in your slicer settings. The most reliable way to ensure good bridging performance is to make a print test.
What causes poor bridging?
Gravity is the failure mechanism of bridges. This happens when the material fails to develop enough rigidity to support the weight of the features being printed. This also implies that different filaments may exhibit different levels of bridging performance. Just knowing this factor goes a long way towards coming up with solutions to poor bridging.
In some cases, bridges can be far too long to be printed without any support structures. Many 3D printing experts would often cite a rule of thumb for how long unsupported bridges can be, although this number can still vary based on filament type and slicer settings.
Tips on improving bridging performance
The solutions to poor bridging are relatively simple, often only involving making minor changes in your slicer settings.
Decrease printing temperature
The easiest adjustment you can make is to lower the printing temperature, possibly to the lowest recommended value for your filament. This will make the plastic less fluid and allow it to become more rigid faster. Hopefully, this will be enough to prevent bridges from collapsing.
Take note that a low printing temperature also has other consequences that you should anticipate. You may run into under-extrusion issues, such as layers gaps or missing layers. Layer adhesion may also suffer because of low printing temperatures. If these are observed, then you may want to recalibrate your printing temperature strategy.
Increase cooling rate
If you’re printing bridges and overhangs, make sure that your part cooling fan is set to the maximum level. This will help the material become more rigid faster and make failure less likely. You could even consider using an external fan to speed up cooling.
Again, there is such a thing as too much cooling. If your cooling settings are too high, layers may not be able to form strong bonds with each other. This will reduce the overall strength of the finished part.
Decrease print speed
If your print speed or extrusion multiplier is too high, there is a chance that bridges will start deforming before they are given enough time to solidify. A good idea to prevent this is to reduce the print speed but only by increments of 10 mm/sec.
Conversely, it is also possible for bridges to fail because print speeds are too low. The failure mechanism for this phenomenon is quite different. When printing is slow, bridges can start to droop before they are connected between the two anchor points. This type of failure is less sudden but is catastrophic, nonetheless.
Add supports

If, despite all efforts, your bridges still fail, then it might be time to consider adding supports. There really is no rule of thumb on how long bridges are supposed to be before supports are needed. There are several factors that come into play such as the type of filament you are using and your printing temperature.
When you decide to use supports, parameters such as printing temperature and cooling rate become irrelevant. This is definitely the most reliable way to avoid bridging problems. If you want to be able to walk away from your 3D printer without having to worry about collapsing bridges, then having supports should give you substantial peace of mind.
The drawbacks of printing with supports are well-known. They increase filament consumption, printing time, and work spent in post-processing. If you have the option of printing with soluble filament like PVA or HIPS, then that would make support removal much easier.
Verifying your printer settings with regards to bridging performance typically involves watching over your project as it is being 3D printed. If a bridge is starting to sag, then there really is nothing else that you can do but to stop the print and go back to the drawing board with your slicer settings.
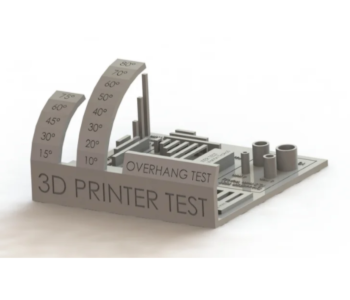
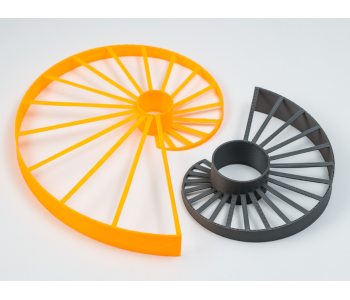
To avoid wasting so much filament on failed prints, we recommend doing a bridging test print. There are lots of excellent free test models that you can download. This helical model is one of the best-looking test prints models for bridging out there, not to mention one of the most challenging. This simpler extrusion model is a less flashy way to test your printer’s bridging performance. You can also go for the massively popular all-in-one 3D printing torture test.
Final thoughts
Printing bridges reliably takes a healthy bit of trial and error, especially if you’re working with an unfamiliar filament. If you’re having trouble with bridges, you may take solace in the fact that poor bridging is one of most commonly encountered problems in 3D printing.
Thankfully, it’s also a fairly simple problem to resolve, taking only a basic understanding of the fundamentals of 3D printing. If you’re having trouble tweaking your slicer settings, then you can just do it the easy way and print bridges with supports.


