What is the Best Infill Pattern in 3D Printing?

If you want your print to be as strong as possible, then a cubic or gyroid infill is the best option. Other alternatives also have benefits in other aspects – a liner infill is best for shortening the printing time, while a concentric infill offers the best flexibility. Other variables like infill density and direction also affect the physical characteristics of the final print.
The infill pattern is one of the best ways to control the weight and density of your 3D print, as well as the amount of filament it consumes. This does not mean that you need to compromise its mechanical characteristics. Here are the best infill pattern options for different 3D printing applications.
Setting your priorities
As with many things in 3D printing, there isn’t a single best option for infill patterns. All options offered by slicers have their merits, although there is a handful that has become the go-to for many users.
Selecting the best infill pattern depends on the priority characteristics for your job. For functional parts, you will likely want them to be as strong as possible. There are also certain situations when flexibility is more important, particularly for vibration dampening or shock absorption mechanisms. If productivity is the priority, then there are also infill patterns built to maximize speed.
No matter your choice, all infill patterns offer the benefit of saving on filament use and shortening the printing time. This is a very important setting in your slicer and one that we recommend you experiment with.
Best for strength: cubic or gyroid
Infill patterns focused on strength are preferable if you’re 3D printing functional parts that need to withstand heavy stress or handling. There are two good options – cubic or gyroid.
A cubic infill pattern is more commonly available in most slicers. It consists of cubes that are tilted and stacked together. Orienting the cubes so that they are standing on their corners provides more reinforcement in the perpendicular direction of the infill and avoids having to print the cubes with overhanging parts. This orientation gives this infill the appearance of triangles when its cross-section is viewed.
A cubic infill pattern primarily along the axes where the corners of the cubes align. However, it still offers very good reinforcement along all the directions. It hits a good balance between strength and printing time, but it is still relatively slow and uses up more filament.
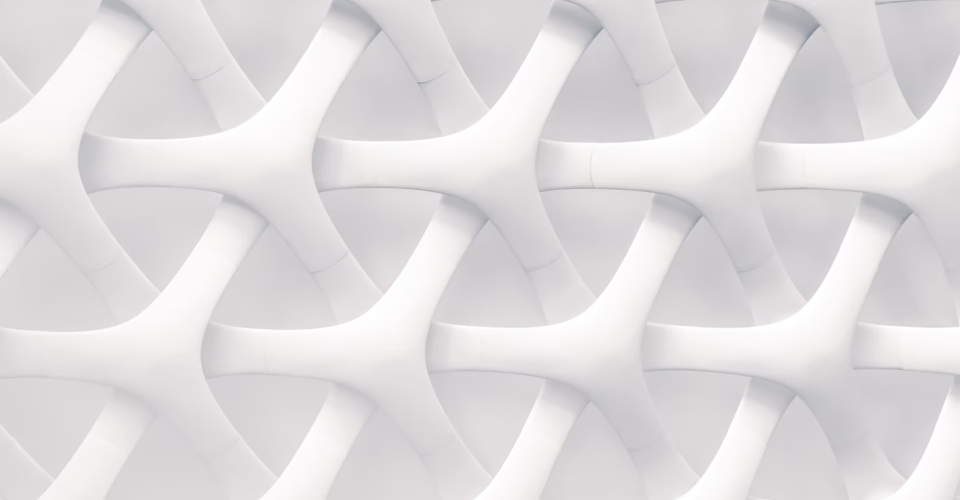
If you need your parts to be strong but less rigid, then a gyroid infill pattern may be perfect for you. This is a fairly complex infill pattern that may take a long time to slice. It may not be an available option in all slicers.
A gyroid pattern consists of waves running across all three primary axes. All these waves are connected and stacked with each other, providing reinforcement equally in all directions. The pattern looks mesmerizing and has even been used by some designers as an essential component in the visual appeal of their models.
Slicing a gyroid pattern may take a long time, but it is faster to print and uses less filament than a cubic infill. It is also a bit more flexible, although can still be more accurately described as a rigid structure.
For both cubic and gyroid patterns, an infill density of at least 50% is recommended for high-strength builds. Setting the density to more than 50% is still an option, although the added benefits are marginal. Going beyond 75% is generally not recommended as the added printing time and filament use are not worth it.
Best for flexibility: concentric
While flexible is not the opposite of strong, it bears mentioning under an entirely different category. Flexible 3D prints are meant to deform when subjected to stress. Such a structure absorbs energy rather than transmits it, making flexible parts ideal for impact absorption and vibration dampening. Flexible parts are also quite intriguing and fun to play with.
The most commonly used infill pattern for flexible parts is concentric. In this pattern, the shape of the outside perimeter is repeated in its interior space at a progressively smaller scale. This pattern is peculiar in that it is partially rigid along the z-axis but has zero rigidity in both the x-axis and y-axis.
The degree of flexibility of a 3D printed part using a concentric infill pattern can be controlled via the infill density. It is possible to set the infill density from 0% to 100% according to how rigid or flexible you need the part to be. At 100% infill, the print attains a rigid structure along the x and y axes on account of the concentric layers almost touching each other.
Compared to a cubic infill, a concentric infill prints faster and uses less filament. Of course, this rule only applies if a similar infill density were used. Printing concentric at 100% infill density will still take longer and use up more filament than a cubic infill at 50% density.
Best for speed: linear
If you want your parts 3D printed as quickly as possible, then it’s a good idea to go with the simplest infill pattern available. As the name implies, the linear infill pattern simply prints a series of parallel lines in the interior space of the model. The direction of the lines alternate per layer, which gives the pattern a bit of a boost in overall strength. The space between the lines is determined entirely by the infill density.
A 3D print with a linear density has poor structural integrity in all directions. It is completely not viable for functional parts. The primary use of the linear infill pattern is for projects that are solely for display.
The chief advantages of a linear pattern are that it’s quick to print and uses less filament. A variation of the linear infill pattern, the zigzag pattern, prints even faster by reducing flow interruption when moving from one line to the next.
The direction of the infill plays a huge role when printing with a linear pattern. The z-axis is a lot stronger than either the x and y axes on account of the overlapping alternating lines. Along the horizontal directions, the linear pattern can only be described as very weak.
The strength of linear infill is not significantly enhanced by increasing its infill density unless the value is approaching 100%. However, reducing the spaces between lines can be beneficial for ensuring that the top of the layer prints smoothly.
Other ways to enhance print strength
You do not have to rely solely on infill pattern and density if you want your 3D print to be as strong as possible. Other factors such as wall thickness, printing temperature, printing speed, cooling rate, and filament of choice significantly affect the overall strength of the finished product.
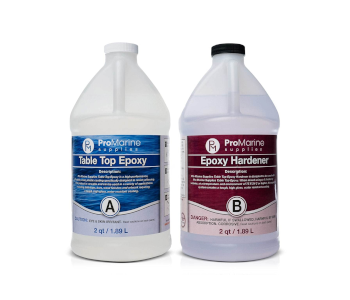
It’s also possible to enhance the strength of a 3D print in post-processing. Applying an epoxy coating on the outer surface of the 3D print helps to bind the layers together and adds a small degree of mechanical support. An epoxy coating can also protect against UV degradation and adds a nice shiny finish on the 3D print that can be polished further.
Final thoughts
The fact that 3D printed objects can be hollowed out easily is one of the characteristics that distinguish them from other manufacturing techniques. This is a great way to control the weight and density of 3D printings. However, hollowing out any object also compromises its mechanical integrity.
Careful selection of infill patterns plays a huge role in determining the overall characteristics of a 3D printed object. There are now lots of options – some slicers have more than a dozen infill patterns. Just keep in mind that the strongest pattern isn’t always the best option. The optimal choice depends on the application or intended purpose of your project.