Selecting the Best Infill Pattern for Your Next 3D Printing Project

3D printing is an incredibly fun and useful activity, but it can also get expensive pretty quickly. Between the costs of the filament, the printer itself, the various accessories, and the power consumed during printing, it’s always worth it to find areas where you can cut back on spending while 3D printing.
One of the easiest ways to conserve your filament supply is to adjust the infill settings of your design. It’s not all about saving on the filament material, though, as infill settings heavily influence the durability of the resulting print. What is infill anyway and how do you choose which one to use?
What is infill, and why is it important?
When it comes to many FDM printing, the most important aspect of a finished print is typically how good it looks. This means that what a print looks like on the inside is decidedly less important. While it’s perfectly possible to create a completely solid print, this is a very impractical way to go and can even result in more printing problems such as warping.
To keep prints cheap, the common solution is to print them with partially hollow internal section and a relatively thin outer shell. This feature is built- in with any slicer software and changing the infill pattern, and percentage for your print could be as easy as selecting an option from a drop-down box. The options for infill could range from a completely hollow object (0%) to a completely solid object (100%).
Aside from savings in filament consumption, printing a design with partial infill also cuts back a lot on the total printing time. For projects with a short turnover, a few hours of savings per print can really add up to a lot, especially if you need to finish multiple prints.
Infill options
When talking about infill, there are really only two things you need to worry about: patterns and percentage. What’s the significance of each parameter?
1. Infill patterns
The pattern of the infill determines how a cross-section of the finished print will look like. Slicer software typically come with a pre-determined range of infill patterns. There are patterns, however, that are incredibly common and that you can expect from any slicer software. The four most commons are rectangular (or grid), triangular, wiggle, or honeycomb. Each infill pattern offers a unique combination of filament savings, strength, and flexibility.
2. Infill percentage
As we’ve mentioned, you can set the percentage of infill for your printing project anywhere from 0 to 100. The infill percentage is essentially between the strength of the finished product and how much filament and printing time you’re willing to spend. Most slicer software have default infill percentage settings at 18% to 20%. While these settings are fine in most cases, you are free to play around with them depending on how strong you need your print to be.
Things to consider when setting your infill
Any slicer software can offer quite a range of infill options. For the inexperienced, this wealth of options can seem intimidating. You’ll likely have to do a bit of trial and error to get the infill for your design just right, but here are a few factors to keep in mind when locking in your infill settings.
1. Strength
If you’re printing an object that is meant only for display and needs no functional capabilities whatsoever, you can set your infill to zero and still get a nice-looking print. You will have to handle your finished print with care, especially if you’re doing any sort of post-processing.
While there is no definite rule on what infill percentage you need to set to produce a sufficiently strong print, the default setting of 18% to 20% is good enough for most situations. However, if the object if your printing is meant to constantly support any weight or withstand any impact, you might need to pump up those numbers to around 50% region.
One thing to keep in mind is that strength does not increase linearly with the infill percentage setting. Instead, the increase in strength diminishes due to additional infill diminished as you go to higher infill percentage numbers. For example, increasing from 25% infill to 50% infill grants a strength upgrade of about 25%. However, increasing the infill further to 75% only makes your print 10% stronger.
In terms of pure strength, the triangle infill pattern is the superior choice. The pattern achieves this by trading it with a long printing time and high filament consumption. The great thing about the triangle pattern is that it provides strength equally on all sides of the product.
2. Flexibility
In the same way that high infill promotes increased strength, setting your infill at a lower setting will also increase in a more flexible product. However, some infill patterns lend themselves more to flexibility than others.
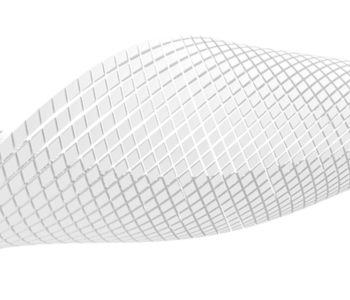
The wiggle pattern (also called “gyroid” by some) resembles waves oriented in a single direction. This is the perfect pattern if you need your finished products to be able to flex a little. Objects printed with a wiggle infill pattern can be stretched, squeezed, and twisted.
3. Print speed and filament use
On the topic of infill, how long it takes to finish the print and how much filament you use are very closely associated. Naturally, an infill pattern that uses more filament material takes longer to print but provides much higher strength to the final product.
However, not all situations call for superior strength. If you’d like to save up on both printing time and filament use but do not want to print a completely hollow object, then you can settle for the rectangular or grid pattern. Being the least complex infill pattern, printing a rectangular infill uses the least amount of filament. The strength it offers isn’t top-notch but is also equally distributed on all sides of the print.
4. Shell thickness
Setting a higher infill percentage isn’t the only way to strengthen your print. Setting a higher thickness for the shell, or the outer wall of the object, is also a viable alternative for strength improvement if you want to conserve on filament. This option will use less filament compared to increasing your infill settings.
If you choose to go this route, just be wary of excessive post-processing. Any smoothing or polishing method will inevitably eat away on the shell of the finished product and effectively decrease wall thickness. This effect doesn’t completely rule out the option of post-processing but is certainly something you need to take into consideration.
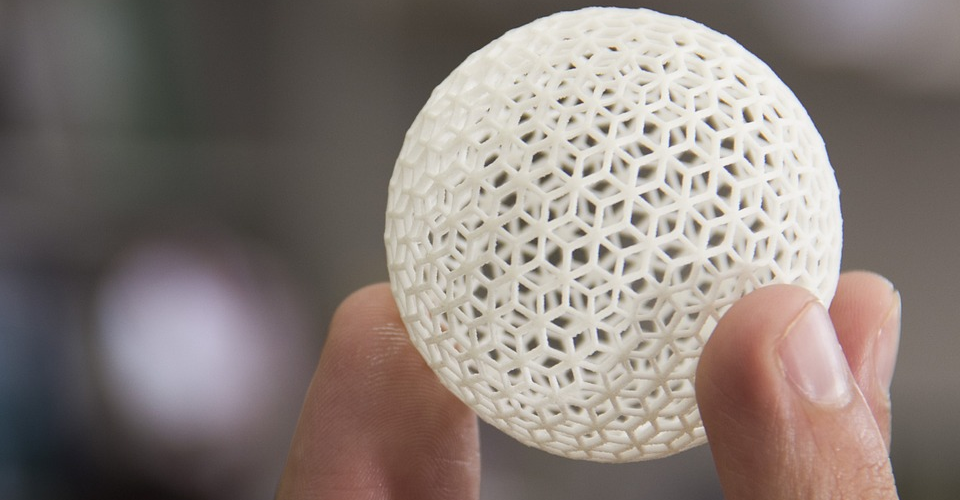
The best compromise – the honeycomb fill pattern
Despite the benefits and disadvantages of each type of infill pattern, there is one that is heavily favored by many 3D printing professionals. The honeycomb pattern is one that we see in nature, mainly in the construction of actual honeycombs. There’s a very good reason for this, of course. The honeycomb pattern strikes the perfect balance of strength and material use – something that bees are instinctively aware of.
Aside from hitting a good mark in terms of both printing speed and filament consumption, the honeycomb pattern also imbues strength equally in all directions. It does require the print head to make a lot of direction changes, which may be problematic for particularly heavy print heads. Still, many 3D printing professionals consider the honeycomb fill their go-to pattern
If you are having trouble dialing in your infill settings, we recommend doing a honeycomb pattern at 20% infill percentage. You can then use these settings as a starting point for further refinements.
Final thoughts
Getting the infill settings just right is one of the most critical steps to produce a successful 3D print. As with most other 3D printer settings, the best infill setting is a balance between several factors. In this case, you need to put into consideration the overall strength of the final print versus the time spent on printing and the amount of filament used.