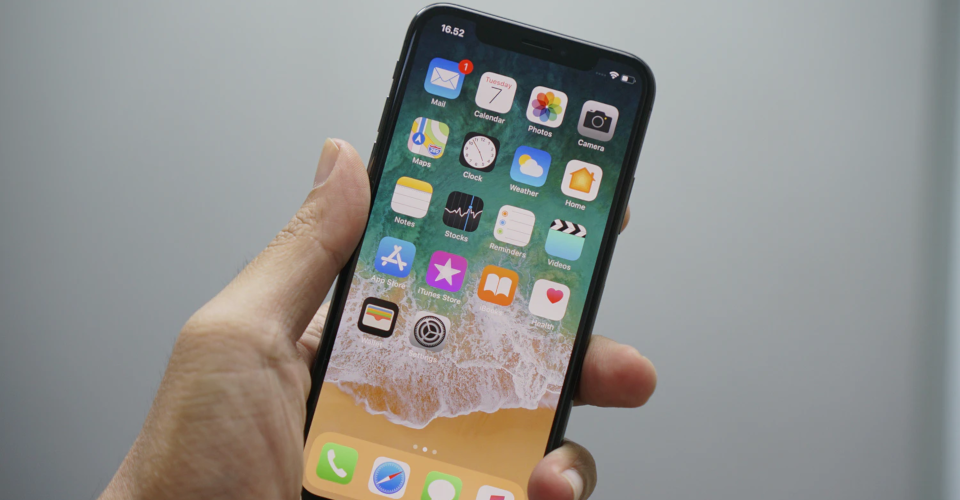
8 Best Video Editing Apps for iPhone in 2020

The iPhone has always been at the forefront when it comes to top-quality pictures and videos. The latest models have multiple cameras and are capable of creating smooth 60fps videos in 4K. All that power means you’re able to bring some stunning videos to life, but not even the most expensive iPhone will make those videos interesting if you post them without editing.
Modern movie video editors are versatile and rival their desktop counterparts in many respects. Most of them are geared towards speedy editing and will help you put out quality content with little hassle. Others feature sophisticated multitrack timelines, a slew of effects, and access to online resources. Mobile video editing has made switching to desktop optional for smaller projects while simultaneously making the transition seamless when advanced cuts are in order.
The only trouble is that apps like this are a dime a dozen. That’s why this guide on the best video editing apps for iPhone is an excellent resource for anyone who wants to take their flexibility and creativity to the next level. Get the right app for your needs, and start making videos no one will ever want to skip!
1. iMovie
iMovie started as a beginner-friendly video editing program for desktop Mac users. Its mobile version was first released ten years ago and has since become one of the most popular and positively-reviewed video editing apps on the App Store. With good reason, as iMovie makes the editing process as easy as can be and helps you create family videos and professional-looking vlogs with equal ease.
The welcome screen gives a brief overview of what iMovie is capable of, and then you’re taken to the projects page. There you can either continue to edit existing ones or create a new one by tapping on a large plus icon. The iMovie app then lets you choose between movies and trailers, just like the desktop version. Trailers are preconfigured templates that require minimal input. You select the appropriate clips, and iMovie arranges them in one of several styles that correspond to travel or family videos, adventures, sports, and more.
Trailers are limited, which is why movies give you more hands-on options. First, you select among clips and pictures iMovie groups into themes to make the process more intuitive. These are then added to the timeline and get an outline, so you know which media you’ve already selected when adding more. Each item on the timeline is connected to its neighbor with the Dissolve transition, but you can choose between several or have no transitions at all.
Editing single clips is straightforward. Selecting one opens up a menu that allows for trimming, splitting, or duplicating the clip. You can adjust its speed and orientation as well. Getting to a specific part of the clip is quick, as you can scrub through it using the playhead. iMovie offers several filters and title styles to enhance your movie’s look.
There are several ways of adjusting audio in iMovie. The simplest is to set the volume of each clip. That’s useful when you’ve got a segment that needs to be quieter because of narration. You may separate the audio track altogether and trim or move it. Music tracks can be added too.
Rendering a movie doesn’t take long, and iMovie supports varied storage options. These include local, sharing on social media, or uploading the movie to iCloud for friends and family to access. Best of all, iMovie works seamlessly with its desktop counterpart; you can start to edit on your iPhone and finish up on your Mac, or vice versa.
2. LumaFusion
iMovie and Splice are fantastic for quick and simple edits, but your iPhone is capable of much more. LumaFusion pushes your Apple hardware to its limits and allows for video editing features even some desktop software doesn’t have. It costs $29.99 and has a steeper learning curve than other apps, but LumaFusion is the best solution for pro videographers on the go.
LumaFusion is developed not just for the iPhone, but for the iPad as well. The result is an app that’s incredibly feature-rich but still looks neat and well-organized on a smaller screen. We love that you can import media from external drives and SD cards. LumaFusion creates copies of the media and saves them as project files as a result.
The video creation process is more involved than with most apps. You’ll see this from the get-go as LumaFusion asks you to choose from a variety of video quality settings and aspect ratios suited for sites like Instagram or YouTube. Some design decisions are ingeniously simple, like the small timeline bar under the preview window that gains segments as you add clips and is great for quick scrubbing. Others are advanced, like the ability to have six video and six audio tracks on the same timeline.
LumaFusion’s interface can get crowded, but most of its options are hidden behind settings menus. Working with multiple layers isn’t a hassle since you can either hide or lock them so you don’t change something accidentally. LumaFusion also recently got markers. These are colorful reminders you place anywhere on the timeline to keep track of future edits and make collaboration easier.
There are lots of effects at your disposal, including look-up tables or LUTs. You can even import your favorite ones from a camera and drastically change a video’s look in seconds. Putting the finishing touches to a scene by playing with contrast or saturation is effortless, as is exporting the video in a wide selection of formats suitable for local or online use. Best of all, you can preview a video on any Apple TV in real-time using AirPlay to check how your audience will experience it.
3. Splice
Splice is hands down the best completely free video editing app for the iPhone. The sheer number of filters, text effects, and options would be impressive for paid-for solutions. At the same time, Splice is one of the cleanest and most intuitive editors that lets you make extensive changes to videos and share them with the world.
There’s nothing special about Splice at first glance; it has a clean home screen focused on past and new projects like many of its rivals. The project creation and media selection process is familiar, as is its sparse editing interface. The differences become evident once you start to make changes to videos. One of the best and most appreciated is the Undo button. It’s not limited to the last action either as you can choose several specific points when changes were made and return to them instantly.
The editing window is broken up into three parts. A preview takes up the top with the timeline underneath. There’s also a contextual menu on the bottom containing all the tools you’ll need. It gives access to media selection, audio, and text effects by default but changes to a set of trimming tools when you tap on a clip, for example.
Splice has one of the most detailed title creation interfaces out there. You get to choose a background along with the color and opacity for both the text and its surroundings. There are lots of fonts at your disposal, and you even get to select text alignment.
Keyframing is another helpful feature you rarely see on mobile video editors. You can use it to set up pans and zooms or add one of Splice’s numerous filters to parts of a clip. Cropping videos so they fit your selected aspect ratio is easy, as is adding slow-motion or speed-up effects for more diversity.
There are diverse audio options to play with too. You can tap the Voiceover button and record yourself as the clip is rolling. Splice generously gives you access to dozens of effects and music tracks. You can add ones from your iTunes library as long as there are no copyright issues.
4. CyberLink PowerDirector
PowerDirector is one of the most in-depth editing tools available on the iPhone. On the other hand, it’s easy to come to grips with thanks to a series of excellent tutorials accessible from its home screen. It’s another app you’ll have to pay for to use to its fullest. Still, the ease and speed with which new videos come together makes the purchase well worth it for pros and enthusiasts alike.
We appreciate how clean PowerDirector’s interface is. Some elements are visible and easily accessible, like the tutorials section and project overview. Others, like clip trimming options, are hidden until you need them. You never feel like the screen is cluttered even though there are lots of ways to transform videos.
PowerDirector has some of the most advanced clip editing tools. You can set up simple pans or zooms, stabilize shaky footage, or flip the video and adjust its speed. Adding more clips snaps them together with existing ones and creates a space for transitions. There are many transitions, filters, and effects to choose from, but most aren’t accessible or free users.
Picture-in-picture is a common feature on desktop and something the PowerDirector app handles particularly well. You can overlay text, stickers, images, and even videos on top of the main video. These elements can be resized or rotated, and adjusting their opacity is possible too. Not satisfied with the PIP? Add a mask and hide parts of the second picture that distract from the main view.
Multiple audio tracks can be added to the timeline, and PowerDirector has an excellent equalizer that lets you control the volume of general audio, music, and effects separately. You can extract the audio from videos or cut it up with a tap.
The Undo tool is there to revert changes if you make a mistake, and once you’re ready to upload PowerDirector offers almost as many formats as LumaFusion. Free users are limited to 720p, but becoming a pro unlocks resolutions up to 4K.
5. Adobe Premiere Rush
Adobe is another heavy hitter in the desktop video editing world, but its mobile advances haven’t been as ground-breaking as Apple’s. Premiere Rush is an intermediate video editing an app that’s superseded Adobe’s basic solution, Premiere Clip. Its main features are seamless cross-platform integration, a magnetic timeline, and a simple interface that facilitates faster editing.
Unlike other apps that are either free or require a one-time payment, Rush has a $9.99/month subscription that grants you access to unlimited uploads and cloud storage. Premiere Pro subscribers don’t have to pay extra as Rush is included in their subscription.
The interface should look familiar if you’ve used other editing apps, especially LumaFusion. Rush supports multiple video and audio layers, as adding and arranging B-roll is straightforward. Placing objects onto a timeline snaps them together and links them if they’re on different tracks. That means B-roll footage will move along with the main clip if you decide to rearrange it.
Rush encourages you to produce content from anywhere. You can activate the iPhone’s camera from inside it and record videos that are automatically added to the timeline. The recording screen also gives you access to pro settings like contrast and ISO levels, ensuring you’ll need minimal editing once the clip is shot. Audio is treated similarly as real-time voiceovers are as easy to do as in Splice.
Compatibility is one of Rush’s most powerful features. It’s a cross-platform app, so anything you edit on the iPhone and upload to Adobe’s Creative Cloud becomes instantly available to work with on either an iPad, Mac, or even PC. Rush handles dozens of file types and formats with ease and blends them together in a single video without issue. You can have 24fps clips shot with a DSLR, a 60fps GoPro video, and 1:1 Instagram images in the same movie and experience no conflicts. Finally, Rush has some of the best rendering times regardless of how heavily tweaked the video is.
6. KineMaster
A clean, intuitive interface goes a long way in speeding up mobile editing. KineMaster is innovative in that respect as most of its editing options are tucked away behind a clever radial menu. KineMaster offers lots of assets through its shop, has fast rendering times, and impresses with the quality you can expect from finished projects.
KineMaster takes media from your iPhone, iCloud, or Google Drive and arranges it into a timeline. Tapping on a clip or image brings up basic individual editing options like trimming and in or out animations. Options that pertain to the entire movie are located on the radial menu.
Tapping the central menu button opens up the camera and works like Premiere Rush without the advanced settings. There’s also a similar voiceover function on the bottom of the wheel and an import media button on top. The right side is reserved for an audio library containing many free effects and music you may use without fear of copywriting issues.
The menu’s left side expands to reveal more video-related options. These include adding more media as PIP, text, effects, stickers, and more. Each addition is given a separate track on the timeline at the playhead’s current location. Things can get out of hand fast, so it’s great that there’s a dedicated button that minimizes the preview window, leaving much more room for layer management. Other notable quick commands include Undo & Redo buttons, along with one that takes a screenshot of the current frame.
KineMaster Heavily promotes the Asset Store, its marketplace for images, animations, fonts, and other cool stuff. You can make eye-catching videos without it, but the store is a valuable addition that may add versatility to them. Paying a one-time fee or a monthly subscription places the shop at your disposal.
7. Magisto
Each iPhone editing app we’ve talked about so far has the potential to occupy you for hours as you tweak a video to perfection. What if you need an eye-catching, professional video ASAP and don’t have time to waste on its presentation? Magisto is the app you’re looking for, as it’s geared towards anyone who could use an AI-driven editing solution that requires minimum input while promising stunning results.
The idea behind Magisto is as simple as it is brilliant. You select which photos and videos you want, choose a theme, add music, and you’re done! The ingredients get uploaded to Magisto’s site, where they’re mixed together into an effective and exciting video. You can leave everything up to Magisto or get involved by pre-trimming clips and adding titles that reflect your brand or channel identity.
Magisto’s strength lies in its access to a vast amount of content. On the one hand, you’ve got dozens of templates designed to appeal to specific demographics. There are vacation and family-themed templates for personal use, tutorials for content creators, and real-estate or portfolio for business owners, just to name a few. On the other, Magisto has access to thousands of photos, videos, and royalty-free music that can become part of your movie.
Magisto is a subscription service with a starting plan of $2.99/month. This gets you 60 2.5-minute videos, premium templates, and unlimited downloads each month. The Business plan is the most advanced titer and costs $39.99/month. The price is well worth it for enterprise clients since you get to make 10-minute videos, include your original branding, and receive access to Magisto’s complete media library.
It’s no surprise that Magisto’s socially-oriented approach comes with sharing options geared towards online use. There’s your standard selection of formats and sites like Facebook, Vimeo, or Instagram. However, Magisto also has its own video player you can embed into your website. Best of all, there’s an email tool that’s perfect for sprucing up your marketing campaigns and reaching an interested audience.
8. Quik
Magisto is an excellent tool for hassle-free video production, but it’s geared towards business use. Content creators who like to publish video blurbs of their recent adventures frequently will get more mileage out of Quik, GoPro’s basic video editing app. You don’t have to own the ubiquitous action camera to take advantage of Quik’s story-driven approach to editing either. There’s no better choice if you’re a casual editor who’d like to streamline content production while retaining a degree of creative input.
Entering Quik for the first time introduces you to a simple interface dominated by the Quik logo and a button prompting you to create a new project. Doing so takes you to the media selection screen where you can choose photos and videos from your iPhone, an SD card, Google Photos, or GoPro Plus. Selecting a short clip will jump straight to story creation while stringing photos and longer clips together lets you create a title first.
Quik fully automates video creation with the use of themes. They’re represented by colorful panels designed to fit video styles like time-lapse or evoke a sense of adventure. Each theme comes with transition effects, a music track, and a unique look for the title. You don’t need to do anything other than export the video if you’re satisfied.
There are a few customization options useful for fine-tuning the video, though. You might think that a theme and music track don’t go well together and can substitute the default for other music tracks from your GoPro or iPhone. Getting rid of sound and music altogether is also an option.
Putting the finishing touches to a video involves adjusting its duration and aspect ratio. You may also want to use a different font or select a different palette for the theme’s automated graphics. Quik lives up to its name in terms of rendering times and supports a good variety of social media sites for sharing.