How to Make Your Own 3D Models for 3D Printing

Anybody who owns a 3D printer has probably tried using free models that can be downloaded easily. However, there is a different level of satisfaction that comes from making your own models or files for 3D printing.
You can build a 3D model in a CAD platform and export this as an STL file that a slicer can recognize. There are several options for CAD software that are free to use and are beginner-friendly. However, there are a few design rules to keep in mind so that the model encounters no problems during 3D printing.
Making 3D models may seem intimidating, but you can build you can start out with simple shapes while gradually building up your skill level. Check out some of our tips to help you in this journey.
Which software to use?
The good news is that you do not need to spend a dime to start using CAD software. There are now several free options that offer more than just the basic features. Here are some of our favorites:
TinkerCAD
Almost everyone who gives advice for 3D modeling beginners will recommend TinkerCAD. Not only is it free to use, but the platform is entirely browser-based. You won’t even need to spend time downloading and installing the software – just sign up for an account on their site and you’re good to go.
The claim to fame of TinkerCAD is that their platform is so easy to use that anyone can create their first 3D model within five minutes. While we can’t confirm the accuracy of that statement, we can say that the platform is very easy to use indeed.
Despite the seemingly simple tools at your disposal, one look at the TinkerCAD gallery will assure you that the platform can be used to make highly complex designs.
FreeCAD
If you’re looking for a slightly more sophisticated CAD platform, then FreeCAD should be right up your alley. This open-source 3D modeler is a lot more versatile than TinkerCAD but requires going through a steeper and higher learning curve.
The beauty of learning how to model in FreeCAD is that it’s a platform that continues to evolve. Since the platform is open-source, the community of users can continuously improve the product, add new features, and fix bugs all for free. When you get skilled enough, you can also come up with your own tool and workflows.
SketchUp
SketchUp (formerly owned by Google, now by Trimble) is a CAD platform that offers both free and paid versions. The free version, called SketchUp Free, is a web-based platform with 10 GB of cloud storage.
The paid versions of SketchUp are standalone downloadable programs. These come with a more robust set of modeling tools, access to pre-built 3D models, and better customer support.
The free version of SketchUp is a great way to get your toes wet in the world of 3D modeling. If you find yourself enjoying the platform, then there’s less of a risk of paying for the more premium version.
Take note that you will have to export all 3D models as STL files so that they can be recognized by your 3D printer.
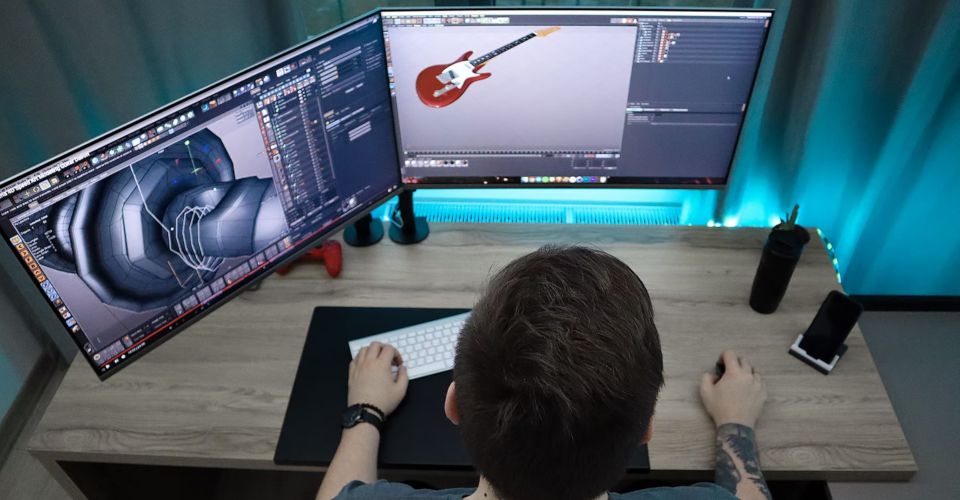
Creating 3D models by scanning

Do you want to create photorealistic models for 3D printing? Or do you want to 3D print an exact replication of an existing tool or part? Creating highly accurate or detailed models via 3D modeling or sculpting is something that requires an exceptional level of skill. You can bypass that skill check by using a 3D scanner.
A 3D scanner uses pulses of light to create a digital copy of any real-world object. This may seem like a complex process, but it can be done using a smartphone camera. The LiDAR sensor that comes with the latest generation of iPhones is an excellent tool for this job, along with apps like Scandy Pro or Trnio.
You can also use a standalone 3D scanner such as the Creality CR-Scan or the Revopoint POP. They are quite expensive (about $500 to $800) but produce much better results than any smartphone camera.
Preparing a 3D scanned model for 3D printing may involve a healthy amount of cleaning up, but these can all be done using a CAD software or the companion software of a 3D scanner. Again, models need to be exported as STL files before they can be sent to a 3D printer.
Rules of thumb for making models for 3D printing
Not all 3D models are appropriate for 3D printing. If you’re making your own models, then it would be better to keep these rules of mind at the very beginning.
Models should be watertight
The first rule is that a 3D printable model should be watertight or “manifold.” This simply means that the model should not have any holes in it. Make sure that each surface intersects with another surface along a well-defined edge.
Most CAD platforms should have a function that checks if a model is manifest. If not, then a slicer software should definitely be able to do this check.
Designate wall thickness values
One other thing that a 3D printer cannot replicate is a paper-thin wall. To avoid this, just assign each wall in your model with a thickness value. You can also choose to create a completely solid model. This can be hollowed out during slicing and replaced with an infill pattern.
Remove overlapping surfaces
Overlapping surfaces are often overlooked because they don’t show up on the exterior of a model. However, they can still be problematic when the model has to be sliced for 3D printing.
Overlapping surfaces often come up when a model is created by combining two or more pre-built models. If there is no tolerance in the intersection, adding or subtracting one shape from the other can result in paper-thin walls.
There is no shortcut to this other than being systematic whenever you combine two pre-built models with each other.
There are other rules of thumb that take into consideration the specific 3D printer that you will be using. For instance, a model being designed for resin printing must integrate drain holes in its hollow section. For FDM printing, knowing the exact nozzle size of the printer can be useful in assigning wall thickness values in the model.
As you design more complex models, you will likely run into many of the usual challenges of 3D printing. Maybe your 3D printing nozzle is too large to recreate some of your details, so you will have to make do with a less detailed model. You can also consider adding “creative” supports to your models so that you will not need as many support structures during 3D printing.
Final thoughts
3D printing a model that you created yourself is way up there in terms of fulfillment. It’s also a great way to level up your 3D printing skills, as you will be forced to acknowledge and work around the limitations of your 3D printer.
The good news is that learning how to make 3D models is no longer as difficult or expensive as it used to be. Free CAD platforms and a wealth of online resources have made this craft very accessible for beginners.