Metal Plating of 3D Printed Parts – How to Do It
3D printing is a massive departure from traditional manufacturing techniques. It’s faster in most cases, cheaper than subtractive manufacturing, and capable of recreating more complex designs. However, it is also limited by available materials – 3D printing mostly uses plastic or resin.
An innovative way to get the best of both worlds is to do metal plating of 3D printed parts. This makes a 3D-printed part a lot stronger while keeping the manufacturing costs cheaper than working with actual metal. How exactly does metal plating of 3D printed parts work?
What is metal plating?

Metal plating is the process of applying a thin layer of metal to any material. A technology that has been around since the 1960s, metal plating of plastic parts is quite common in the automotive industry. Metals commonly used in this process include copper, zinc, nickel, brass, gold, silver, and titanium.
Metal plating is a way to gain the advantages of both metalworking and 3D printing. By plating plastic parts with metal, they can be made a lot stronger and more durable. They can also be imparted with electrical and thermal conductivity if needed. This is possible while still maintaining the versatility and flexible workflow of 3D printing.
Most metal plated plastic parts are 3D printed using either SLA or SLS technology. FDM printing is not very common in this application because electroplating requires a smooth and even finish on the 3D printed part. There’s also the fact that metal plating of 3D printed parts is something that is typically only done for professional applications.
Methods for metal plating
There are two options for metal plating – electroplating and electroless plating. While you can probably already glean how each method works based on their names, we’ll go ahead and explore each one in detail.
Electroplating involves submerging the plastic part in a solution containing the salts of the metal you want to plate your part with. A current is then passed through the solution, which instantly deposits a layer of metal ions on the surface of the 3D printed part.
Electroplating is a very fast method that delivers results almost instantaneously. It’s also reliable in creating layers that are exceptionally even and long-lasting. Its biggest disadvantage is that it is limited to plating very thin layers. If you need thicker layers, you may need to do several rounds of electroplating or combine it with the second method.
Electroless plating, as the name implies, does not rely on the application of an electrical current to a metal salt solution. Instead, it involves submerging the 3D printed part in a solution where chemical reactions take place to deposit a layer of metal on the plastic surface.
Electroless plating provides better control over how thick you want the plated layer to be. This allows more customization for parts that need to achieve specific levels of mechanical strength or resistance to corrosion. However, 3D printed parts run the risk of warping because of the need to apply heat to the chemical solution during plating.

Regardless of the method you choose, substantial work needs to go into preparing the 3D printed part for metal plating. Bear in mind that the surface of the 3D printed part needs to be as smooth as possible. It also has to be cleaned of any residual resin, oils, dirt, or dust. A slightly alkaline cleaner is best for this purpose.
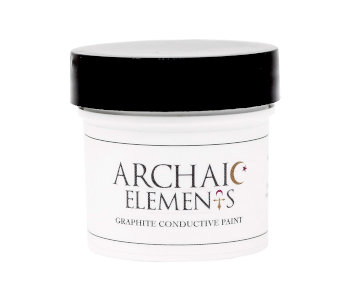
For electroplating, the surface of the 3D printed part needs to be primed to create a conductive medium for the metal ions to adhere to. Applying a thin layer of graphite conductive paint is the most convenient option. Make sure that the graphite paint is applied in smooth and even layers.
For electroless plating, you will need to apply a catalytic layer on the surface of the 3D printed part. This will drive the metal deposition reaction forward. Different metals will require different catalysts. For instance, tin-palladium is considered a cost-effective option with near-universal applications. In contrast, nickel plating proceeds via an autocatalytic reaction, which means that its products catalyze the reaction to proceed further.
Post-processing options
Just as with standard 3D printing, post-processing of a metal plated part is an option if you want to improve its visual appeal. Polishing is the most basic and sensible, considering how metal plated surfaces tend to come out dull when untreated. This can be done by using a metal polish compound and buffing the surface until you are satisfied.
Those who are producing metal plated 3D printed parts at a large scale can op to use an automatic or rotary sander to speed up post-processing. Just be careful not to heat up the surface of the metal too much, as the plastic underneath can still melt or warp.
Final thoughts
Metal plating is one of the more unconventional ways to post-process a 3D-printed part. It’s quite an involved process whether you choose to go through the electroplating or electroless plating method. With huge capital and operating costs, metal plating is really only a practical option for professional or commercial products, particularly in the engineering space.
Given how it involves metal salts and chemical solutions, this likely isn’t the kind of thing that you can do at home. For manufacturing companies, metal plating provides an option to produce metal parts while leveraging the simpler workflow of 3D printing. It’s a worthwhile option until metal 3D printing becomes more accessible.


