A Guide to 3D Printing with Ninjaflex Filament

In the world of FDM 3D printing, some filaments are more challenging to work with than the others. While we’ve all heard of the usual and PLA filaments, probably fewer of us are familiar with the Ninjaflex line.
A Ninjaflex filament is something special. It’s selectively useful and can be quite a handful to work with if you don’t know what you’re doing. However, it’s also one of the more unique filament options. If you’re sufficiently intrigued, then read on for our guide on Ninjaflex filaments and how to best use them.
What is Ninjaflex filament?

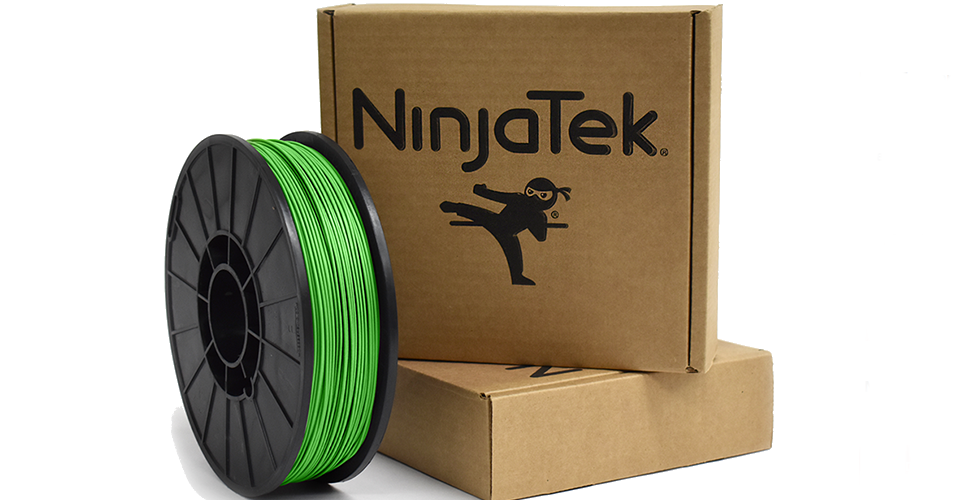
Ninjaflex is one of several 3D printing filament lines from the NinjaTek brand. What makes it unique is that it’s made of Thermoplastic Polyurethane (TPU), a polymer known for its elasticity and flexibility. TPU has been often touted as the closest that one could get to 3D printing with rubber. Although there are several other TPU filaments in the market, Ninjaflex is by far the most popular option.
According to the product specs, Ninjaflex filaments have a shore hardness of 85A and are rated for 660% elongation without wearing, cracking, or deforming permanently. It is available in both 1.75-mm and 3.00-mm diameter variations. The available Ninjaflex colors aren’t just diverse, they are also incredibly fun with names like Radiant Orchid, Mustard, and Flamingo.
When to use Ninjaflex
The properties of Ninjaflex make it vastly different from other 3D printing filaments like ABS or PLA. While most other plastics used in 3D printing are hard plastics, Ninjaflex is only one a handful of flexible filaments. Thus, Ninjaflex and other TPU filaments belong to a class of their own.
This also means that Ninjaflex isn’t the type of filament that one would normally use for the usual 3D printing projects. The first reason is that Ninjaflex filaments are fairly expensive – about twice the cost of your usual PLA or ABS filament.
The flexible nature of Ninjaflex makes it unsuitable for any application that requires significant strength or rigidity. When subjected to a load, flexible filament like Ninjaflex will either compress or stretch rather than hold its shape. However, this makes Ninjaflex perfect for containers that need to have a snug fit, such as cases for phones and other electronic devices.
Ninjaflex has a very high coefficient of friction, which means it will take significant force for it to slip or slide. If you want to make a custom-made grip for your hand tools, then Ninjaflex should be worth considering.
Lastly, Ninjaflex has very good impact resistance. Its ability to deform means that it can absorb a great deal of energy, making it a great enhancement for high-impact applications. It’s not unusual to see TPU filaments used to 3D print replacement gaskets, O-rings, and other replacement parts for common household items.
Best 3D printer settings for Ninjaflex
As far as 3D printing filaments go, Ninjaflex is still considered an “exotic” option. Not many people use it only because it just a selectively useful plastic but also because it is a somewhat difficult material to work with. Ninjaflex isn’t the type of filament you would print with just for fun. Rather, printing with Ninjaflex is typically towards a legitimate objective. It’s also quite expensive, so it’s not the kind of filament you would be comfortable wasting.
Printing temperature
The recommended printing temperature for Ninjaflex is somewhere between 225 to 235 C. This is a pretty narrow range, so finding the best temperature for your specific filament should not be too difficult. Factors such as the diameter of the filament, the diameter of the nozzle, and the layer thickness settings will have an effect on which temperature is optical. We suggest setting the temperature at the minimum and working your way up until you get the best results.
Bed temperature
A heated bed is not necessary when printing with Ninjaflex filament, but you have the option of using one. The official Ninjatek website recommends a maximum setting of 40 C for the print bed. However, other users have also been successful with setting the bed up to 70 C. Feel free to experiment with this parameter and increase the temperature if you’re running into bed adhesion problems.
Bed adhesion
Flexible filaments are known to have poor bed adhesion. This is something to keep in mind when printing with Ninjaflex filament. If you’re still having issues despite using a heated bed, then feel free to put a layer of blue painter’s tape on the print bed. A glue stick is also a viable option, especially since putting on the tape could be too much work. You can also try to tweak your printer settings to print hotter and slower.
Cooling
When printing with Ninjaflex, you want the plastic to cool down as quickly as possible so it can develop strength earlier. This is particularly important if your model has bridges or overhanging features. The lack of rigidity of Ninjaflex makes it much more prone to collapsing or deforming if it does not cool down quickly enough.
For best results, we suggest having no cooling for the first two layers of the print. The consideration here is making sure that the first layers of the print adhere properly to the print bed. After the first two layers, go ahead and set the cooling fan to operate at maximum speed.
Print speed
Slow and steady wins the race when printing with Ninjaflex. The suggested print speed for Ninjaflex is between 15 to 35 mm/s for both the infill and shell parts. This is a relatively slow setting that aims to give the filament time to cool down and solidify before it needs to bear the weight of succeeding layers. We recommend setting the speed at the lowest value for the first two layers to aid with bed adhesion. You will also want to set the printing speed lower for the shell, with the maximum values reserved for the infill.
Retraction settings
Stringing is a common problem when printing with any flexible filament. This isn’t surprising considering how easily these materials flow when they are molten. When working with Ninjaflex filament, it’s generally recommended to enable retraction right off the bat. A retraction distance of 1 mm and a speed of 30 mm/s should work just fine, but feel free to increase the values if you’re still having stringing issues.
Other tips to make the most out of your Ninjaflex filament
Tweak your settings for Bowden extruders.

The debate between using direct extruders or Bowden extruders for flexible filaments has been around for a very long time. On one hand, most people would say that direct extruders are a lot easier to use. On the other, a minority attests that Bowden extruders don’t deserve the poor reputation they get.
Whichever side of the debate you’re on, the fact is that flexible filaments like Ninjaflex can buckle and deform under stress. This is the main cause of extruders clogging when working with flexible filaments. The problem is further emphasized when using Bowden extruders only because of the larger distance between the extruder and the nozzle.
If you’re using a direct extruder, then you should have no problem using the settings we have outlined above.
While it’s true that using a Bowden extruder with Ninjaflex is still possible, you can expect to spend a bit more time to get the perfect extruder settings. It might be easier to fix the printing speed at 30 mm/s and play around with the printing temperature until you get consistent extrusion. You will also likely need to increase both the retraction distance and speed.
Be conservative with overhangs
Overhanging features can be problematic when printing with Ninjaflex because of how the filament lacks strength. This is the reason for the recommendation to print slowly and with the cooling fan set at maximum. Still, you may want to be conservative with the overhanging features of your model.
First off, try and orient your model to have as few overhangs as possible. However, getting rid of all overhangs is likely not possible. If it cannot be helped, then be generous with the support structures in your slicer settings. Supports may be a pain to remove but having more of them is less of a problem than having your model’s features collapse.
Do a test print
The best way to check if you have dialed in the right settings for your Ninjaflex filament is to do a test print. The standard Benchy model works well enough for this purpose. During the test print, check how well overhanging features hold up and be on the lookout for signs of poor bed adhesion.
The Benchy model is perfect because it’s small – it does not use a lot of filament and could be printed in less than an hour. These are important considerations when you’re printing with a filament as expensive as the Ninjaflex. You’ll also end up with a squishy Benchy which is never a bad thing.
Final thoughts
As the most popular brand of flexible filaments, Ninjaflex is likely how most people are introduced to 3D printing with “soft” plastics. While working with Ninjaflex is challenging at first, the results are well worth the effort. Just make sure to stick with test prints at first – Ninjaflex filament is too expensive to waste!
As with any material, being able to use Ninjaflex optimally requires going through a learning curve. Getting the right slicer settings will take a bit of trial and error, but you should get the perfect settings eventually. Again, a fundamental understating of 3D printing and how polymers behave will come in handy.