Best Open Source 3D Printers

In simplest terms, an open source 3D printer refers to a 3D printer whose hardware and software information are available to the public, typically under a license. The information can be used by anyone to build, modify, or improve the 3D printer.
If you’re looking for real open source 3D printers, then you’ve come to the right place. In this guide, we introduce you to completely open source 3D printers. The hardware and software information of all the products listed here can be easily found on the internet.
| Budget |
|---|
 |
| Original Prusa i3 MK3 |
| 4.9/5.0 |
| 14 lb |
| USB, SD card |
| Remarkably low noise level and power outage resume capability. |
| Check Amazon |
| Best Value |
|---|
 |
| LulzBot Mini |
| 4.6/5.0 |
| 18.9 lb |
| USB |
| Good print speed and includes auto-leveling system. |
| Check Amazon |
| Top Pick |
|---|
 |
| LulzBot TAZ 6 |
| 4.8/5.0 |
| 33 lb |
| USB, SD card |
| Sturdy aluminum frame and relatively low noise level. |
| Check Amazon |
Some people confuse open source 3D printers for 3D printers that are simply compatible with most commercial printing software or can print with filaments from third-party vendors. We can’t really blame you if you’re in the same boat – manufacturers can be misleading.
Many companies have the audacity to market their 3D printers as “open source” when in fact they don’t really share their products’ source code and schematics – they usually just throw lame excuses to people asking for said information.
Best Open Source 3D Printers Comparison Table
| Make and Model | Weight | Connectivity | Price |
|---|---|---|---|
| LulzBot TAZ 6 | 33 lb | USB, SD card | Check Price |
| Original Prusa i3 MK3 | 14 lb | USB, SD card | Check Price |
| LulzBot Mini | 18.9 lb | USB | Check Price |
| Ultimaker 3 | 23.4 lb | Wi-Fi, USB | Check Price |
| BCN3D Sigmax | 39.7 lb | USB, SD card | Check Price |
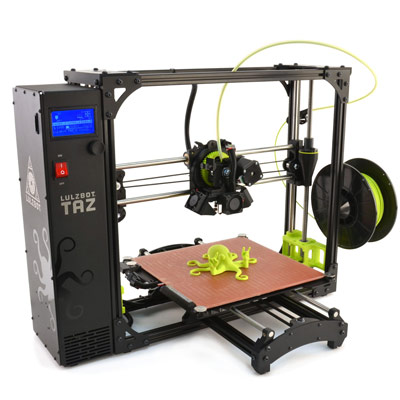
1. LulzBot TAZ 6
Editor’s Rating: 4.8/5
Go ask around online forums about open source 3D printers and it won’t take long before someone mentions LulzBot as one of the best in that category. Even in discussions not limited to open source 3D printers, LulzBot almost never fails to get at least one mention.
The TAZ 6 is the current flagbearer of Aleph Objects’s lineup of open source 3D printers. It’s a brilliant machine designed for tinkerers and hobbyists, boasting specifications not many products in the same price range can hope to match or surpass. If you’re in the market for an open source 3D printer, the TAZ 6 should be the first product you should give a hard look.
The TAZ 6 is mostly assembled right out of the box, with only a few parts that need to be installed manually. The minor assembly shouldn’t take you more than 30 minutes, thanks to the incredibly detailed manual the TAZ 6 comes with. In fact, the included manual is one of the most detailed and well-written manuals you will ever encounter, which already speaks volumes about Aleph Objects’s commitment to quality.
Most open-framed 3D printers come with a separate power box. The TAZ 6 isn’t one of them. The TAZ 6’s power box is neatly attached to the aluminum frame, giving it a smaller footprint compared to other large open-framed 3D printers. Featured on the power box are a power switch and a small LCD interface used for adjusting the printer settings and for printing untethered via SD card.
Setting up the TAZ 6 is straightforward. The print bed is easy to level and the custom Cura printing software – called the Cura LulzBot Edition – is relatively easy to grasp. If you have prior experience with 3D printers, the initial setup should be a breeze, and even if you’re a complete newbie, the comprehensive manual ensures it won’t take hours to get the TAZ 6 up and running.
One of the TAZ 6’s most notable pluses is that you get access to a large build platform. Combine that with the machine’s compatibility with various filaments – including ABS, HIPS, PVA, Nylon, and PETG – and you have yourself a 3D printer more than capable of taking on larger and more complex 3D models. Just make sure you’re running with the right print settings for the job; otherwise, the TAZ 6 won’t be able to produce optimum results.
The TAZ 6 isn’t the best at regulating temperature, which is hardly surprising considering it doesn’t have an enclosure. The lack of an enclosure also exposes it to dust, so you need to be diligent about maintenance if you want to minimize performance issues. Of course, both issues can be remedied by building your own enclosure, but the trade-off is that you give up the TAZ 6’s relatively small footprint.
It’s not that hard to like the TAZ 6. It’s one of those 3D printers that delivers on nearly everything mentioned in marketing materials. If you can afford to spend $3,000 on a 3D printer, the TAZ 6 should be the first product on your list. If you can’t … well, you can check out our picks for best budget and best value.

| Tech Specs |
|---|
| Resolution: 50 microns |
| Volume: 11 x 11 x 9.8 in |
| Filament: 3 mm |
| Type: ABS, PLA, HIPS, and others |
| Weight: 33 lb |
| Connect: USB, SD card |
| The Pros |
|---|
| Easy to set up |
| Outstanding print quality and performance |
| Bed leveling is quick and easy |
| Relatively low noise level |
| Large build volume |
| Excellent after-sales support |
| Sturdy aluminum frame |
| Comprehensive instruction manual |
| The Cons |
|---|
| No enclosure |
| Expensive |
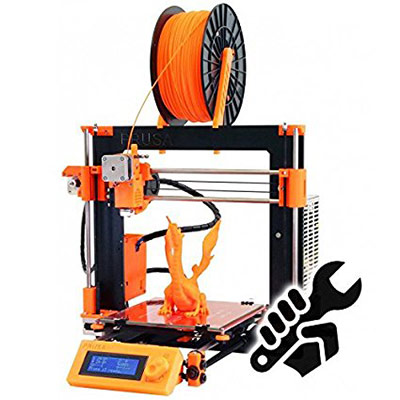
2. Original Prusa i3 MK3
Editor’s Rating: 4.9/5
Everyone should send flowers and a thank-you card to Josef Prusa every month for remaining committed to open source hardware and software. If he had decided to send the Original Prusa i3 MK3 down the MakerBot path, the 3D printing community would have been robbed of one of the most affordable open source 3D printers on the market.
Released just last year, the MK3 is the latest in Prusa’s acclaimed series of open source 3D printers. It’s available in two packages: a DIY kit and a pre-assembled package. The price difference between the two is $200, with the DIY kit obviously being the more affordable one. If you are good with electronics or have prior experience with 3D printers, go for the DIY kit. If you don’t want to deal with the assembly, which can take 6-8 hours, pick up the pre-assembled package.
Right out of the box, the MK3 makes it clear it’s built with nothing but quality in mind. The included instruction manual is incredibly thorough, providing everything you need to get your 3D printer up and running. If you go for the DIY kit, rest assured the instruction manual will guide you throughout the entire assembly process.
The MK3 is better than the MK2S in almost every way. It’s faster and more precise, producing the kind of results most 3D printers struggle to match even in their best print settings. The MK3’s print quality is outstanding, with a level of detail and smoothness that would make you glad you didn’t settle for any other open source 3D printer under $1,000. The MK3 is remarkably quiet, too, which is something you don’t normally say about an open-framed 3D printer.
The MK3 is compatible with all sorts of filament types and comes with a generous build volume, allowing you to experiment with advanced materials and more complex 3D models. If you want to double your fun, you can also get the MK3 Multi-Material 2.0 upgrade, which allows you to print with up to five – yes, five! –different materials.
When printing a large-volume 3D model, your worst nightmare is a power outage, which forces you to start over from scratch. The MK3 is equipped to deal with such a scenario. In the event of a power loss, the MK3 saves your progress, allowing you to continue from where you left off. It’s a handy feature that should be a staple in every 3D printer.
Speaking of handy features, the MK3 also includes a smart filament sensor. It automatically pauses once it’s out of filament and waits for you to load a new roll of filament, allowing you to print high-resolution 3D models that take over 12 hours to complete without missing a beat. In addition, the MK3 can detect if the nozzle is clogged with filament, automatically pausing and giving you the chance to clean the nozzle before moving forward.
It’s almost unfair to the competition that the MK3 can be had for less than $1,000 – the DIY kit is available for just $750. If you read the specs and features without looking at the product name, you’d assume you’re reading about a 3D printer worth $2,000. If you want the best open source 3D printer that you can get for less than $1,000, the MK3 is for you.
| Tech Specs |
|---|
| Resolution: 50 microns |
| Volume: 9.8 x 8.3 x 8.3 in |
| Filament: 1.75 mm |
| Type: ABS, PLA, Nylon, and others |
| Weight: 14 lb |
| Connect: USB, SD card |
| The Pros |
|---|
| Comprehensive instruction manual |
| Easy to set up |
| Generous build volume |
| Exceptional print quality |
| Smart filament sensor |
| Remarkably low noise level |
| Fast print speed |
| Power outage resume capability |
| Good customer support |
| The Cons |
|---|
| No enclosure |
| Not readily available in popular online stores |
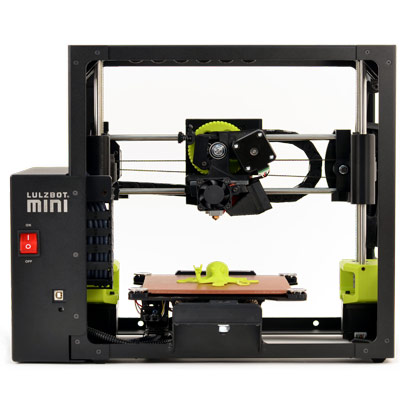
3. LulzBot Mini
Editor’s Rating: 4.6/5
If you want a desktop 3D printer with a small footprint that is close to the TAZ 6 in quality, the obvious choice would be the LulzBot Mini, the TAZ 6’s little brother. It’s arguably the best “mini’ 3D printer you can get today, bringing excellent value to the table while staying fairly affordable.
The Mini looks very similar to the TAZ 6. It’s an open-framed 3D printer housed in a sturdy metal frame, giving it more stability compared to mini 3D printers held together by acrylic frames. The power box is attached to the side, which saves space. But unlike the TAZ 6, the Mini has no onboard controls, not counting the red power switch.
Similar to the TAZ 6, the Mini arrives nearly assembled and only requires minor assembly on your part. Installing the remaining parts will only take a few minutes, thanks in part to the Mini’s detailed instruction manual, which walks you through the entire initial setup. In all, the initial setup should only take around 30 minutes to one hour, maybe two if you take your time reading the manual and double-checking every screw.
The Mini presents a straightforward operation that makes it accessible to everyone, even those with zero experience with 3D printers. It’s easy to use, includes a user-friendly custom printing software, and, most crucially for beginners, comes with an auto-leveling system that works as advertised. The latter eliminates the manual bed leveling process, which can be really tricky and time-consuming.
The heated print bed has excellent adhesion right out of the box, so you don’t need to resort to tricks like applying glue. The print bed heats up fast, too. The reason to be excited about the heated print bed is that you get to print with all sorts of filaments, including ABS, Nylon, and HIPS. Most mini 3D printers are limited to PLA, so the Mini’s versatility alone is enough to justify the price tag.
But what if you only plan to use PLA and don’t really care about the Mini’s versatility? In that case, the Mini’s print quality will do the convincing. The Mini’s print quality is one of the smoothest and most detailed you will ever see from a mini 3D printer, provided you’re running with the right print settings. It embarrasses most of the competition, making other mini 3D printers look like cheap toys.
The Mini’s print speed is fairly fast, too, with small items only taking a few hours to complete. The bad news is that it can be really noisy, which is a contrast to the TAZ 6’s relatively low noise level. In addition, the Mini’s limited build volume may not be adequate for more complex projects, although it’s more generous than other mini 3D printers like the MakerBot Replicator Mini.
Since it doesn’t have an onboard interface, which removes standalone printing off the equation, the Mini needs to be constantly tethered to your computer while printing. It’s not really a deal-breaker. But you do have to deal with the fact that your computer has to be running all the time during marathon printing and while printing high-resolution 3D models that can take over 12 hours to build.
In summary, the Mini is a reasonably priced desktop 3D printer that has little trouble keeping up with the big boys, so to speak. It’s a mini 3D printer but offers way more upsides than your average mini 3D printer – which isn’t really surprising considering it’s practically just a smaller TAZ 6.
| Tech Specs |
|---|
| Resolution: 50 microns |
| Volume: 6 x 6 x 6.2 in |
| Filament: 3 mm |
| Type: ABS, PLA, PETG, and others |
| Weight: 18.9 lb |
| Connect: USB |
| The Pros |
|---|
| Extremely easy to set up right out of the box |
| Includes auto-leveling system |
| Sturdy metal frame |
| Heated print bed |
| Great print bed adhesion by default |
| Impressive print quality |
| Good print speed |
| Excellent customer |
| The Cons |
|---|
| Limited build volume |
| No enclosure |
| No onboard interface |
| No offline printing capability |
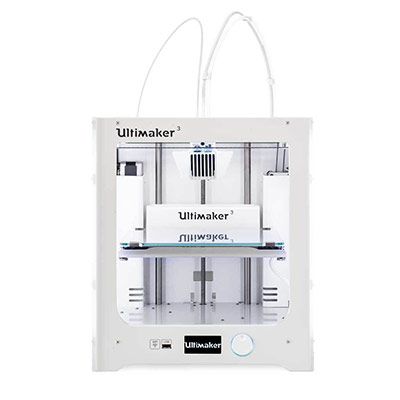
4. Ultimaker 3
Editor’s Rating: 4.6/5
The Ultimaker 3 was designed to be an improvement over the Ultimaker 2 and Ultimaker 2 Plus in almost every facet. Based on both customer and critic reviews so far, it appears Ultimaker, for lack of a more appropriate word, nailed it.
However, the Ultimaker 3 comes with a number of notable downsides that prevent it from taking the crown here in our guide to the best open source 3D printers – most notable of which is the price tag. The Ultimaker 3 is an expensive high-end machine that can make even the most hardcore hobbyists and dedicated professionals cringe at the sight of that $3,000 tag. It’s not for everybody. If you’re operating with a budget not even remotely close to that number, stop reading now; otherwise, carry on.
Like the TAZ 6, the Ultimaker 3 is mostly assembled out of the box. Just install the remaining parts, which should probably take 10-15 minutes, and you’re good to go. But of course, you need to go through the initial setup first before you can actually start printing. Fortunately, the Ultimaker 3 is a breeze to set up, taking only about 30 minutes to one hour, and that includes the initial tinkering on the software side.
The Ultimaker 3’s design is identical to the Ultimaker 2. It’s housed in a sturdy frame with a clean, all-white finish. The spool holder is still located at the back, which can make changing the filament a hassle if you have the Ultimaker 3 propped against a wall. Out front, the Ultimaker 3 features a USB slot and a small knob-operated interface for direct control.
With the Ultimaker 3, you now have the convenience of being able to directly send prints over the network and monitor your print progress from afar, the latter courtesy of the built-in camera. The wireless option may produce headaches in the beginning while you’re trying to establish a connection. But once connected, it works and is more than reliable, which can’t be said for other Wi-Fi enabled 3D printers.
Featuring a dual filament extrusion setup, the Ultimaker 3 is right up there near the top in terms of print quality. It’s capable of producing exceptionally detailed and smooth results that can make spending all that money on it seem like a genius move. The dual extrusion setup works like a charm and produces more successful results than issues, which has not been the case for lots of other dual extruder 3D printers.
On the other hand, the Ultimaker 3 is hilariously slow. Even small, low-resolution 3D models take a while to finish. The Ultimaker 3’s unimpressive print speed becomes even more pronounced while printing in dual filament extrusion mode. Seriously, the Ultimaker 3 is so slow that you’d be tempted to only run it in low settings in order to print more stuff per week.
Several users have reported having issues with the Ultimaker 3 when printing with ABS. It appears the Ultimaker 3 is not cut out for that, at least by default. In order to produce successful results with ABS, you need to build a door for the Ultimaker 3. It’s not that hard to build one.
If you want to move on to high-end territory and are willing to cough up $3,000, the Ultimaker 3 is one of the best open source 3D printers you can get in that price range. It’s reliable, has outstanding print quality even in low settings, has a large build volume, and is very easy to use.
In case you need more build volume, you can go for the Ultimaker 3 Extended, one the best large 3D printers out on the market. But if you have the financial capability to spend $4,000 on a 3D printer, you might as well go for something better in the form of the BCN3D Sigmax which … well, read on below for more details on that one.
| Tech Specs |
|---|
| Resolution: 20 microns |
| Volume: 8.5 x 8.5 x 7.9 in |
| Filament: 2.85 mm |
| Type: ABS, PLA, PETG, and others |
| Weight: 23.4 lb |
| Connect: Wi-Fi, USB |
| The Pros |
|---|
| Exceptional print quality |
| Large build size |
| Wi-Fi enabled |
| Integrated camera for remote monitoring |
| Robust construction |
| Straightforward initial configuration |
| Dual filament extrusion |
| Good customer support |
| The Cons |
|---|
| Terribly slow printing speed |
| Expensive |
| Not fully enclosed |
| Auto-leveling feature is hit-and-miss |
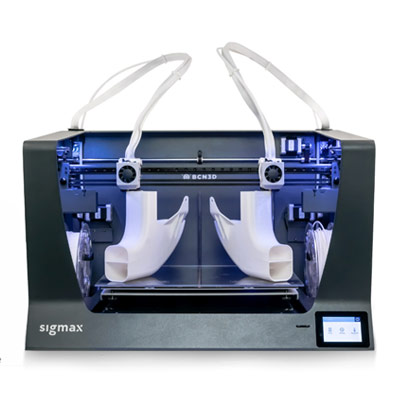
5. BCN3D Sigmax
Editor’s Rating: 4.7/5
The BCN3D Sigmax is one of the most expensive open source 3D printers out on the market. It makes the TAZ 6 look like a bargain and the Prusa i3 MK3 a cheap toy from a flea market. If you have no regard for your wallet’s feelings and can easily afford a high-end 3D printer, check out the Sigmax.
The Sigmax is a massive 3D printer that arrives fully assembled and ready to go right out of the box. It takes less than one hour to get it up and running, which involves the usual initial tinkering on the software side. It ships with a Cura-based printing software that includes plenty of options for both beginners and intermediate users.
Boasting an independent dual extruder system, the Sigmax screams “high-end” from every angle, unlike other expensive 3D printers that merely look luxurious on paper. It’s housed in a robust frame that helps with stability during printing. Everything is secured inside the frame, including the spool holders. If you want an enclosure, you can either buy the official Sigmax enclosure or build your own enclosure.
The Sigmax includes a touchscreen interface, located at the base. The interface is user-friendly, responsive, and includes straightforward options. For connectivity, the Sigmax supports USB connection and offline printing via SD card. It lacks a Wi-Fi option, though, which is kind of disappointing considering the price.
The Sigmax’s independent dual extruder system is the real highlight here. It opens you up to a lot of possibilities, most obvious of which is that you can print with two colors. With the dual extruder setup, you can a) print soluble supports for more complex models, b) print two identical models at the same time, and c) print mirror images of a single model. The latter two can considerably speed up productivity, which is especially beneficial to those who print for business purposes.
In regard to print quality, the Sigmax is exactly as advertised. It’s got outstanding print quality even in low settings, producing incredibly smooth and highly detailed 3D models in a reliable manner. It’s compatible with all sorts of filament types, which include PETG, Nylon, TPU, and ABS. The Sigmax’s enormous build volume means you literally have a lot of room for larger and more complex 3D models, so don’t limit yourself to small, non-functional items – think big!
Ultimately, the Sigmax is not for everybody, so we couldn’t really crown it as our top pick despite all the good things we can say about it. Not everyone has the financial capability to drop $4,000 on a 3D printer. But in an alternate world in which everyone has a loaded wallet, we’d happily recommend the Sigmax to anyone looking for a top-class open source 3D printer.
| Tech Specs |
|---|
| Resolution: 50 microns |
| Volume: 16.5 x 11.7 x 8.3 in |
| Filament: 2.85 mm |
| Type: ABS, PLA, TPU, and others |
| Weight: 39.7 lb |
| Connect: ABS, PLA, TPU, and others |
| The Pros |
|---|
| Easy to use |
| Straightforward initial setup |
| Massive build volume |
| Fantastic print quality |
| Sturdy frame |
| Independent dual extruder setup |
| Supports offline printing |
| User-friendly default printing software |
| The Cons |
|---|
| Eye-popping price tag |
| No Wi-Fi option |
| Not fully enclosed |
Contents