How to Optimize Layer Height in 3D Printing

The rule of thumb is to set a layer height that is between 25% to 75% of the nozzle diameter. Smaller layer height favors better detail accuracy and resolution, while larger layer height favors optical properties and faster printing.
Getting your 3D printed project just right requires a confluence of about a dozen different factors, all dialed in to the best values. Some of these are more important than others, but one factor that is arguably one of the most critical is layer height.
The definition of layer height may be very simple, but this understates just how crucial layer height is in determining output quality parameters like detail accuracy and strength. How exactly should you set the layer height of your 3D print? Is there a range of values that are considered best?
What is layer height?
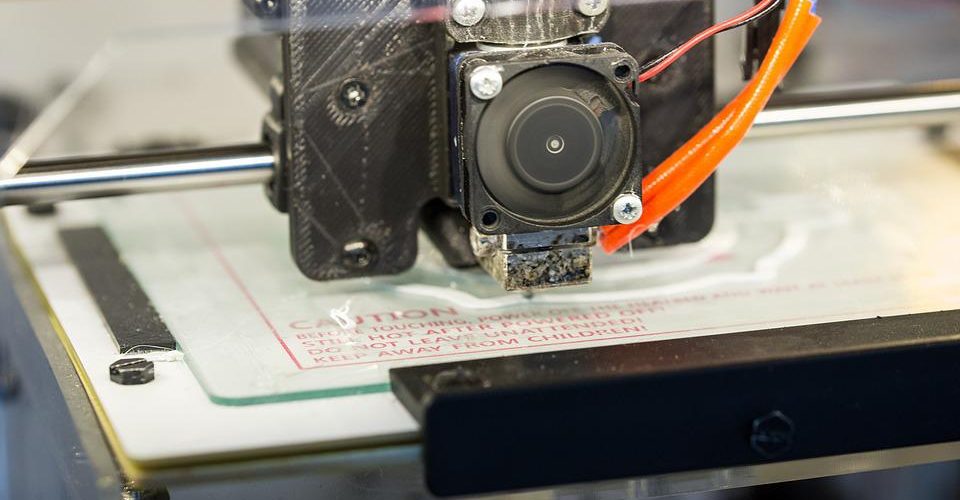
Simply put, layer height refers to the height or thickness of each layer as it is extruded from the nozzle of the 3D printer. Factors like the nozzle size and the movement of the 3D printer along the z-axis determine the height of each layer.
The actual value of layer height can be set using the slicer software. The minimum layer height of a 3D printer varies from one to another. This is one of the most important technical specifications that should be considered when buying a 3D printer.
Why is layer height so important?
Layer height is a 3D printing parameter that affects many other performance and quality metrics. It is easily one of the most important parameters in this respect, emphasizing the need to dial it in carefully during slicing. Here are some factors to consider when setting your project’s layer height:
Speed
This is the most obvious effect of changing layer height. Printing with thicker layers can massively reduce printing time since a model will be printed with fewer layers. The opposite is also true – reducing the layer height to a minimum can increase printing time by a factor of two or above.
Detail accuracy
If your model has a lot of very fine details, you might be better off printing at smaller layer height values. Thinner layers better capture the intricacies of any design, resulting in better detail accuracy and generally superior visual appeal.
Another testament to the importance of layer height is the fact that most 3D printers have a higher resolution on the z-axis compared to the x and y axes. With this in mind, a common strategy is to position very fine details to be printed along the z-axis. Reducing layer height further enhances this design strategy.
Optical properties
The optical properties of a finished print become important if your aim is to 3D print an object that is as close to transparent as possible. A recommended strategy is to print with thicker layers, thus also reducing the number of layers for any given model.
The goal behind this strategy is to print a model with as few layer boundaries as possible. These layer boundaries can compromise the transparency of a print as they can cause light to refract or reflect rather than pass through.
Bridging and overhang performance

Overhang features and bridges are just about unavoidable in 3D printing, especially if you’re working on highly complex models. If you’re having trouble with these parts, it might be a good idea to print at a smaller layer height.
By printing thinner layers, bridges and overhangs are better supported by the previous layers because of a greater overlap. Thinner layers are also lighter, making them less likely to collapse.
Curved surfaces
Curved surfaces tend to look smoother when printed at low layer height values. Thinner layers do a much better job of simulating the look of an actual curved surface, even if they are still made of flat layers stacked on top of each other. This benefit also extends to any project that you want to look as smooth as possible even before post-processing.
Strength
There are different schools of thought when it comes to how layer height affects the overall strength of a 3D print. On one hand, printing thicker layers reduces the number of layer boundaries in any print. These are the natural weak points of any 3D printed project, so reducing them should make the print stronger.
On the other hand, printing thinner layers also allows them to melt into each other better. This allows for layer bonding at the molecular level, especially if the method is complemented by higher printing temperatures.
Based on some tests, the best strength performance actually comes from layer thickness in the middle range. This balance between the two extremes indicates that there is some merit in both claims that are in favor of either high or low layer thickness values.
Making minor adjustments to layer height settings in the slicer can have huge effects on a 3D printing project. You may end up with longer printing times, overhangs that collapse, or small details that don’t show up. When done right, setting an optimal layer height should just hit the right balance based on the objectives of your project.
What is the best value for layer height?
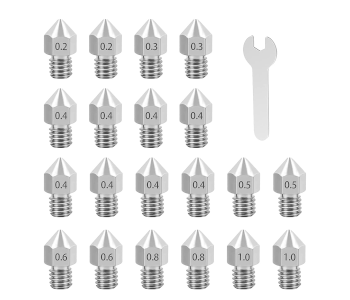
There are two factors to consider when setting the optimal layer height – the diameter of the nozzle and the size of the “step” of the Z-axis stepper motor.
The more basic rule of thumb is to set the layer height between 25% to 75% of the diameter of the nozzle. This is still a broad range, but these are the recommended values depending on the purpose of the 3D printing project. However, taking your nozzle diameter and multiplying it by three-fourths is not enough – there are also “magic numbers” that you will do well to follow.
For best results, you need to make sure that the layer height value is a multiple of the “step” of the Z-axis stepper motor. Some people refer to these as the “magic numbers” for assigning layer height values for any specific 3D printer. Using these numbers ensures that layer thickness will be more consistent throughout a print and that the target layer height values are actually attained.
For instance, the Z-axis stepper motors of printers like the Ender 3 or the CR-10 allows movement in steps of 0.04 mm. This means that multiples of 0.04 mm. should be used as layer height values.
If you have a 0.4-mm. diameter nozzle and you’re targeting a layer height that is 25% of the nozzle diameter, then the ideal layer height is 0.1 mm. However, this is not a multiple of 0.04 mm. This means that you will need to adjust the layer height setting in your slicer in either direction by setting it at 0.08 mm. or 0.12 mm. Either way, both these layer height values can be more realistically attained with the movement of the Z-axis stepper motors.
Conversely, you can target a 75% value of the nozzle diameter as the ideal layer height in cases when you want to reduce printing time. The ideal layer height in this case is 0.3 mm. Again, this is not a multiple of 0.04 mm. step value. The layer height setting will then have to be adjusted to either 0.28 mm. or 0.32 mm. Going beyond the 75% threshold is generally not recommended, so the 0.28 mm. setting is more sensible in this scenario.
There is ultimately no best value to set the layer height of your project. It all depends on your objectives for the project and the hardware of your 3D printer. Each layer height setting still involves a dynamic balance between different quality and performance parameters.
Final thoughts
Layer height is only one of about a dozen parameters that need to be set on the slicer before starting a 3D print. It seems like a very simple setting but it greatly influences the quality and appearance of the finished product, as well as the execution of the 3D printing process.
There are only a few rules of thumb to consider when setting an optimal layer height value. Hardware considerations include the diameter of the nozzle and the size of the step of the Z-axis stepper motors. Outside of these rules, the choice of layer height is really up to you. It becomes a matter of which parameter to prioritize – detail accuracy, resolution, printing time, mechanical strength, or optical properties.