Over-Extrusion in 3D Printing – Causes and How to Solve

Over-extrusion happens when the 3D printer extrudes more filament than what is intended. This can typically be resolved by making a few adjustments in the slicer settings, particularly in printing temperature, flow rate, extrusion multiplier, or filament diameter. You can also check for hardware defects such as a worn-out nozzle.
If you want to make your 3D prints look perfect, you will have to dial in your extruder settings just right. Too little extrusion is as equally as bad as too much extrusion. In this issue, we will be tackling the issue of over-extrusion. What causes it and how can you fix it?
Signs of over-extrusion

By its very name, over-extrusion happens when the 3D printer extrudes more filament than it intends to. This can manifest in different ways. The most common result of over-extrusion is that the layers of 3D print end up drooping because of the excess filaments. Strong and blobs are considered less prominent effects of over-extrusion that can also ruin the aesthetics of a 3D print.
If left unattended, the excess filament being extruded by a 3D printer can cause excess pressure in the extruder that can develop into clogged material. This is a serious problem because of how much manual disassembly and cleaning it will take for it to be resolved.
In any case, it is best to attempt to resolve the root cause of over-extrusion at the first sign that it is becoming an issue. Otherwise, it can progress to a more serious problem – one that cannot be solved by just adjusting some slicer settings.
How to solve over-extrusion
As with any other 3D printing problem, we must be methodical in trying to solve over-extrusion. It can have several possible causes and going through the list of these causes one by one is a great way to develop an understanding of how 3D printers work.
Check for nozzle damage
The first and easiest thing you can do is to look at your nozzle to make sure that it has not yet been worn out. Brass nozzles are particularly prone to this, especially if you have been printing with filament that is abrasive such as polycarbonate, wood, or metal.
The best way to do this is to compare the opening of your current nozzle with another nozzle that has not yet been used. If the difference is visually apparent, then you definitely need to replace the old nozzle.
Printing with a worn-out nozzle will mean that layers will end up being thicker or taller than intended. This will significantly mess up the dimensional accuracy of the finished product. One danger of printing layers thicker than intended is that they are more likely to droop because of all the extra material.
Confirm your filament diameter setting
When setting up the slicer settings for your project, the slicer assumes that you are providing accurate details for it make the calculations for several of the printing parameters. If you provide the wrong details, then you are almost certainly going to run into problems.
It may sound ridiculous but inputting the wrong filament diameter is an incredibly common error in 3D printing. This typically happens when you’re switching from 1.75 mm to 2.85 mm or vice-versa. It would not hurt to make a quick check on the filament diameter setting in your slicer and confirm that it corresponds to the actual diameter of your filament.
Lower the printing temperature
When thermoplastic melts, its molecular bonds stretch to a degree where the plastic takes on more fluid-like properties. This is ideal for extrusion as it allows the plastic to conform to the small opening of the nozzle. After this, the molecular bonds become shorter again as the plastic cools down.
Signs of over-extrusion can come up if the plastic is heated to too high temperatures. As the plastic becomes more fluid, it becomes more likely to create strings or blobs as it drips down from the nozzle. Even if stringing or blobs were avoided, printing too hot will make it more likely for the layers to droop because cooling them down takes too long.
If you are seeing such signs, then you can try to reduce the printing temperature in 5 °C increments. Make sure to still keep within the recommended temperature range for the filament you are using and to watch out for signs of under-extrusion. If you are already at the lowest recommended temperature and still see signs of over-extrusion, then you will have to look at other possible causes.
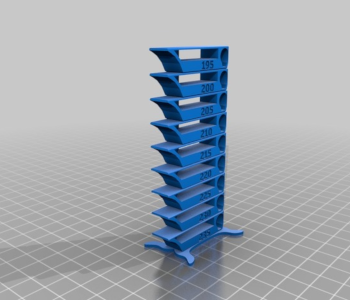
Printing a temperature tower is a good way to test different printing temperatures simultaneously.
Adjust your extrusion multiplier
The extrusion multiplier is a setting in your slicer that allows for fine-tuning of the printer’s filament flowrate. By default, it should be set at a value of 1. However, it is common to adjust the extrusion multiplier to any value between 0.9 and 1.1.
The ideal way to calibrate the extrusion multiplier is to print a sample model with a shell that is exactly one layer thick. You will then measure this wall thickness and compare it to the target wall thickness based on the slicer settings. However, doing this reliably will require the use of a high-precision digital caliper.
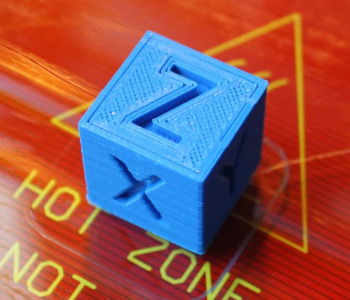
If you don’t have the equipment and the patience to do the calibration, you can just eyeball the best setting by doing a few calibration prints. We suggest using this 20mm calibration cube. For each iteration of the trial, you will visually assess the product to determine if more adjustments will be necessary.
The idea is that the layers of the calibration cube should become less visible if you reduce the extrusion multiplier. You will know that the extrusion multiplier has been set too low if gaps between layer lines start to appear. It would be best to adjust this parameter by 0.1 increments until you are satisfied with the results.
Reduce the flowrate
The flow rate is just another parameter that controls the rate at which filament is extruded by the 3D printer. In a way, it functions the same as the extrusion multiplier. Either the flowrate or extrusion multiplier can be adjusted to fine-tune the 3D printing flowrate. These parameters work independently.
The default value for flowrate is 100 but adjusting it between 90 and 110 is typical. As with the extrusion multiplier, it is best to do trial and error using a small calibration cube and adjust the setting in unit increments.
Making any changes to your printing or extrusion settings will likely also affect the performance of your 3D printer in several other aspects. Before printing your project, we suggest doing a torture test print first just to check if the adjustments you have made did not create other problems.
Final thoughts
Over-extrusion is a very common problem in 3D printing and one that you need to learn to spot quickly. It’s a fairly minor problem but can still easily ruin the appearance of the finished product. If left unchecked, a minor over-extrusion problem can lead to clogging of the extruder.
The good news is that it’s usually very easy to solve with just a few slicer setting adjustments. There will likely be some trial and error involved, but it’s nothing as headache-inducing as other 3D printing problems.