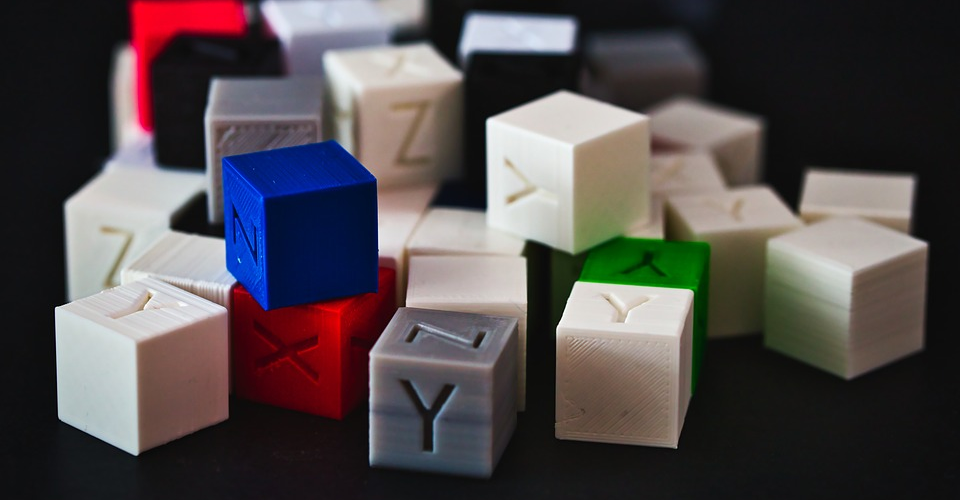
Tips on Painting Your 3D Printed Models

If you’re just creating 3D printed models for fun, then finishing it off with some light sanding to smooth its surfaces is perfectly fine. However, if you’re creating prototypes for presentation or if you create these models professionally, you’ll have to take the finishing process all the way to the last step -painting.
It may sound simple, but getting good results when you print your 3D prints may take a bit of preparation and good technique. You’re going to need a bit of practice to get perfect results, but the tips we’ve listed here should get you a good start.
1. Get all materials and tools ready
- Goggles or any eye protection
- Face mask or any respiratory protection
- Gloves
- Paper towels
- Pair of pliers
- X-acto knife
- Rubbing alcohol
- Plastic adhesive (depends on the material used for the model)
- Sandpaper with different grit numbers
- Large container filled with water
- Spray primer/filler for plastic
- Hanging cord
- Acrylic paint in color of your choice
- Plastic polishing compound
Another thing we need to remind you is to make sure that your working area has good ventilation. You will eventually have to deal with fine plastic particles, solvent fumes, or paint in aerosol form – basically stuff that you would not want to breathe in.
Which paint to use? In choosing paint to use for your 3D printed model, there are two factors to consider: the composition of the paint and the method of application.
There are several types of paint that are compatible with common filament plastics. The most accessible would be acrylics, enamels, lacquers, or oil-based paints. If you’re not familiar with using any of these, then we recommend getting an acrylic paint because of how quickly it dries, how easy it is to apply an even coat, and the fact that you can easily clean up any mess you make with just water.
In terms of application, you may either get a paint that needs to be applied with a brush or one that comes in a spray can. While painting with a brush is much cheaper, it also requires a deft hand and good amount of skill to apply the paint in even layers. If you’re not feeling too confident with your hand-painting skills, then we suggest going the spray paint route. This isn’t foolproof – you’ll still need good technique to pull it off perfectly – but the skill barrier is much lower.
2. Plan ahead – even before you print
If you’re printing a model that you plan to finish and paint, then you can make a few tweaks to the slicer software settings to make the painting job easier. Setting a smaller layer thickness value is one of the easiest ways to make the surfaces of your finished print easier, especially if it’s a surface that is curved with respect to the z-axis.
Support structures, although necessary at times, make finishing a print much more difficult. Removing the support structures using a pair of pliers is hard enough, but what takes a frustratingly long amount of time is sanding smooth the nubs that will inevitably get left behind. If you’re creating a print that will have to be finished with professional-grade quality, then using as few supports as possible is going to make the job a whole lot easier.
3. Remove support structures
Let’s a fast-forward a few hours and jump ahead to the point when you have completed printing your model. Let it cool down for several minutes and carefully remove it from your build platform using a spatula.
First things first: put on your gloves, eye protection, and respiratory protection. Trimming off support structures could result in small pieces of plastic flying around, which could hit your eyes. When you move on to the later steps, you’ll have to contend with fine plastic dust and aerosol compounds. Just to reiterate, make sure that you’re working in a well-ventilated place.
Your first order of business is to remove any lingering support structures, rafts, or skirts. Our favorite tools for this job are a pair of pliers and an X-acto knife. This is a perfect combination that should allow you to quickly remove large pieces using the pliers and dull down the remaining nubs with a swipe of the knife.
Remember to be extra careful when removing supports from small and very delicate parts. You would not want to ruin your model just after you have finished printing it.
4. Glue separate parts together

Depending on the complexity of your model, you might have had to divide the model into parts and print them separately. This is a common technique for large builds or for designs that simply won’t work when printed as a single piece. If you’re under this situation, then this is the best time to glue those pieces together.
The choice of which adhesive compound is best depends on the type of material you used to print your model. If you’re working with ABS, then making your own ABS glue is, by far, the cheapest and most effective method. Two-part epoxies can also work, especially if there are gaps that you need to fill. Cyanoacrylate glue or super glue is a good go-to option when you simply can’t decide.
In any case, you will need to clean the surface of the model that you will apply the adhesive to. This is best done by a couple of dabs of rubbing alcohol. Adhesive works best on a rough surface; thus, the reason we’re doing it before the sanding step. If you find that the surface you’re applying the adhesive to is still too smooth, you can give it a few quick rubs using the coarsest sandpaper you have.
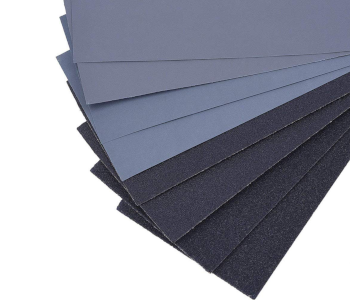
5. Sand the surface smooth
With the supports out of the way, it’s now time to get rid of all those pesky layer lines and artifacts. Get your set of sandpaper with the lowest grit number (coarse grit) and start sanding the surface of your print using a circular motion. Be patient and take it slow, as sanding quickly can produce heat, which can melt and deform your model. Give the model a wipe-down with paper towels every now and then to remove any of the leftover plastic dust.
Once you’re satisfied with the first pass-through of the coarse grit sandpaper, you can move on the next higher grit number. The process should get easier and faster as the sandpaper grit you are using becomes finer.
Continue repeating this process until you get to a grit number of about 400. At this point, we recommend switching to a wet sanding method. This is simply done by taking your container of water, fully submerging your model, and continue sanding it as normal. This serves to mobilize the dust particles that get removed during the sanding process, resulting in a smoother surface at less time needed.
Continue doing the wet sanding method as you move on to even higher grit numbers. We suggest going up to at least a 1000-grit sandpaper to get acceptable results. You can go higher, of course, if you want an even smoother model.
6. Apply a primer
Despite your best efforts in sanding, your model will inevitably have very small crevices that can ruin its overall look. A primer fills in these crevices and smoothens the surface of your model to a degree unattainable by simple sanding.
REMINDER: Use a primer compound that can be sanded. If you are unsure, then it’s best to ask the manufacturer.
When applying a primer, it’s important to keep a very thin and even coat. This is done by holding the spray can about 12 inches away from the print and to constantly move the can around while you spray. Remember that your goal is to simply fill any imperfections in the surface of your model, and not to create an entirely new layer.
Go around your model, spraying the primer in a very fine mist, two to three times. Allow the primer to dry for about an hour.
7. Sand (again)
After the primer has dried, you will likely end up with a surface that’s a little rough to the touch. Don’t panic – the primer is meant to be sanded smooth.
Take your finest grit sandpaper and lightly sand your model using gentle, circular strokes. This step shouldn’t take long. You’ll know that you’ve done a good job when you get a finish that both looks and feels smooth.
If you spot any imperfections in your model that you think can still be filled in the primer, then feel free to reapply the primer on the spot. This is no excuse to focus on a single area of the print or to spray too close – it’s still best to spray from afar using broad strokes. Allow the area to dry and sand the surface again.
8. Apply the paint
Now that you have a model with a smooth surface, it’s time to apply the paint. If you’ll only be painting your model using a single color, then using a can of spray paint is the fastest and easiest way to get the job done. Just remember to use the same techniques that you did when applying the primer – spray from 12 inches away, keep moving, and avoid staying in one spot for too long.
However, it’s also perfectly understandable if you go with the paintbrush route. Some models (prototypes or action figures) may have to be painted with multiple colors or have very intricate details that need to be painted with precision. No matter if you apply the paint using an aerosol can or a hand brush, it’s recommended to wait 24 to 48 hours for the paint to fully cure.
With so many materials that can be used for 3D printing, it’s hard to identify a single paint type that is sure to work for your particular build. If you’re unsure about the compatibility of your paint and plastic, then you can dab a very small amount of paint in an inconspicuous area of the model and allow it to dry for 24 to 48 hours.
9. Apply a polishing compound
Your print should be looking great now, but there’s a last finishing touch that we can do. A layer of a polishing compound will give your model a porcelain-like sheen that will look amazing in a display case.
A liquid polishing compound can be applied to your model using a washcloth. Rub the polishing compound into your model using broad motions, applying the compound to the surface while simultaneously polishing it. The end-product of this step should look great and will fit right into a professional display case.
Final thoughts
A 3D printed model is interesting enough on its own, but it can really only be considered impressive by doing a bit of professional-quality finishing. We’ve already talked about polishing your PLA prints are smoothing your ABS prints using an acetone vapor bath. However, a fully painted 3D printed model just pops out because of how unique and well-customized it is.
Painting a 3D printed model is sort of an integration of all the finishing methods that we’ve talked about in the past. You still need to create a perfectly smooth surface by sanding and priming and finish off the process with some good old plastic polish. It takes a lot of elbow grease and creative juices but the results are certainly worth it.