Getting the Perfect 3D Printer Layer Height Settings

Using a lower layer height favors better detail accuracy and resolution. However, setting a higher layer height significantly reduces printing time and creates mechanically stronger parts. Regardless of your choice, your layer height setting should not exceed 80% of the nozzle diameter to ensure sufficient layer adhesion.
Whether you’re after quality or speed, layer height is one of the most important settings in 3D printing. If you’re planning on experimenting with layer height, then we recommend knowing the ideal settings and understanding how it affects the characteristics of your finished 3D print.
The effects of layer height
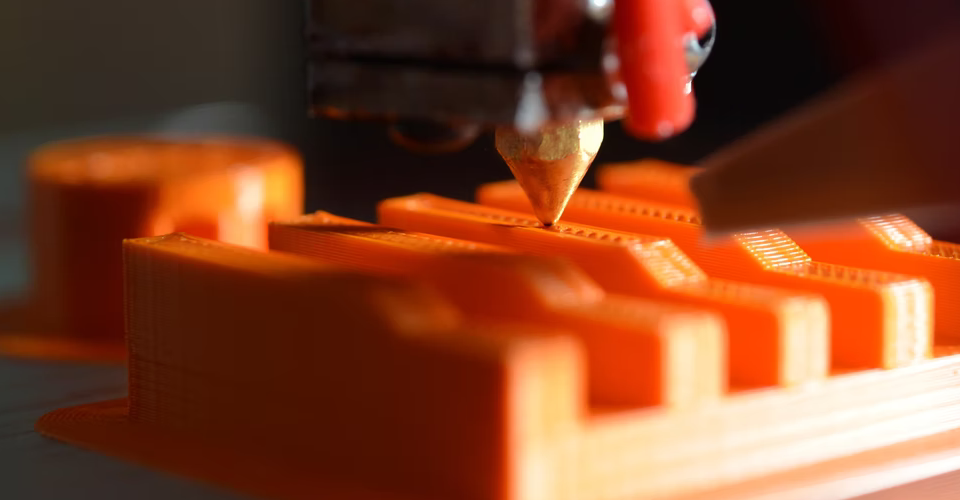
The term “layer height” is self-explanatory. It is the thickness of each layer that is deposited by the nozzle to build the 3D print based on the sliced model. There is a wide range of layer height values and choosing one over the others involves coming to a compromise between different quality and performance parameters.
When setting a layer height value, these are the possible results that you should consider:
Detail resolution
In 3D printing, the layer height is considered the resolution along the Z-axis. This is akin to the resolution of a video or photo and is one of the factors determining how good small details will look in the finished product. In this regard, setting a small layer height is very favorable for prints that have lots of fine details.
Surface quality
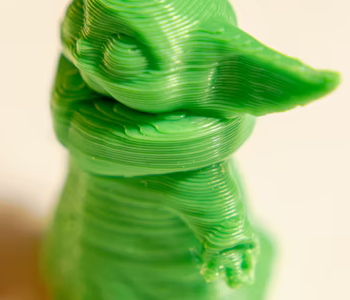
The surfaces of a 3D print are created by a series of straight layers laid on top of each other. This is not problematic when it is done to create a model with lots of straight surfaces. However, curved surfaces are a bit more complex as these are merely approximated using straight layers.
Using thick layers on a curved surface will make it look staggered or broken apart into steps like stairs. This can be very off-putting for projects that value design quality and appearance. Even if layer lines can be sanded smooth, changing the geometry of a surface to look curved will take considerably more work in post-processing.
Mechanical strength
In a 3D printed project, the interface between the layers is considered its mechanical weak point. This is similar to two solid pieces that have been glued together – if a part fails, it will likely fail at the point where individual pieces are joined.
Printing with thicker layers is an excellent way to reduce the number of layer interfaces. This enhances the overall mechanical strength of the part especially against any stress in the X and Y directions.
Printing time
If you set a low layer height, then that also means that more layers will be needed to 3D print a model. This has a huge effect on printing time. You can easily double or triple the printing time of a project just by tweaking the layer height settings.
Based on this analysis, deciding on a layer height value becomes a question of aesthetics over function. This is a common dichotomy in 3D printing and is not a surprising decision point for layer height.
Layer height vs. nozzle diameter

One factor that will dictate the layer height options available to you is the diameter of your hot end nozzle. The filament is extruded through the nozzle at a diameter that follows the nozzle opening. However, the actual layer height is typically lower than the nozzle diameter to help with layer adhesion.
The way this works is that a new layer compresses the layer that was laid down previously. This physical compression helps the layers stick to each other better. However, it also creates a bulging effect on the layers as they are compressed.
The standard practice in 3D printing is to set the layer height a maximum of about 75% of the nozzle diameter. There is room to go lower until a minimum of about 25%. For most 3D printers that come with stock 0.4-mm nozzles, the default layer height setting is at about 0.2 mm. This is a very good middle ground that balances both the printing time and output quality.
This rule of thumb means that you can benefit from increased resolution if you print with a smaller nozzle. For instance, a 0.4-mm nozzle can only print at a minimum layer height of 0.1 mm. If you used a 0.2-mm nozzle, then you can go as low as 0.0.5 mm. This will create an extremely detailed model, albeit one that takes a lot of time to 3D print.
Optimal layer height settings
Now that we know the rules of thumb in setting layer height values, we can try to come up with baseline settings for different circumstances. There are two factors here that we can prioritize – detail quality and productivity.
Best quality
It can be tempting to push a 3D printer to the lowest possible layer height setting to improve the detail quality of its output. If you don’t mind longer print times, then you can go ahead and use a lower setting.
Just a word of warning – the print time can get a lot longer with just small adjustments to layer height. For instance, a model that prints in less than half an hour at 0.2 mm layer height can take more than two hours if printed at a layer height of 0.1 mm.
The common advice in 3D printing is to set the layer height at 0.1 mm if you’re going for maximum detail quality and accuracy. While it’s possible to set the height at a lower value, the difference becomes barely imperceptible. Going below 0.1 mm will also significantly lengthen the printing time with very little added benefit to visual quality.
Optimal printing time
The answer to shortening the printing time is straightforward – just print at the maximum layer height allowed for your nozzle. This means printing at a 0.3-mm layer height if your nozzle diameter is 0.4 mm.
If you’re really going for speed, then you might even consider swapping out your nozzle for one with a large diameter. 3D printing nozzles can have diameters that go up to 1.0 mm. This will allow you to print at a layer height of about 0.7 mm. This is very fast – around ten times faster than printing at a 0.1-mm layer height.
The obvious consequence of this strategy is that you lose a lot of detail accuracy when printing with thick layers. Layer height settings 0.4 mm and higher are meant for large models with simple geometrical designs such as containers or vases for plants. If the design has a curved surface, then it will not look very good when printed with thick layers.
Best mechanical strength
The strength of a 3D print is not something that can be determined by the layer height alone. While it is true that thicker layers tend to create stronger prints, factors such as layer adhesion and layer orientation also play critical roles.
Layer adhesion is enhanced by the compression effect as the layers are extruded. This is because the contact area between the layers is increased as they are compressed. What this implies is that thinner layers become stronger when they are extruded through larger nozzles, as they require a greater degree of compression.
As we had already pointed out, the boundaries between the layers are the weakest points of a 3D print. If a force were exerted perpendicular to the layer boundaries, the layers can easily lose adhesion and come apart. If you’re 3D printing a part meant to withstand a load, then it is prudent to orient the layer lines parallel to the direction of the force application.
A wise strategy, if you’re printing something for the first time, is to make a prototype using thick layers. This is a way to troubleshoot any potential issues with the design or 3D printer performance without having to spend too much time. Once the design or process has been refined, you can then go ahead and print at lower layer height settings.
Final thoughts
The layer height setting is one of the more critical variables in 3D printing. It affects a lot of other quality and process characteristics. Experimenting with layer height settings is also very interesting and will help you develop a deeper understanding of the 3D printing process.
There is no universally superior layer height value. The best value depends on the model you are printing and the goals of your project. As with many decision points in 3D printing, choosing a layer height becomes a question of quality versus productivity.