
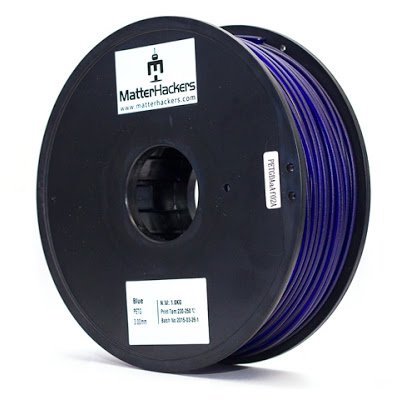
Best 3D Printer Settings for PETG Filament

One of the best things about FDM printing is the sheer variety of filaments that you can work with. There are filaments that are flexible, those that mimic the finish of wood, and some even have some degree of electrical conductivity.
The downside of having all these filament choices is that each one requires you to learn how to use them. In this article, we teach you how to get good prints with PETG, a filament which seems to be on track to becoming one of the most popular today. What are the best printer settings with PETG? What issues with PETG should you be anticipating?
What is PETG?
PETG is a derivative of the super-popular polyethylene terephthalate (PET). The “G” in PETG stands for “glycol-enhanced.” The addition of a glycol group makes PETG a little more durable and less brittle. It also has better optical properties and is easier to work with compared to PET. It has excellent chemical resistance and is a good moisture barrier.
In the world of 3D printing, PETG has often been touted as representing the best of both worlds of the top two most popular filaments, PLA and ABS. It prints at high temperatures like ABS, thus giving it good heat stability. However, it doesn’t have a large shrinkage factor and has better layer-to-layer adhesion, which means that it doesn’t have serious warping issues. It also doesn’t release harmful gases while printing, which is one of the worst things about printing with ABS.
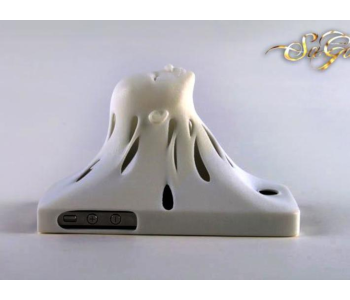
In summary, PETG gives you almost all the mechanical and chemical advantages of ABS with the same ease of workability as PLA. It’s a good choice of material for functional parts that need to withstand constant movement or pressure. It can also be printed almost completely clear, making it a great material for ornamental items.
Set up your print bed
If you’ve ever printed with ABS, then you know how complicated it is to get the first layer of the ABS print to stick to the print bed. PETG is also somewhat problematic, but in the opposite manner – it sticks a little too well. If you don’t take the necessary precautions, you could up with a finished print that you can’t get of the print bed without causing any damage.
Because of the high printing temperature of PETG, you still can’t do without a heated printing bed. The drastic temperature drop will almost certainly lead to a warping problem if your print bed is too cold. We recommend a setting of 70 to 80 °C for the heated bed. If you’re still having bed adhesion problems at these settings, you can as high as 100 °C.
To make sure that the print comes off easily enough, we recommend using an adhesion aid that will come off along with the print, such as glue stick or hairspray. Do not print directly on glass, lest you end up with scratches on the surface of your print bed. Don’t use any BuildTak as you’ll just end up with a ruined BuildTak surface every time you work on a PETG project (which can get pretty expensive).
Since PETG has no bed adhesion problems, there’s no need to set the nozzle too low for the base layer. This is a technique done to “squish” the first layer against the bed and help with base layer adhesion. If you already have a tried and tested nozzle height setting for ABS or PLA, then you can comfortably set a value that’s two or three times higher with PETG. We prefer going as high as possible for aesthetics, so start at the highest setting and work your way down incrementally if you run into any problems with bed adhesion.
If you want to do an accurate nozzle height calibration, then a setting of 0.02 to 0.05 mm from the nozzle to the print bed would be a good starting point. You can set this as both the initial nozzle height and the height for the rest of the print.
Printing temperature, speed, and retraction
The main reason why PETG gets compared with ABS so much is the fact that it prints at relatively high temperatures. A range of 220 to 265 °C is commonly used, but the recommendations of your specific filament brand may vary slightly. Although PETG practically eliminates any issues with warping, you’re still bound to run into the other complications associated with high-filament printing.
The first thing you’ll have to as is if your printer is capable of reaching these temperatures. Some printers are capped at 250 °C, particularly those that use PTFE tubing as the idler inside the extruder assembly. If you push through with the inappropriate equipment, you’ll end up ruining, not just your print but also your extruder.
Setting your printing speed is a balancing act where your printing temperature should also be considered. Printing at a high speed setting if your temperature is too low may result in the extruder “skipping” because the filament isn’t soft enough to exit the nozzle. However, printing fast at very high temperatures could result in stringing – an altogether separate problem.
For starters, we like to start at a relatively moderate speed of 25 mm/s. If there are no problems at this setting, then you increase the speed up to 50 mm/s. This should just good enough to produce a good PETG print without spending too much time. We have seen accounts of PETG being printed at 60 mm/s, but this should be the absolute maximum if you don’t want to have any stringing.
Dealing with stringing
One of the more common problems when using high-temperature filaments is stringing. This happens when the molten filament oozes out of the nozzle as the print head travels, resulting in strings of filament that run across the whole print. Stringing with PETG is particularly frustrating because of how durable and hard to remove PETG is.
Unfortunately, a filament that melts at high temperatures also has a low viscosity, making it more prone to stringing. If this happens with your PETG print, the first recourse would be to slightly lower both your printing temperature and speed settings. This will definitely compromise the total time spent printing any project.
Another option is to enable retraction in your printer if your printer allows it. Retraction allows the extruder gear to “pull back” a small portion of the filament to ease any pressure on the molten filament that’s right on the tip of the nozzle. You can refine some parameters such as the retraction distance or speed until you no longer see any signs of stringing.
Reduce fan speed
PETG prints nicely and preserves a good level of detail without any cooling fan. Not having any cooling will also result in better layer-to-layer adhesion. Printing with the cooling fan turned off for the whole duration of PETG printing is perfectly fine if you don’t want to bother having to tweak its settings.
Some users have shared their experience in keeping the cooling fan turned off only for the first two layers of a PETG print and then printing with a fan at 100% setting for all succeeding layers. This might be a worthwhile strategy if your model has a lot of bridges and overhanging features or if you want your print to be as detailed as possible. Just watch out for any signs of cracking or layers that are coming off while you print – PETG still prints at high temperature and doesn’t like going through a rapid temperature drop.
Experimentation is the key
PETG may be a bit easier to work with than ABS, but it is still a novel filament that many people have had experience with. Different filament brands may also behave in varying and unpredictable ways. Between adjusting the printing temperature, bed temperature, printing speed, and retraction settings, it may take you some time before you can find that “sweet spot” where you get to enjoy all the benefits of PETG without running into so many problems.
Our advice is to pick a PETG filament from a reliable brand and stick with it. It’s going to take a few failed prints before you can get the best settings. Write those down, keep refining them, and working with PETG should get easier after some time.
Final thoughts
Many 3D printing professionals have been gushing about PETG for some time now because of its potential to dethrone ABS from the “big two” position. After all, it has comparable properties but is not quite as tricky to work with.
To say that PETG is as easy to work with as PLA is giving it too much credit. PLA will always be the beginner’s filament because of how usable it is for someone with basic skills and equipment. PETG will still require a high-end 3D printer because of its temperature needs. Finding that “sweet spot” – the best possible combination of temperature, speed, and retraction – is also a complex matter that will need a lot of trial and error.
Hopefully, the guide we’ve prepared has helped some of you get less intimidated with PETG and convince you to give it a try. The initial learning curve is well worth it when you realize how brilliant the material is.
I am new to 3d printing and have learned a lot from this article.