3D Printer Settings for PLA Filament – A Beginner’s Guide

3D printing may seem like an intimidating hobby because of how technically complex it is. While there’s some accuracy in that impression, there’s a way for beginners to ease into 3D printing even without any of the advanced skills. One of the most common recommendations is for beginners to start with PLA as their first filament.
PLA is well-known as one of the easiest filaments to work with. Its appeal doesn’t end there – it has a couple of nice characteristics that make it a favorite even among 3D printing professionals. What makes PLA so special? What parameters should you set for your 3D printer when using PLA?
What is PLA?
PLA stands for polylactic acid, a polymer made from lactic acid monomers. In the world of 3D printing, PLA is distinct as being the only mainstream filament that is purely sustainable and biodegradable. The lactide raw material used to manufacture PLA can be derived from plant material. PLA Upon breaking down, PLA dissociates into its base lactic acid building blocks, which are safe for both the human body and the environment.
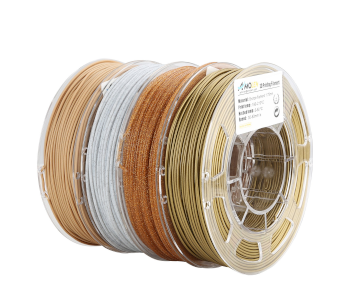
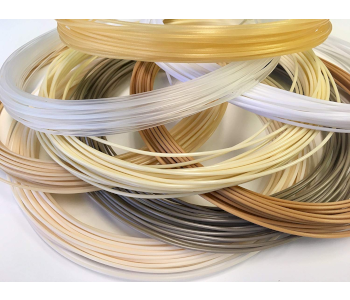
Due to its positioning as one of the few environmentally-friendly plastics, PLA has become the second most widely used bioplastic in the world. In 3D printing, the popularity of PLA has been boosted by its generally uncomplicated workflow. PLA is also widely used as the plastic component of infused materials, or filaments infused with solid particles. Examples include wood filament (PLA infused with wood shavings) and bronze filament (PLA infused with bronze particles).
The ease of use and sustainability of PLA comes at a price, however. PLA prints are not known for their durability, so you can’t rely on them as functional tools or moving parts. They have very low thermal stability and may start deforming even when left out on a particularly hot day. Since they are 100% biodegradable, PLA prints naturally deteriorate over time, although this process can be accelerated when PLA is exposed to outdoor conditions.
Print bed preparation
PLA is pretty fuss-free when it comes to print bed requirements. It adheres well to most surfaces, and its low printing temperature means that it has a low tendency to warp. If you don’t have a heated print bed, then it’s still perfectly fine to print with PLA. Just make sure to apply some adhesion aid to the print bed. Our top pick would be blue painter’s tape because of well it sticks and how easily it can be removed. You can also use hairspray or glue stick, although those options are a little messier.
Before you apply any adhesion to a print bed, make sure to clean it of any dust or oils which may have gotten stuck on its surface during handling or storage. Any contaminants on the bed surface will compromise bed adhesion. We find it best to clean a 3D printer bed with Windex, an ammonia-based cleaning solution. A diluted solution of isopropyl alcohol will also do quite well.
If you do have a heated printing bed, then printing with PLA is going to be a lot easier. You’ll have to set the bed temperature to just below PLA’s glass transition temperature. Any value in the range of 55 to 70 °C should work. We like setting it to as low as possible to avoid any risk of deformation, so set it at 55 °C and just work your way up if you’re still running into bed adhesion problems.
If you’re using a heated print bed, then you need to use an adhesive that is heat stable. The most common options are Kapton tape or hairspray. You can also try to print directly on the glass, which results in prints with smoother bottom surfaces.
The more important setting you’ll have to deal with is the height between the nozzle and the print bed. If you set this too high, the filament cools down too much as it exits the nozzle, resulting in poor layer adhesion. Setting it too close, however, may result in the nozzle “dragging” the filament and deforming it. If you’re experiencing any of these problems, then simply adjust the nozzle height by 0.5 mm increments until you see a pronounced improvement.
Printing temperature
What makes PLA a great first filament for beginners is that it’s very forgiving of minor discrepancies from its optimal 3D printer settings. However, problems may still come up if you don’t know what you’re doing. This is very apparent in PLA’s printing temperature.
It’s worth mentioning that PLA filaments made by different manufacturers may have different optimal printing temperatures. It’s best to use their recommendations as a starting point. If this doesn’t work out for you, then you can set your initial printing temperature at 180 °C and try to work your way up to a maximum of 220 °C.
Knowing if you’re printing too cold or too hot is usually pretty easy. Too low of a temperature setting, and you’re bound to encounter bed adhesion and layer adhesion problems. You’ll also have to watch out for the tell-tale clicking sounds from the extruder, which is usually a sign that the extruder gear is “skipping” as it can no longer push the filament forward because it’s not getting melted fast enough.
The more common problem encountered with PLA is stringing or oozing and is a sign that your printing temperature setting is too high. Stringing happens when the molten portion of the filament oozes out of the nozzle as the print head moves. This results in strings of plastic that cross across the features of the print. While these strings can be removed during post-processing, stringing can become bad enough that the print can no longer be salvaged.
If your printer allows retraction, then that’s an easy way to solve the stringing problem. Retraction tells the extruder gears to pull back on the filament while the print head moves, easing off the pressure on the section of the filament that has already been heated beyond the melting temperature. However, it’s still worth the time and effort to reduce the printing temperature of PLA to as low as possible, as that means that you’ll be able to preserve more intricate details on the final print.
Print speed
Setting the print speed needs to take into consideration the temperature you’re printing with and the thickness of your filament. A thicker filament will take longer to heat up, and thus needs to be printed slower. If you set your printing temperature a little on the high side of the acceptable range, then you can probably get away with higher printing speeds as well.
A range of 30 mm/sec to 90 mm/sec is generally recommended for PLA. This is a very wide range and you’ll need to exercise your good judgment to balance print speed with printing temperature.
Cooling
PLA isn’t as finicky as other filaments when it comes to cooling but cooling too quickly is still a bad idea. We recommend still disabling any cooling for the first two or three players of the print. This will aid bed adhesion and ensure that the rest of your print will be standing on some pretty solid footing.
For the next layers, it’s best to turn up the cooling to 100%. This helps layers solidify faster for better bridging performance and preservation of fine details. If your printer doesn’t have a cooling fan, then it’s perfectly fine to finish a PLA print with no cooling. Your print quality might suffer, so just try and compensate with a low printing temperature.
Other tips
1. Store your filament in an air-sealed container
Just like all the other 3D printing filaments, PLA is hygroscopic, which means that it readily takes up moisture from its surroundings. For this reason, it’s best to store your PLA filament in a sufficiently airtight container with a few packs of desiccant.
The reason why proper storage is a bit more critical with PLA is that its low glass transition temperature virtually eliminates the use of an oven for drying. If your PLA filament has already taken up moisture, then your safest recourse would be to dry it via desiccant. This is a slow process that could take more than a day.
2. Sand and polish your finished print for that professional look
PLA looks great with some post-processing. While there’s no compatible solvent that could selectively smooth the surface of PLA, it’s highly compatible with more mechanical methods. Sanding with progressively finer sandpaper and applying a polishing compound remains the most popular method of post-processing PLA. It takes a bit of manual work, but it’s simple and not technically demanding. You can even bring it up a notch and apply some paint!
Final thoughts
PLA still holds the distinction of being most beginner-friendly of all the 3D printing filaments. Our guide may have made it seem like you need to be highly accurate with the settings of your 3D printer, but the truth is that PLA is extremely forgiving. Even if you don’t get it perfectly the first time, you’ll still have a good chance of coming up with something presentable.