What is the Best Printing Speed for PLA Filament?

Making a perfect 3D printed project involves a complex interplay of several different factors. You can think of it as the cumulative result of making several decisions when it comes to 3D printing parameters. One such parameter is printing speed. If you’re printing with PLA, what printing speed should you set?
Any value between 40mm/s to 70 mm/s is considered a good setting for PLA. The most optimal value will depend on factors such as the other 3D printer settings and the type of PLA filament that you are using. You may need to do some trial and error before you can find that “sweet spot,” although printing at 60 mm/s and 210 °C temperature seems to work fine in most circumstances.
As with many things in 3D printing, speeding up or slowing down the printing speed excessively can result in some quality issues. What other factors should you consider? How can you test your printer speed settings?
The different aspects of printing speed
Strictly speaking, the printing speed of a 3D printer is the rate at which the filament is being extruded through the nozzle. However, it is not necessary to set a single printing speed for an entire project. Depending on what phase of the model is being printed, it is possible to toggle between different printing speed values.
Bottom layer
The bottom layers determine how well the print sticks to the build plate and its resistance to warping. To maximize bed adhesion, the bottom layer is often printed at the lowest recommended printing speed for the filament. Although PLA is not particularly prone to warping, reducing the print speed for the bottom layer is still considered good practice.
Shell
The shell of a 3D print consists of its outermost layers. As this is the part of the model that is visible, detail quality and precision are the top priorities. Again, printing at a low speed becomes beneficial here. If the printing time suffers too much because of the low printing speed, you can consider reducing the number of shell layers.
Infill
The infill is the material that goes inside the shell of a model. Your choice of infill pattern and density plays a huge role in determining the weight, density, and mechanical strength of the finished print.
In most cases, the bulk of the printing time will be spent on printing the infill. For this reason, increasing the printing time for the infill has the greatest benefit in terms of reducing the total printing time. You will want to set this a bit high for PA – at least 60 mm/s should work just fine.
Top layer
As you near the end of your 3D printing project, you will want to prevent pillowing. This is a common issue that happens on the top layers of 3D prints characterized by gaps or bumps. Pillowing happens when the top layer warps or cannot be supported by the infill pattern of immediately preceding layers.
One solution to pillowing is to simply reduce the printing speed for the top layer. This will give the top layer enough time to cool down and develop the strength to counter the effects of warping. This will also make them less likely to collapse through the gaps of the infill pattern.
With these different phases in mind, we can designate two different printing speeds for PLA. The “standard printing speed” is slightly higher and can be used for the infill layers. You will also need a “reduced printing speed” for the top and bottom layers, as well as for the shell.
Other speed parameters
Discussing speed in 3D printing can get a bit confusing as it can refer to a few different things. We have already discussed the printing speed of PLA as the rate at which filament is extruded through the nozzle. However, there is also the “travel speed” or the speed at which the print head travels across the X and Y gantries.
As with the printing speed, adjusting the travel speed can also significantly affect a project’s printing time. However, the movement speed is not dependent on the type of filament being used. Instead, the movement speed takes into consideration the total weight of the print head.
A heavy print head with a direct drive extruder tends to carry more inertia as it moves. This makes it less likely to overshoot its target destination while moving. Setting very high movement speeds can cause a drastic drop in print quality and can even cause layers to become shifted.
The role of printing temperature
A discussion of printing speed is not complete without considering the effect of printing temperature. Temperature and speed go hand-in-hand in 3D printing. In the case of PLA, you want to target a temperature between 195 to 220 °C.
The general rule of thumb is that you can increase the printing speed if you’re also going to increase the printing temperature. While this will ultimately reduce the printing time, this can also result in poorer detail accuracy and quality. If you’re printing something a model that is exquisitely detailed, it is often a better idea to print slowly.
For most users, the sweet spot for PLA is a printing speed of 60 mm/s and 210 °C. You can adjust both the speed and temperature as the situation dictates. Take note that this may not apply to all types of PLA filaments.
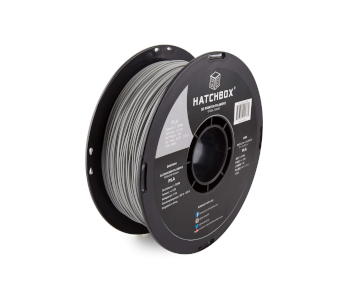
Filament diameter and filament type
One other thing to consider is the type of PLA filament you are printing with. The most obvious difference is the filament diameter. Are you printing with a 1.75-mm filament or a 2.85-mm filament? A thicker filament will likely need a higher temperature in the heating block to retain the same printing speed.
If you’re using a PLA filament that you have not worked with before, you may need to do some experimentation before finding that sweet spot. Some additives and dyes, particularly the darker colors, can make PLA harder to melt.
This rule also applies to composite filaments, most of which are based on a PLA matrix. Some additives, such as wood or carbon fiber, can make it more difficult for PLA to reach its melting temperature. On the other hand, conductive additives such as metals can facilitate heat transfer. The same basic logic applies here – hold back on the printing speed if there are additives in the filament that make it more difficult to melt.
Testing your printer speed

If you’d rather not waste filament on several trial and error sessions, then we suggest printing a free speed test model. This is a tower divided into segments, each of which is meant to be printed at a different printing speed. The target speed range is from 20 mm/s to 100 mm/s.
Take note that you may have to edit some segments of the G-Code so that the speed test changes for each segment of the tower. We also suggest changing the printing temperature in the G-Code to the target temperature for your PLA filament.
Some users have reported failure when manually changing the G-Code to automatically change printing speed values. An alternative is to manually pause the print as each segmented is finished and changing printing speed settings in your slicer. The model is quite small and should not take more than 20 minutes to finish printing.
Final thoughts
PLA is considered by many to be the easiest 3D printing filament to work with. It is quite forgiving, even when it comes to printing speed. Although we recommend standard printing speed values here, you can probably swing it by a few digits either way and still get acceptable quality in your output.
If you’re a relative beginner, it’s worth taking the time to master PLA while learning the fundamentals of 3D printing. Only then can you be prepared to deal with the more “difficult” filaments like ABS, PETG, or Nylon.