Podcast Editing Basics – How to Make Your Show Better

You’ve found a subject you’re passionate about and recorded a few podcast episodes, but people are showing little interest? They say the devil is in the details, and that’s doubly true in an age where anyone with an internet connection and a microphone can make a podcast. Being unique is a good start, but audiences appreciate polished, well-presented content equally, if not more.
This guide will introduce you to the basics of podcast editing. It offers helpful tips on how to ensure the editing stage runs as smoothly as possible and what to prioritize during it. You’ll have a much better grasp on what software to use, what mistakes to avoid, and how to streamline the editing process once you’re through with it. Read on and instantly improve the quality of your podcasts.
Before you edit
You can make the editing stage a lot easier on yourself by having a plan and some key prerequisites in place. Trimming a long-winded recording is a much smaller problem than having inadequate, poorly-recorded content as your basis. Here are the core things to keep in mind.
Thoroughly research your topic and prepare accordingly.
No amount of editing will save your podcast if you don’t know what you’re talking about or can’t ask the right questions. Delve into the topic you’re presenting, find the right guests, and come up with a list of items that will cover every aspect of the subject matter in an interesting way.
Have a script, but don’t use it as a crutch.
Unless your podcast’s whole premise is to ramble on about what pops into you and your guest’s head, introducing structure is one of the best ways to ensure everything is running smoothly. Write down a few key bullet points that outline the show’s general flow and return to them from time to time.
It’s also a good idea to sit down with guests and have a practice conversation. That will give them time to relax and gather their thoughts, and you might even discover a bit of information you haven’t considered. Preparing guests will also cut down on the amount of ums & errs you’ll have to deal with later.
Record in a quiet environment.
Background distractions and echoes are a pain to remove during editing, so making sure that there are as few of these as possible will help tremendously later on. A professional recording studio is the best solution, but you can get away with a quiet room in your house too. Just make sure that there’s a lot of furniture around to absorb the noise, so you don’t have to deal with echoes.
That being said, recording outside can give certain podcasts a more authentic flair. You’ll have to decide whether the added editing challenge is worth it.
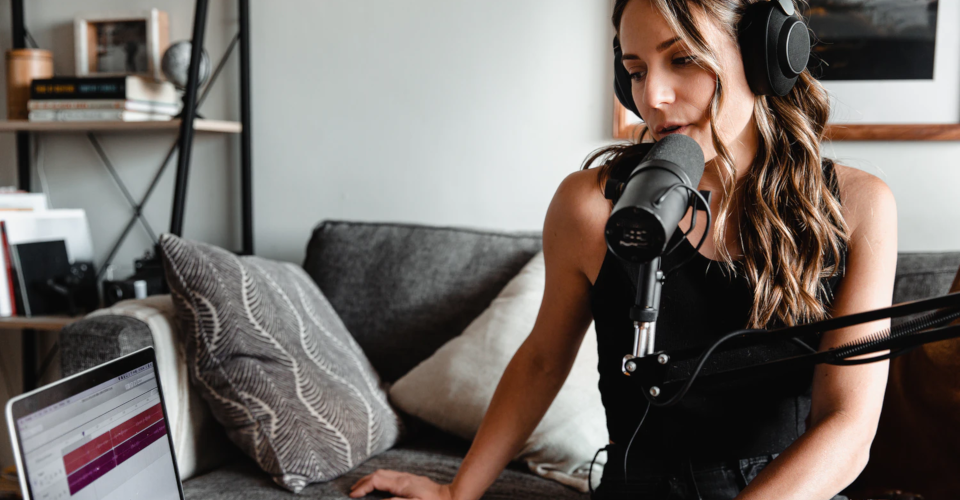
Get the best recording equipment you can afford.
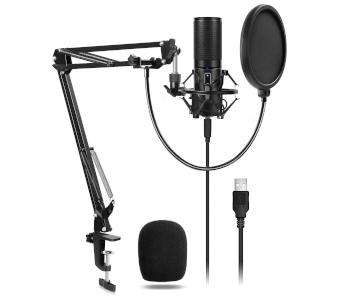
The better your raw audio, the less time you’ll have to spend correcting levels and adjusting for hisses or other disturbances. You can get quality microphones for less than $200 and get better ones as your budget allows. Don’t forget to also invest in pop filters to eliminate most plosives during the recording stage.
Help yourself find big mistakes more quickly.
You’ll inevitably make a few major blunders while recording an episode, especially if you’re still new and nervous. That’s perfectly OK! However, how you go about addressing it can have a noticeable impact on editing speed. Avoid creating new clips each time a slip occurs. Record everything in one go instead, pausing for a few seconds after major mistakes and clapping or clicking, so it’s easier to identify and remove them during editing.
Have one mic per speaker and always record each on separate channels
This is one of the easiest ways of exercising much more control over the podcast audio. Recording each speaker on a separate track lets you quickly isolate and fix overlapping dialogue. Unexpected disruptions might also be heard more loudly from one side, so having multiple mics can minimize their impact.
What do you need to edit a podcast?
Podcast editing is done with specialized programs referred to as digital audio workstations or DAWs. You can use DAWs to trim your recordings, adjust audio levels so that one speaker isn’t louder than others, add music & effects, and much more. You may record audio directly into any DAW, which comes in handy since you don’t have to use a separate program if you can avoid it. DAWs recognize many audio codecs, so don’t worry if you have to import footage captured with call recording software or out in the field.
There are several DAWs you could use to make your podcast presentable. Which one’s the best? That depends on your willingness to spend money on purchasing and time on learning the ins & outs of a particular program. Any DAW can get the basic job done. However, you’ll want software that can deliver better-produced results if you’re tackling complex projects like documentary podcasts or audio dramas.
Here are our favorite picks:
Audacity
Audacity has been around since the 90s and hasn’t bothered to change its interface in the meantime. It’s a free, open-source DAW many beginner podcasters embrace since it’s easy to pick up the basics. Audacity’s toolset provides everything you need to put together a decent-sounding podcast episode after only a handful of tutorials. It’s more limited than paid-for alternatives, though. Audacity also has a destructive workflow, meaning that changes you make to a recording are hard or impossible to undo.
GarageBand
Podcasters used to working in the Apple environment love GarageBand since it comes with their OS free of charge. It’s primarily intended for music production, but GarageBand offers plenty for podcast editing as well. Its intuitive interface is easy to pick up, and you’ll be ready to export your podcasts in no time. The software is centered on music production, so there are many options you’ll never need to use. The trick is to learn which settings to avoid, like the temptation to put your microphone into voice mode and introduce unnecessary effects.
Hindenburg Journalist

Hindenburg Journalist was designed with reporters & podcasters in mind. It’s more challenging to master than our two previous suggestions, but it offers a better approach to multitrack editing. The software has a unique clipboard you can pin audio snippets to and organize for easy reach. Hindenburg Journalist can tackle all kinds of audio format and performs even tricky edits with ease.
Adobe Audition
Audition is the first of three pro-level DSWs we love and among the most powerful editing tools at your disposal. It’s more beginner-friendly than Reaper and Pro Tools since it has an Essential Sound tab that lets you adjust levels and intuitively add effects. Once the training wheels are off, you can use it to precisely tailor the volume of each clip in each track of a multitrack recording. There are dozens of effects to apply, and you can even use spectral analysis to muffle unwanted sounds that happened while you or a guest were speaking.
Audition’s only drawback is its pricing model. You’ll have to pay a monthly subscription to keep using it.
Reaper

Reaper is the cheapest pro editor as it has a one-time fee of $60, along with a 60-day trial you can take advantage of before buying. It’s a small, lightweight, and incredibly flexible DAW that will run flawlessly even on older hardware. It uses ripple editing, so inserting clips into a podcast sequence won’t upset its symmetry. You can augment its functionality with more than thirty plug-ins and have access to complete support for MIDI files if you want to compose your own music or insert some free effects.
Sound cleanup could be better, but that’s a small price to pay for the tools Reaper brings to the table.
Pro Tools
As its name suggests, Pro Tools is the industry standard when it comes to any audio recording. It offers the most comprehensive suite of editing options on the planet and is constantly being improved with new additions. The interface is broken up into two main tabs – Edit and Mix. That’s where you’ll organize clips, synchronize their loudness, and eliminate unwanted sounds. Pro Tools is relatively straightforward to get into but takes a lot of time to master due to the complexity and abundance of its toolset.
Getting Pro Tools will set you back $600, and you’ll have to continue to pay a monthly fee after the first year if you want to keep receiving updates.
How to edit a podcast?
You’ve done your homework, got the best DAW & equipment you can, and recorded a podcast episode. Great job, but now what? Now you’re at the editing stage, and here’s everything you should consider.
How much do you need to edit anyway?
An excellent question, the answer to which depends on your podcast’s style. Two guys gushing about their favorite jazz musicians doesn’t require nearly as much editing as an episode of your favorite history podcast. You’ll be tempted to micromanage every single detail and cut out any imperfections. Doing so is the quickest way to waste time and eventually give up on your show. Would you rather leave a few insignificant mistakes in and start creating the next episode, or spend hours fixing stuff no one will care about only to give up in frustration?
You’ll have to learn to leave well enough alone, and that comes with experience. In the beginning, focus more on producing gripping content that will attract more listeners with each episode.
Will your show have an intro?
Intros aren’t necessary; in fact, some podcasts pride themselves in getting straight to the point. However, an opening can be a valuable part of your brand identity. The first few episodes of the podcast don’t need to have an intro. That gives you time to develop a routine, focus on the show’s direction, and find a more appropriate intro.
Numerous online services offer affordable music and transition effects you can use to shape the intro, or you can compose it yourself. It’s also a good idea to have a look at your listeners’ trends if you publish on sites like Spotify to see what type of music they’ll find appealing.
Listen to everything once before editing.
The first step in the actual editing process is to sit down and listen to the entire raw recording at normal speed. This will help you get a general feel of the episode’s rhythm as well as to mark problematic points for later removal. It’s a good idea to make notes simultaneously. These will make sure you don’t accidentally delete an answer you might find irrelevant afterward. The notes can serve as an excellent source of suggestions for improving the next episode.
Address differences in loudness before making other changes.

Some people are naturally soft-spoken, while others have booming voices. You can take care of either during the recording stage by having good gear and ensuring each microphone is at the appropriate distance. That’s sometimes not an option, which is why you’ll have to adjust the gain so all speakers sound roughly the same.
Topping & tailing
Editing has to start somewhere, so why not trim the excess first? Topping & tailing is a term for cutting out the unneeded bits before and after your show starts. This can be a few moments of awkward silence, an equipment & connection check, or a conversation that precedes or follows the show. You don’t need them in the podcast proper, but keep an ear out for fun snippets during such conversations. They might come in handy as teasers, with the other person’s consent, of course.
Cut out the unimportant stuff.
Even scripted conversations can take an unexpected turn, and it’s your job as an editor to assess how relevant these turns are to the topic at hand. Sometimes the entire conversation is enjoyable, but leaving everything in would make the episode longer than it should be. These are the times when you’re faced with removing entire segments of the recording. They can last a few seconds, but sometimes they’ll be several minutes long.
Try to set logical end and resume points or use transition effects if there’s no other choice. Having a hard time deciding what to cut? Look for long-winded responses and answers that add nothing new or repeat what the person has already said.
Overlapping & interruptions
Chances are that your podcasts won’t always run smoothly, especially if you’re talking to someone via an online call. The call quality can degrade, or their kid might burst into the room and demand attention. They’re out of your control during the recording, but do your best to get rid of them while editing. On the other hand, some of these situations might be fun for the audience to listen to if your show has a lighthearted tone. Use your best judgment when leaving some in.
Ahs, ums, & word crutches
These are the bane of every editor’s existence. They’re frequent, annoying, and sometimes hard to edit out because they’re part of an otherwise insightful sentence. You’ll have to strike a balance between being meticulous and making so many cuts that the conversation becomes unnatural and jarring.
It’s perfectly fine to leave a few of these in to preserve the natural way your guests speak. An uttered umm left in the right place can even add interest to the conversation. For example, it can signify the person is genuinely unsure of something or is about to start discussing an unpleasant topic.
The sound of silence
Silent pauses are a natural part of every conversation as people take the time to answer or give each other room to speak. Such a pause can be a powerful addition to the episode if it signifies that the person is taken back by a statement or trying to choose her words carefully in response to a complex question. Most of the time the pauses add nothing to the conversation, so take care of them.
Tastefully incorporate music & sound effects.
Adding the odd effect and a careful selection of music can elevate the quality of your podcast. Some creepy organ notes can set the stage for a Halloween special perfectly, while the right sound at the right time can turn a moderately funny comment into a zinger. The trick is to know when and how many sounds to insert. If you’re having doubts about a particular sound, it’s better to leave it out than to overdo it and make the podcast sound corny.
Conclusion
Editing a podcast relies a lot on common sense. Having a clear set of guidelines helps, as does an established routine. If you aren’t sure about a particular segment despite these, ask yourself the following:
- Does it add value to the show?
- Would editing it out take more time than it’s worth?
- Would the audience appreciate this?
- Would leaving it in make the episode longer than it needs to be?
- Would removing it make the dialogue sound stilted or jittery?
With these guidelines in mind, you’re sure to start producing content at a high enough quality to catch the interest of a growing audience.