How to Prevent PLA Warping – Easy to Do Techniques

Making high-quality 3D prints isn’t as simple as buying a 3D printer, loading it up with your favorite filament, and printing that model you found online. Many things can go wrong during the process, and perfecting it involves a delicate balance and deep understanding of how the filament material reacts to changes in temperature.
One of the most common problems that 3D printers encounter, especially when working with new filament materials, is warping. What measures can you do to prevent warping? In this article, we’ll start simple and limit our discussions to techniques for preventing warping when making PLA prints.
What causes warping?
Warping – also known as curling – is a phenomenon that naturally happens in 3D printing and is the most common problem that 3D printers encounter. Although some filament materials are more prone to warping than others, special techniques will be needed to prevent warping in practically all types of filaments. Fortunately, these techniques are relatively simple and don’t require sophisticated equipment.
In the simplest terms, warping is caused by uneven cooling. The technology of 3D printing using Fused Deposition Modeling (FDM) relies on heating of a filament material until it melts to an appropriate degree. Layers of the melted filament are then laid on top of one another according to a 3D design. The temperature of the 3D printer’s heating element, how fast the filament is extruded, and how fast the filament cools upon exiting the extruder all play a part in determining the overall quality of the print.
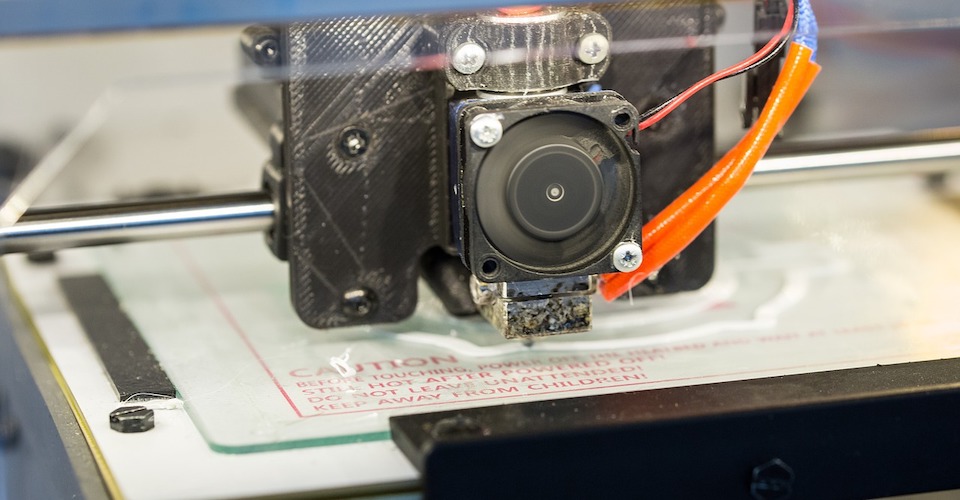
The warping problem becomes most apparent in the first layer of a 3D print. With no prior layers to stick to, the first layer of a print is laid down on what is called a build plate or platform. The moment the filament material exits the extruder of the printer and is laid down on the platform, it starts cooling down. The problem is that the completed layer does not cool down uniformly: the outer edges, by their exposure to a colder environment, cool down and contract faster than the inner portion.
The imbalance due to the uneven cooling process results in stress, particularly in the corners of the print. This results in warping or “curling” of these corners. While the integrity of the 3D print is rarely affected by warping, the print does not end up looking good at all. If you’re going for a more professional looking 3D print, then you need to take measures to address the warping problem.
Techniques to prevent PLA warping?
By understanding why warping happens, it becomes much easier for us to come up with the best solutions. If you’re working with PLA, then you’re in a much easier situation than most, as PLA is one of the materials that is least prone to warping.
Below are some of the techniques that you can use to prevent warping in your PLA print, arranged from the simplest to the most complex. Take note that not all PLA filaments are made equally, and lower quality versions may have a higher tendency to warp. If one method doesn’t work for you, try augmenting it with the next method until you get the results you are looking for.
1. Check the nozzle’s initial Z coordinates
Problems with bed adhesion can be as simple as keeping the distance from the nozzle to the printing bed at a minimum. If the Z position of the nozzle is set too high, especially on the first layer, the filament material tends to cool down before coming into contact with the build platform. This temperature drop results in poor bed adhesion.
However, there’s a delicate balance in setting the initial Z coordinates of the printer nozzle, as setting it too close to the build platform will result in another set of problems. To hit the perfect setting, we recommend lowering the initial height of the nozzle in increments of 0.05 mm. until you see a pronounced improvement in bed adhesion. It might include a lot of trial and error, but even a marginal improvement in bed adhesion can go a long way towards solving your warping problem.
2. Add a raft
If you are experiencing warping in your PLA print, the easiest and quickest solution would be to add a raft to your design. A raft is simply a thin, horizontal layer that is added to the bottom of the design. This layer is deposited directly to the build platform, improving bed adhesion and making it much easier for you to get the first layer right. Most 3D printing software programs have provisions to add a raft which allow you to set how thick or wide the raft will be.
Although adding a raft is one of the quickest ways for you to solve the warping problem, it also has a few drawbacks. A raft is an extraneous part, something you’ll need to remove from your 3D print during the finishing step. Since rafts are designed to be strong and stable, removing them can prove to be difficult and can even cause smaller components of your print to break off. Printing a raft also wastes a lot of filament material, so it may not be the most practical long-term solution.
3. Decrease infill
Another easy-to-implement solution to address warping is to print with lower infill settings. With lower infill, there is less plastic material used in your print, which also means that there is less stress due to uneven contraction of the material. The sweet spot should be somewhere between 20% to 25%.
Obviously, a lower infill setting also means that the durability of the print will be reduced. If you are printing an object that needs to be durable, then this may not be the best solution for you.
4. Use a design with rounded corners
3D printing experts know that when warping occurs, it is more pronounced in the corners of the print. This happens because all of the stress due to uneven contraction of the material accumulates at the corners. Moreover, each corner bears the brunt of stress from at least two directions.
With this in mind, a creative solution that 3D printing enthusiasts have come up with is to use designs with rounded, instead of cornered, edges. By using a rounded edge, the stress that corners typically endure can be more evenly distributed along the edges of the print. While it’s no guarantee that a design with rounded corners will no longer warp, this is a quick and easy remedy that’s worth a shot.
5. Clean the printing bed and use a bed adhesive
Applying a layer of adhesive to the build platform is a standard practice in 3D printing which can help keep the bottom layer from curling upwards. Before you can apply an adhesive, you need to make sure that bed is clean. Any traces of oil or grease (even just from your fingertips!) on the bed can compromise bed adhesion and cancel out any efforts you’ve made to prevent warping.
The best way to clean a printing bed is to use an ammonia-based cleaning product such as Windex. If you can’t get your hands on Windex, then a solution of water and isopropyl alcohol should do just fine. Make sure that all the cleaning solution has dried off before applying your adhesive.
When working with PLA, the most recommended adhesive to use is standard blue painter’s tape. Painter’s tape is a lot like regular masking tape but is designed to remove more cleanly without leaving traces of adhesive. Not only does painter’s tape improve adhesion of PLA to the printing bed, but the bottom of PLA prints also come out with a smoother finish. Blue painter’s tape is also easy to find and quite inexpensive.
When applying painter’s tape, make sure that you maintain an even layer on the printing bed. This means that you should not miss even a small spot on the bed and that you should avoid having overlapping spots of tape application. Painter’s tape is not meant to be used with heated beds, as high temperatures render the tape’s adhesive ineffective.
Hairspray is a good alternative to blue painter’s tape, should you happen to have a canister lying around the house. The adhesion quality of hairspray is not as good as painter’s tape, but it can be applied much faster. All you need to do is to apply a thin layer of hairspray directly on the printing bed, ensuring that the bed is completely covered.
If you are using a heated bed and find that bed adhesion is still a problem, then you can apply a layer of Kapton tape on your bed. You can go for the thinnest Kapton variants to keep the costs down, as they should perform sufficiently well for PLA.
6. Use a heated printing bed
Getting a heated printing bed is probably the most reliable solution to your warping problem, but it’s also the most expensive. It’s well worth the investment, though, as a heated bed gives you a lot of flexibility to work with more filament types.
As its name implies, a heated bed allows you to lay down the filament material on a build platform with a temperature higher than ambient. The conventional advice when using a heated printing bed is to set it at a temperature just below the glass transition temperature of the material you are working with. This keeps the filament material in a solid state while keeping it just soft enough to adhere to the surface of the bed.
The recommended bed temperature for printing PLA is 60 °C. For best results, a heated glass bed will all but eliminate any issues with PLA warping. Aside from providing a massive improvement in bed adhesion, prints down on a glass heated bed also come out with a smooth and shiny bottom layer.
7. Don’t use a cooling fan – at least for the first few layers
Rapid cooling is the enemy when it comes to preventing warping, so using a cooling fan when printing PLA is a massively bad idea. It is critical that you do not turn on your printer’s cooling fan for the first few layers of a print, as these are the most prone to warping.
If you really must, then you can start to use a cooling fan once the bottom layers have completely cooled. Most 3D printing software have pre-programmed functions that will activate the cooling fan only after a specific height or number of layers has been achieved. However, if you’re not in a hurry, then we recommend not using a cooling fan at all.
8. Use an enclosure
If a heated bed still does not solve your PLA warping problem, then you can add an enclosure to your 3D printer to eliminating the cooling effect of drafts in your working environment. This is especially important if you are working in a setting where drafts cannot be completely eliminated.
This measure is rarely needed for PLA since it prints at a relatively low temperature. However, getting an enclosure could still be a worthwhile investment if you plan on using high-temperature filaments such as polycarbonate (PC) in the future. If you’re not keen on spending for an aftermarket 3D printer enclosure, you can come up with DIY versions using cardboard boxes, acrylic sheets, or one of those cheap clear plastic storage boxes.
Final thoughts
3D printing is one of those skills that are easily learned but hard to master. Anyone can fork over the money for a 3D printer and some filaments, download a free 3D design, and start 3D printing in a matter of minutes. However, solving persistent problems and making subtle improvements to the print quality takes a considerable amount of effort to learn and play around with the printer’s settings.
Warping is just one of the more common problems that 3D printers encounter. It’s rarely a problem when working with PLA, but it can still happen. Fortunately, PLA is one of the filaments that are least prone to warping. If you are encountering warping with your PLA filament, then you can take the steps we have outlined above. You’ll be producing PLA prints with perfectly flat base layers in no time.
useless these posts, all of them, Warping cant be stopped. Theory is fine but in practise these ‘easy fixes’ do not work at all. Use hair spray? come on, 3D printing is way more powerful to warp then the spray can prevent. all useless fixes to avoid saying the truth. 3D printing just doesnt work yet
BlaBla, you are wrong. I am new to 3D printing, and I can control warping already. The ideas here aren’t necessarily the best, but they are a good start, and as you learn more, you can overcome the annoying warping.
In my case, it’s the filament company. I had to switch. Pay extra for good filament and you’ll have better results. Also, don’t just go for the cheapest printer available, though there are at least 2 brands that have 3D printers in their lines that are both inexpensive, and very versatile and good. You have to fiddle with them more, but once you tune things up, you’re golden.
Yes, 3D printing hasn’t arrived yet, because some people aren’t smart enough to get things to work.
My son gave me a wall plaque that says it best, “Can’t Fix Stupid” and I’m looking at it now.
I absolutely love this firmware. From the awesome white lines around options boxes ( I cant say how many times I had hit bed level again by accident without that little tweak) to its general all round goodness in fixing so many issue I was having with my printer. I switched to the alpha build as I couldnt get a consistent print using the other on my 422 board ender 3 v2. although it seemed to do a full bed level fine and the bed was already level manually, it just seemed to be getting into tighter tolerances as soon as it went right of centre. Alpha seems to have sorted it. I did have one occasion with the alpha that had the printer set off and try to print before the nozzle and bed were up to temp. but thats only happened once in around 10 or fiftenn prints so definitely a glitch moment rather than a regular thing. I just wanted to say thanks for the fw. appreciated.
You should NEVER have a heated bed above 60 for PLA. That actually CAUSES warping! 50-55 is much the best temperature. I don’t know who is recommending 70 degrees but they are OH SO VERY WRONG!
well that explains my warping… I have found a heated bed of 75 degrees tends to work well for sunlu blue pla, but I use a raft…