A Detailed Guide to the Prusa 3D Printers
As one of the most well-known names in the 3D printing industry, Czech-based Prusa Research has built a solid reputation bolstered by the excellent quality of their 3D printers. The open-source model adopted by manufacturer Josef Prusa has helped make the development of these printers a work done by the community.
Right now, Prusa sells four 3D printer models, all of which are relatively affordable and highly reviewed. If you want to get in on this action, then here’s a detailed guide on which Prusa 3D printer you should go for, regardless of your level of experience.
1. Original Prusa Mini
Price: $349.00
Launch date: Late 2019
Ideal for: Beginners, users with limited space
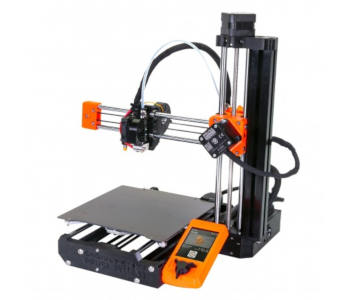
As the name implies, the Original Prusa Mini is a highly compact 3D printer that offers all the best features of the full-sized Prusa models. This is also their entry into the budget market – it costs less than half the price of Prusa’s flagship 3D printer, the Original Prusa I3 MK3S.
With its small 380 x 330 mm footprint, the Original Prusa Mini is the perfect 3D printer for those who don’t have a lot of space to work. Of course, this also means that the build volume of the Prusa Mini is fairly limited at 180 x 180 x 180 mm. This is something you’ll have to deal with but all the brilliant design elements we have come to expect from Prusa are there – from the magnetic steel print bed to the colored LCD screen interface.
The Prusa Mini comes almost fully disassembled when it ships, so expect to spend between 1 to 2 hours for assembly. A lot of thought has gone into making the assembly instructions as intuitive and easy to follow as possible, so even beginners should find this whole experience fun.
To help keep the Prusa Mini small, it comes with a Bowden-style extruder. Much has been said and written about the complications of using a Bowden extruder, and all those pretty much still manifest in the Prusa Mini. With a longer path for the filament to travel, the Bowden Extruder can clog more frequently than you care for. If this happens, you may need to loosen the extruder gear or replace the PTFE lining of the hot end completely to get the filament running again.
Aside from that hiccup, the Prusa Mini has elements that make it very beginner-friendly. It ships with the PrusaSlice slicer software which has now been updated with a profile for the Mini. You can run the slicer in Simple mode which only gives the most basic parameters to adjust, or you can switch over to Expert mode for more customization options. Loading of files into the Prusa Mini can be done either via a USB cable or online through the printer’s Ethernet port.
The color LCD screen of the Prusa Mini is also a very useful tool for starting up and monitoring the status of the project. At the onset, the screen displays the estimated time it will take for the project to finish and how much filament it will consume. The display then updates as printing progresses to show the total elapsed time.
One of the best features of the Prusa Mini (and other Prusa printers) is the removable magnetic print bed. Not only can the bed be heated up to 100 C, but it has also been coated with PEI to help with bed adhesion and can be easily popped off the printer to facilitate removal of your finished print. It works great in most cases, although the temperature limitation of the bed can be problematic in some cases.
According to Prusa, the Mini can work with a selection of filament materials that include PLA, ABS, PETG, ASA, and ABS. The maximum temperature that the extruder can reach is 280 C, which should theoretically be hot enough to print with Nylon. However, warping can be a problem because of the limited bed temperature. If you’re planning on printing with Nylon or ABS, it would be a good idea to use a DIY enclosure.
The Prusa Mini lacks an empty filament sensor (only available as an optional upgrade) or any print resume function. This is presumably a move to help keep the price of the printer down and is not a deal-breaker in any way.
Overall, the Original Prusa Mini is a compelling product for those who want to get into 3D printing but aren’t willing to spend $500 to $1000 on their first 3D printer. Prusa seems to have designed the Mini specifically to be beginner-friendly with the level of care and quality that we have come to expect from the brand.
2. Original Prusa i3 MK3S
Price: $749.00 (kit) or $999.00 (assembled)
Launch date: Early 2020
Ideal for: Experienced users
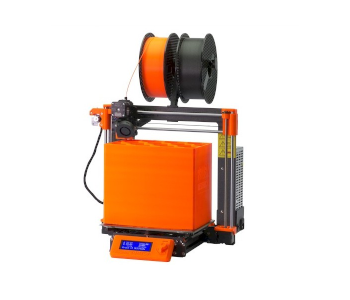
The flagship of the Prusa brand, the i3 MK3S is Prusa’s follow-up to the award-winning MK2S printer. Even with lofty expectations, the i3 MK3S has managed to impress just about every industry expert and has been repeatedly declared as the best 3D printer of 2020 by several review sites.
Simply put, this 3D printer benefits from all the lessons learned from the other Prusa models that came before it. It features improvements in the empty filament sensor, extruder design, and slicer software. Combined with the old and reliable features, the i3 MK3S is simply described as a 3D printer that works without being too complicated to use.
The beefier i3 MK3S can accommodate a maximum build volume of 250 x 210 x 200 mm, which should be enough for all but the exceptionally large 3D printing projects. As with previous iterations, its printhead is mounted on rails that allow movement in both the X-axis and Z-axis, while the print bed is free to move along the Y-axis. This design helps with rigidity and eases the movement requirement of the print bed, allowing for printing that is more precise, faster, and quieter.
The i3 MK3S uses a direct extruder which has been redesigned with two extruder gears. This makes the handling of all filament types, including flexible ones, less problematic. The extruder has also been redesigned to allow access and replacement of the PTFE tubing without having to take apart the entire extruder assembly.
The magnetic PEI-coated print bed is back in the i3 MK3S. This time, Prusa offers both a smooth PEI sheet and a textured PEI sheet for better adhesion. The bed temperature can reach a maximum of 120 C, while the hot end temperature can be heated up to 200 C. At these temperatures, printing with filaments like Nylon, ABS, or Polycarbonate should no longer be a problem, although you might still need an enclosure. An all-metal hot end contributes as well to making the i3 MK3S as versatile as possible in terms of filament compatibility.
The Prusa i3 MK3S is a fairly “smart” 3D printer. It comes with an automatic bed leveling feature and has a “Power Panic” mode which kicks in if there is a loss of power. Once the printer detects a power interruption, it shuts down all heating systems and saves the status of the current print job so you can pick up right where you left off when the power comes back.
The i3 MK3S comes with the Prusa Slic3r, a slicer software that is powerful yet intuitive and easy to use. This version of the slicer has been upgraded with more profile options, easily allowing users to swap between “Speed” and “Quality” modes.
The Prusa i3 MK3S isn’t exactly cheap, but it’s easily one of the most reliable, yet easy to use, 3D printers available right now. The various quality-of-life improvements that Prusa has made with this 3D printer has rounded it out into one of the best they have ever developed. Prusa also offers top-notch customer service should you run into any problems. This printer is highly recommended for users with a moderate level of experience who are considering offering commercial 3D printing services.
3. Original Prusa i3 Multi Material 2S Upgrade Kit
Price: $299
IDEAL FOR: Long-time owners of the Prusa i3 MK3S
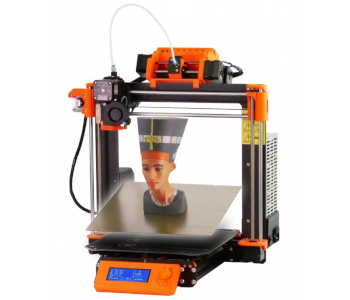
This is not a separate 3D printer but is instead just an upgrade to the Original Prusa i3 MK3S. The technology has been around for a couple of years but has now been updated to its best version in the MMU2S. This kit is also compatible with the MK2.5 and MK3 versions of the Prusa i3 printers.
Like the older versions, the MMU2S is designed to handle switching between up to five different filaments. It’s basically a print head replacement for the Prusa i3 MK3S, although saying it that way may be understating just how complex the setup can be. Assembly of the MMU2S is just slightly more complicated than the assembly of the MK3S printer itself, in case you ordered it as a kit. Thus, we recommend getting familiar with the components of your 3D printer before going ahead and ordering this upgrade.
Prusa has made a lot of improvements in this version of the Multi Material upgrade. It now has a direct extruder (instead of Bowden) and just a single PTFE tube to lead the selected filament into the extruder. It also benefits from the new hybrid mechanical-optical filament sensor of the i3 MK3S, as well as its Bondtech double extruder gears.
The MMU2S kit comes with an external filament buffer which helps prevent filament entanglement and makes it so much easier to position the five filament spools relative to the printer. It seamlessly integrates into the smart systems of the i3 MK3S and can also detect and recover from power loss.
The standard Prusa Slic3r software supports the MMU2S upgrade with its various wipe features. To save on filament and time, you can choose to either wipe excess filament into the infill, into an object, or simply have a Smart Wipe Tower. This allows for a clean changeover from one filament to another while minimizing filament waste.
One only needs to look at Prusa’s showcase of prints made using their MMU2S upgrade to realize the potential of this add-on. It requires a step-up in terms of technical skill to fully utilize its potential, but this is an upgrade worth considering for anyone who has spent time with their Prusa i3 printers.
4. Original Prusa SL1
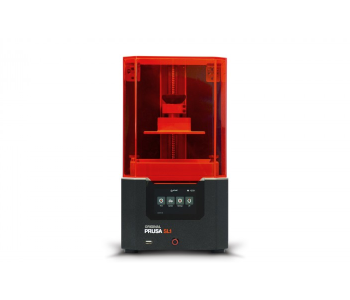
Price: $1399 (kit), $1699 (assembled)
Launch date: Early 2019
IDEAL FOR: Professional and commercial users
Prusa has managed to build a pretty solid reputation with their FDM printers, so it really was only a matter of time before they delved into SLA printing. The SL1 represents their initial effort and was only made possible by acquiring Futur3D, a company with five years of experience with the technology. Overall, the SL1 was great for an initial product but isn’t quite there yet compared to more developed SLA printers.
The Prusa SL1 strives to be a cut above the budget SLA printers but still at a relatively affordable price. The premium feel is apparent in the SL1’s build quality and a well-thought-out interface that features one of the first Prusa printers to come with an LCD interface.
If you order the kit version of the Prusa SL1, then be prepared to spend the better part of the next one or two days to put it together. There is a whole array of panels, circuit boards, and wires to assemble which fortunately is made easier by the detailed instructions written up by Prusa. This makes it sound a little more complex than it actually is – it’s not terribly technical, just time-consuming.
More specifically, the Prusa SL1 is an MSLA, or masked SLA, 3D printer. What this means is that the SL1 shines UV light through a mask to cure an entire layer of photosensitive resin simultaneously. This is in contrast with traditional SLA printers that use a beam to cure the resin one point at a time. Using the 5.5-inch 2K LED screen, the Prusa SLI1 improves on the throughput of a traditional SLA 3D printer.
Another characteristic that makes the Prusa SL1 unique from other SLA printers is the way that the resin vat tilts ever so slightly once a layer has been completed. This reduces the vertical force needed to separate the finished print from the bottom of the resin tank. For reference, the Prusa SL1 is a bottom-up printer with a transparent build plate that moves up as the print progresses.
In terms of print quality, the Prusa SL1 performs as excellently as just about any high-quality SLA printer. It can reproduce details at a much finer level and produces prints with layer lines that are barely visible. The 405-nm wavelength of the SL1’s UV light made it compatible with a wide selection of third-party photopolymer resins, although you may have to play around with exposure time settings.
The Prusa SL1 also comes with the signature Pruca Slic3r software, which has been updated for SLA slicing. The software is fairly easy to use has been updated and improved since the initial launch of the Prusa SL1.
Prusa also sells the Original Prusa Curing and Washing Machine (CW1) as an add-on for the SL1. This is an all-around processing tool fo SLA prints. The machine has functions for washing of finished prints with isopropyl alcohol, drying, and post-curing UV exposure. This is a great accessory for eliminating the mess and hazard of handling the mixture of isopropyl alcohol and uncured resin.
The Original Prusa SL1 is a great option for those who are into commercial 3D printing and need a higher level of detail than what FDM
technology can provide. Although there are other SLA printers that are much more expensive, the Prusa SL1 is certainly not cheap – especially if you pair it with the Prusa CW1 post-processing machine. What we know for sure is that Prusa is a stickler for innovation and that we probably have not seen their last stab at SLA printing.
Final thoughts
The Prusa has managed to maintain a solid reputation in the world of 3D printing by continuously coming up with more and more innovative features for 3D printers. Aside from the fact that the printers are open-source, the company itself takes pride in being cognizant of the needs of their users.
This community-driven approach to product development has propelled the Prusa brand to heights that have made them virtually unequaled. It’s hardly surprising that their products routinely win awards and get declared the best 3D printer of the year, every year.

