10 RC Decals for the Ultimate Makeover

RC decals are custom designs prepared on sheets, most with adhesive backing. Materials include things like waterslide transfer paper, transparent PVC film, and white inkjet vinyl. There are 1000s of readymade decals to choose from. Some hobbyists like to create their own unique designs. You need to know how to apply them to your RC model in either case, and that’s what this introduction covers.
Keep reading if you’re new to customizing RC cars, trucks, planes, or other models. The reviews that follow will make more sense if you do, and you’ll know how to apply decals—the right way.
5 Steps to Applying RC Decals
Here are the 5 steps needed to customize your RC vehicle like a pro:
- Make your plan
- Get the right tools
- Proper preparation
- Trim like a pro
- Apply the stickers
It may sound like a simple process, and it is with the right approach. But it’s also possible to make a complete botch of everything, and many people do. Common blunders include touching the sticky side with fingers or trapping air bubbles. Others are placing splatters, drips, and flames, etc., in the wrong directions. All these things and others are avoidable with a little knowledge.
#1 Plan for Your Decals
It’s vital that you have a plan for your stickers. There’s nothing worse than putting something in place only to realize it’s too soon. For example, you may have wanted it to overlap another decal that isn’t on the model yet. Make sure you know what goes where and the order to place them.
#2 The Must-Have Decal Tools
Makeshift tools won’t do. Having the proper instruments guarantees to make the job easier and more successful. Make sure you have a pair of quality decal scissors. Regular multi-purpose ones are okay for large stickers. However, decal-specific scissors are invaluable for cutting small intricate designs. You also want a hobby knife to weed with and for making cuts that are too tiny for scissors. That’s it.
#3 Preparation Is Crucial
Preparing your new model is the most tedious part of the job, but it’s also vital. If you fail to prepare the body, then you should prepare to fail. It’s as simple as that. Prepping the surface of your RC model shouldn’t take long. The secret is to make sure it’s 100% free of dust, dirt, and greasy finger marks, etc. Some like to clean their models using isopropyl alcohol on a lint-free cloth.
Tip: Reclean each section before you apply the decal, but make sure the alcohol has dried 100%.
Cleaning an old model
Removing old decals from a model can leave a sticky residue behind. Isopropyl alcohol is not much good in this case. Instead, use a product like Dynamite 5500 Magnum Force 2 Motor Spray. Apply some to a paper towel and wipe it over the sticky area until the residue as completely gone.
#4 Trimming Matters
OK, you have your tools, so now it’s time to cut the decals from the sheet. The way you cut determines the finish. The secret to a pro look is to cut close to the design so that no excess material remains. Take your time with this process. Seriously, even a little excess transparent material will result in an amateur finish. Even precut stickers need their clear borders trimmed before you apply them.
#5 How to Apply RC Decals
A lot of mistakes happen out of ignorance, impatience, and frustration. It doesn’t have to be that way. There are various ways to overcome any awkward situations when applying decals. This section looks at working with large stickers, how to deal with curves, and proper placement.
Coping with large stickers
First-timers may find it tricky to apply large stickers to their RC model. You risk stretching and tearing if you need to pull it off to reposition the design or number. And the more you do it, the less effective the adhesive becomes. The solution here is to replace stick with slide.
First, add a drop of regular dishwashing detergent to a few ounces of water and stir. Next, apply a little of that solution to the area you want to place the decal. Now you can gently slide the design or number into place. Gently squeegee out any excess water with a clean cloth and wait for it to dry. Pop any air bubbles that materialize with your hobby knife, then press the material down.
Working the curves
Stickers sometimes meet curves, and it can be fiddly trying to get them to lay flat on the surface. The way to overcome that is to make the material more pliable. Gently warm it up using an ordinary hairdryer on a slow blow setting with medium heat. This approach makes working the curves much easier. Don’t be afraid to make one or two relief cuts with your hobby knife if you need to.
Decal placement
OK, now you know how to deal with large stickers and work the bends. Now it’s time to decorate your model and make it stand out from the rest. We have two approaches for this, but first a tip.
KEEP YOUR FINGERS AWAY FROM THE STICKY BACKING
Even an accidental touch with the finger tips could render the decal useless. It’s easy to do, but it’s also easy to avoid when you use one of the two methods below.
Method 1: Carefully remove the entire backing, and then place part of it back onto the sticky surface. You can now use the unstuck part of the backing as a handle to move and position the decal.
Method 2: Carefully remove the entire backing. You can now use your hobby knife blade, or a thin, flat screwdriver as the handle to move and position the decal. An even better pick-up tool is a stainless-steel wax and clay spatula. That’s something to think about if you plan to work with stickers a lot.
About My ‘RC Decals’ Guide
Below are 10 mini-reviews for RC decals and sticker packs. There are lots of products out there, but some are better than others. I have cherry-picked the ones here based on personal experience and real user feedback. The first three products are the Editor’s pick for Best Budget followed by Best Value, and then the Top pick. There should be something here for most RC custom projects.
RC Decals Comparison Table
1. RC 1/10 Scale Truck Body Decal Set | Best Budget
EDITOR’S RATING: 4.9/5
What’s in the pack: 42 vinyl decal stickers on one sheet, 7.5” x 3”
These Best Budget decal stickers are small-sized, precut, and ready to apply. The makers print the designs onto 3M air release HD wrap vinyl, finished with a high-gloss laminate. It’s a quality product that should outlive the life of the RC model when applied correctly. There’s a good variety here, so you have plenty of opportunities to give your RC vehicle a unique look.
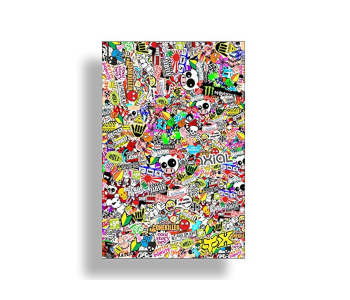
2. Graffiti 1/10 Scale Sticker Bomb Decals | Best Value
EDITOR’S RATING: 4.6/5
What’s in the pack: One sticker bomb on two sheets, 8.75” x 5.75”
This decal pack is custom printed, which means it’s not layered. The product uses 3M™ premium cast vinyl—a reputable brand in the world of RC decals. It’s a wild and whacky design used to cover large parts or the entire body of an RC vehicle. The prints are ultra-clear with consistent colors. It’s an eye-catching finish and a lot easier to achieve than a custom paint job.
3. Assorted 25 Piece Racing Decal Sticker Pack | Top Pick
EDITOR’S RATING: 4.7/5
What’s in the pack: One assorted pack of at least 25 RC stickers
The Top Pick is a random race-related decal pack by Crash Daddy. It’s a popular choice among RC enthusiasts. However, you don’t know what you’re going to get until it arrives. That’s also half the fun as there are sure to be several unique designs that few others have. Some stickers are well-known companies and others less so. Sizes vary too, ranging anywhere from 2–9 inches.
4. Pine Car Derby Dry Transfer Decals Stripes/Flames
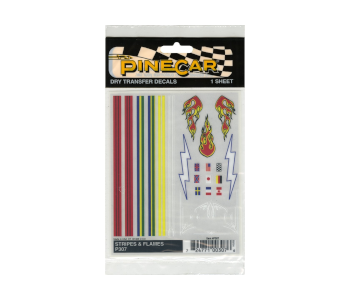
EDITOR’S RATING: 4.3/5
What’s in the pack: Stipes and flames decals on one sheet 4 x 5”
This decal pack is for decorating RC Pinewood Derby car kits. The flames and stripe decals are quite small, and some people find dry transfer awkward. It’s not if you follow the company directions. To apply the stickers, position them on the car, and hold firmly. Then, rub a ball burnisher or blunt pencil over the surface area, making sure not to press too hard. That’s about it.
The great thing about these decals—aside from the price—is that they don’t show lines or transparent film like stick-ons. Newbies to dry transfer should watch the video tutorial by Woodland Scenics.
5. Traxxas Racing Sponsors Complete Decal Sheet
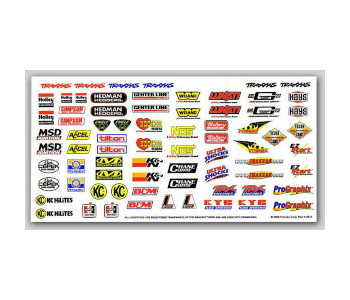
EDITOR’S RATING: 4.2/5
What’s in the pack: 25 assorted decals on one sheet, 12 x 5”
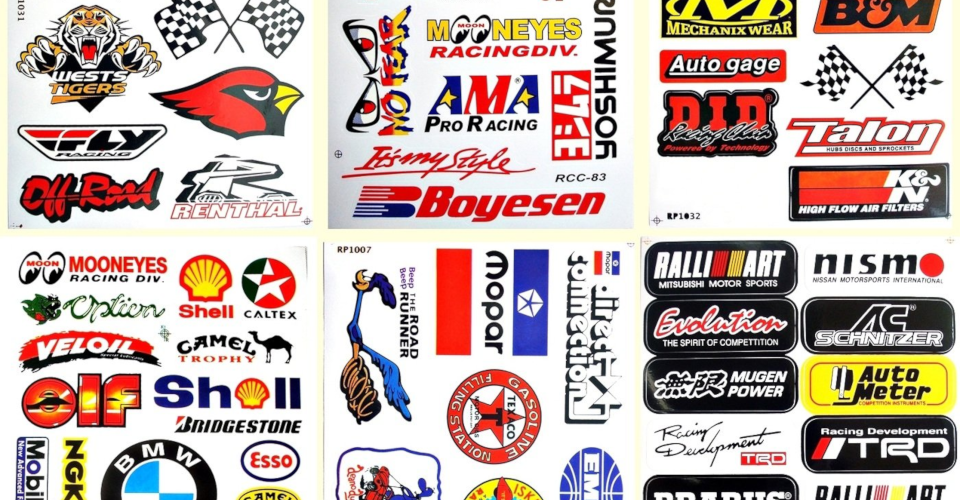
There are plenty of cool small-sized decals in this pack to dress up your RC model. The product has many brand name sponsors of Traxxas Racing. Some of those include K&N, Hooker headers, Mechanix, NOS, Holley, and Wear. There are also some Traxxas logos in the pack, including the high-profile TRAXXAS.COM. These are not pre-cut stickers, so you need your decal scissors and a hobby knife.
6. Genuine MyTrickRC 1/10 Scale Full Sticker Set
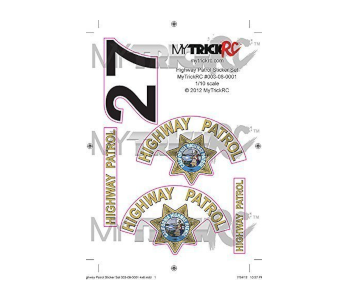
EDITOR’S RATING: 4.8/5
What’s in the pack: One pack of 6+ various decals
MyTrickRC CHP Stickers can add a touch of realism to any 1/10 scale police vehicle. They not only look fantastic, but they’re fully waterproof and super-easy to apply. Police stickers are not that easy to come by, so this pack is a welcome addition to fans of Highway Patrol. And at under 10 dollars (at the time of writing), they’re correctly priced in a competitive decal market.
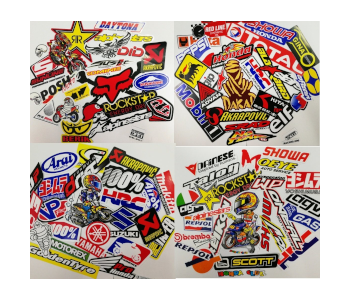
7. RC Auto Truck Sponsor ATV Drag Racing Decals
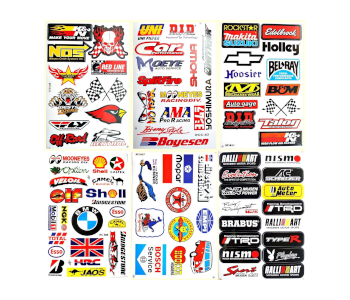
EDITOR’S RATING: 4.5/5
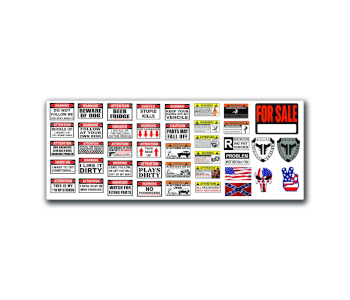
What’s in the pack: One pack contains 6 x 7×10” sheets of 70+ assorted race stickers.
There are a lot of decals in these packs for the money. The brands are the same as those shown on the sales image and contain many well-known racing sponsors. Each one is water and weather-proof, die-cut, and ready to use right out of the pack. There are some legitimate complaints that they’re hard to peel. Still, you’re unlikely to cause damage if you take your time lifting them off the sheet.
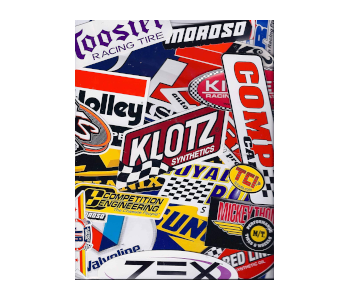
8. Random Motorcycle Car Racing Decal Set
EDITOR’S RATING: 4.4/5
What’s in the pack: 45 random stickers
This decal pack is a lucky dip. There are at least 45 small to medium-sized stickers included, but you don’t know what you get until it arrives. All items are pre-cut, fixed onto quality, self-adhesive vinyl, and ready to use. Each pack should include plenty of brand name sponsors. It’s a waterproof, weatherproof product that looks great on RC models or wherever else you want to place them.
9. General Lee Scale Duke of Hazzard Decals
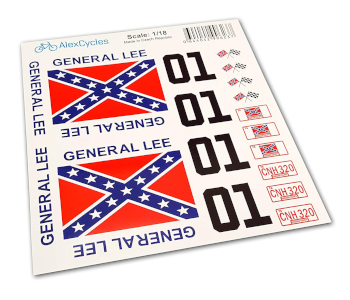
EDITOR’S RATING: 4.5/5
What’s in the pack: Full set of Duke of Hazzard Decals
This is a high-quality full body kit by Alex-Cycles. It’s a must-have collection of decals for fans of General Lee and the Duke of Hazzard. There’s everything included to decorate 1/18 scale RC cars. Each of the various sized stickers arrives pre-cut with special application tape. You get to choose from two variants. One is each letter or number separately, and the other is a one-piece format.
10. Factory Effex Sponsor/Logo Decals Sticker Sheet
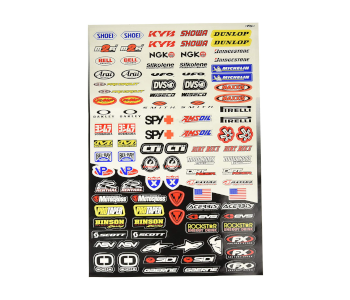
EDITOR’S RATING: 4.4/5
What’s in the pack: Approx. 100 stickers on a single 13″ x 19″ sheet
There are many small decent quality, brand name sponsor stickers in this pack. They’re not individually precut—they’re all attached to the same sheet. That means you need a steady hand and a hobby knife to lift the edges to peel them off as needed. These stickers are easy to apply and just as easy to remove if you decide to change them. It’s a nice product for anyone looking for tiny decals.
Contents
- 5 Steps to Applying RC Decals
- #1 Plan for Your Decals
- #2 The Must-Have Decal Tools
- #3 Preparation Is Crucial
- Cleaning an old model
- #4 Trimming Matters
- #5 How to Apply RC Decals
- Coping with large stickers
- Working the curves
- Decal placement
- About My ‘RC Decals’ Guide
- RC Decals Comparison Table
- 1. RC 1/10 Scale Truck Body Decal Set | Best Budget
- 2. Graffiti 1/10 Scale Sticker Bomb Decals | Best Value
- 3. Assorted 25 Piece Racing Decal Sticker Pack | Top Pick
- 4. Pine Car Derby Dry Transfer Decals Stripes/Flames
- 5. Traxxas Racing Sponsors Complete Decal Sheet
- 6. Genuine MyTrickRC 1/10 Scale Full Sticker Set
- 7. RC Auto Truck Sponsor ATV Drag Racing Decals
- 8. Random Motorcycle Car Racing Decal Set
- 9. General Lee Scale Duke of Hazzard Decals
- 10. Factory Effex Sponsor/Logo Decals Sticker Sheet