Tips on Starting A Real Estate Photography Business
Much like any other business, not everyone who goes into real estate photography stumbles into success. The idea sounds simple – just take photos of houses that real estate agents can use for their property listings. While just about any photographer can take photos of houses and rooms, standing out in what could be a crowded market will require exceptional skills and gear.
It may take some effort but the biggest incentive of serving the needs of the real estate industry is that it can quickly be very lucrative for a good photographer. To improve your chances of succeeding as a real estate photographer, here are some of our best tips.
What is real estate photography?

It may sound strange to hire a professional photographer to take photos of your house, but this is done for one very specific objective – to sell property. Thus, real estate photographers are hired by real estate agents so they can spruce up their property listings with professionally shot photos and videos.
Real estate photography is still considered a niche profession, so it may not enjoy the same level of widespread popularity as general photography services. However, it offers the possibility of a lucrative career by taking on even just a few high-value clients. Real estate photographers can charge anywhere between $100 to $1000, depending on several variables.
Videos can also be a great addition to real estate photography services. With videos, clients can take potential buyers on virtual tours of the properties they are selling without having to schedule physical visits. Videos can be shot using a handheld camera or more unconventional means, like a camera drone.
Get a camera with automatic bracketing
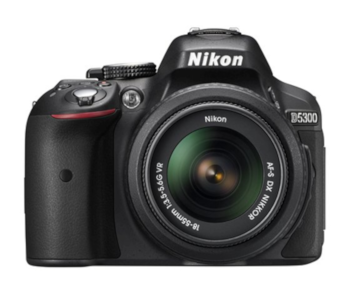
The good news is that you don’t need a sophisticated or high-end camera to shoot photos for real-estate advertising. Even a beginner camera will do perfectly fine in the hands of a skilled photographer.
Aside from all the usual features, a less common one to look for is automatic bracketing. This automatically takes multiple shots of a scene with each one taken at a different exposure level. With auto-bracketing, you no longer need to worry about details getting washed out or darkened due to improper exposure. This is especially important for property listings where every single detail needs to be visible.
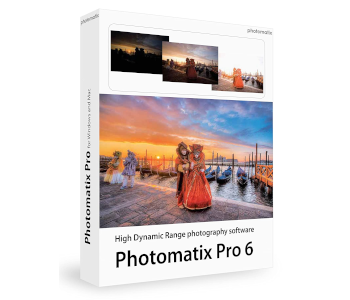
If you’re going to take bracketed photos, then you will need good post-processing software to make the most out of them. Photomatix Pro is a good option for software that is specially designed for the merging of bracketed photos or what is commonly referred to as an HDR workflow. Adobe Lightroom is a more all-around option that also offers an HDR workflow on top off many other post-processing tools.
Invest in the right gear
Although you can work perfectly well with a basic camera body, there are three other accessories that we recommend you get – a high-quality tripod, a standard wireless flash, and a wide-angle zoom lens.
The tripod is simply a necessity for any type of professional photography work. You can set up your camera at a corner while you mix and match the elements of a room to give each shot a different “flavor”. If you want to maximize the available light by taking long exposure shots, then the stability that a tripod can provide is incredibly essential. Taking good bracketed shots will also be virtually impossible without a solid tripod.
A wireless flash is simply a means to have better control of the lighting of your shots. Although natural light is still the best option, you cannot reliably expect a healthy dose of natural light whenever or wherever you have to do a real estate shoot. Relying on a room’s built-in lights is usually fine but may also limit how you can frame or angle your photos.
You can even enhance the effects of lighting with umbrellas or softboxes. Lighting is something you can learn with experience, so don’t get intimated by all these lighting accessories – if all else fails, just take as many shots as you can take with different lighting setups.
We consider the wide-angle lens as the most essential accessory for real estate photography. In real estate advertising, your goal will always be to create an illusion of space – to make any room or house look larger than it is. For versatility, we recommend getting a 16-35 mm lens. You can also make do with a 14-24 mm if you don’t anticipate having to shoot at the widest setting frequently.
Browse real estate listings
When you’re just starting out, it can be hard to figure out what makes a good real estate photo. The quickest solution is to look at what others do, simply by taking a look at listing for real estate properties on sale.
The advantage of doing is two-fold. The first benefit is for you to see how photographers frame or compose their shots for real estate listings. The thought that goes into this shot may not be immediately apparent by just looking at it, certain aspects of it like angles and lighting can be easily deduced. This does not mean that you need to copy their techniques, but you can take a look at what works and develop your own style using these shots as starting points.
The other benefit of browsing real estate listings is that you can collect contact details of real estate agents with properties listed in your area. These are your potential clients. As soon as you have a solid business plan with a good portfolio and established service rates, then you can just cold call or send emails to these real estate agents to offer your services.
Build your portfolio
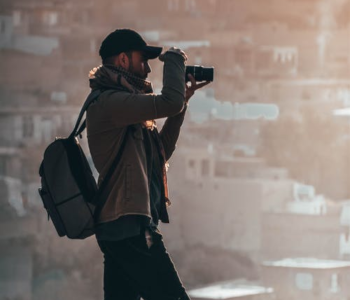
Before you can present yourself as a viable service provider to real estate agents, you’ll have to come up with a solid portfolio. A question always comes up when this topic is discussed – how will a budding real estate photographer build a portfolio if they haven’t done any jobs yet? This is a pretty bitter pill to swallow but you’ll likely have to do a few jobs for free.
This does not automatically mean that you need to get in touch with a real estate agent and offer your service for free. Why not start with family and friends? Perhaps your brother or sister has a nice house that they will let you photograph in exchange for just having nice photos of their home. If your friend has a café or restaurant, they would certainly appreciate having professionally taken photos of their establishment which they can use for advertising. Just make it clear to these people that you will also be using their photos for your portfolio.
The best thing about shooting photos exclusively for your portfolio is that you have the liberty of post-processing them heavily to make them look as good as possible. Even if you need to clean up a stain off the wall or edit out unsightly weeds from a lawn, your primary objective here is aesthetics – not accuracy. After all, your friend’s house may not look as immaculate as a brand-new house that’s on the market.
No matter your subjects, you will want to build a professional website to highlight your portfolio. You don’t need to build your website from scratch, as there are a LOT of free website builders out there. Some of these website building services, such as Wix, are even made especially for creatives to easily create their portfolios.
The best thing about creating your own website is that you are in full control of how the site will look like, making sure that it reflects your identity and your business. This is in contrast with social media channels, which are also valuable but in a different way.
Establish your rates

One more thing you need to do before you get in touch with potential clients is to establish the rates of your services. If you’re just beginning, then you may have to settle for rates that are lower than the average in your market. This also stresses the importance of doing a bit of research – how much do photographers in your area charge for real estate services? For instance, prices can be so much higher in big cities compared to smaller towns.
There are a couple of other variables to consider when establishing your rates. A good reference point would be the market value or the total area of the property you’re shooting. Photographers typically charge upwards of $500 per shoot for properties that are listed at $1 million or above. For smaller properties or those that measure 300 square feet at most, around $200 seems like a reasonable amount to charge.
You will also want to consider how long you may need to spend on the job beyond just taking the photos. Will you take several days to post-process the shots? Does the job require a quick turnaround? You might even need to spend a few hours to travel to the site. Each one of these factors can likely be used to justify an additional premium to your rates.
In any case, your business plan should always enumerate all business-related expenses. For your business to survive, you will have to make sure that you are earning higher than you are spending. This means taking stock of how much you spent for your gear, as well as other business-related expenses such as advertising, travel, software licenses, and equipment maintenance. Ultimately, this should be the basis of the rates you will charge for your service.
Promote via social media

Much has been said about the issues of social media relating to privacy and data security, but there’s no question that it can be an effective marketing tool. If you’re offering real estate photography services, then you should at least have accounts on Facebook, Instagram, and LinkedIn. Twitter, Behance, and Pinterest are also worthwhile considerations.
Social media platforms may not offer the same degree of customization as a full-fledged website, but it allows your work to reach a much wider audience. This is a great way to get both your work and your name out there. The unique advantage of social media is that it allows users to share your work out of their own volition, thus creating the possibility of your work going viral beyond the capabilities of any single person. It’s also mostly free to advertise your work via social media, so why not just explore this avenue?
Stand out with better technology
While experience plays a huge role in being able to charge premium rates for your service, there is one other element to explore – technology. Old-fashioned photography using DSLRs is mostly fine, especially in the hands of good photographers. However, there are now more advanced tools that can be useful specifically for real estate photography.
Drones can be quite a novel addition to your photography arsenal. A drone with a good camera can take pictures of property from angles that are simply not possible with a handheld camera. You can even use a drone to record a video while the drone flies around the perimeter of a house, showing off its lawn and a glimpse of the immediate neighborhood. The good thing about drones is that they aren’t necessarily expensive – you can probably get a good camera drone for the same price as a professional DSLR setup.
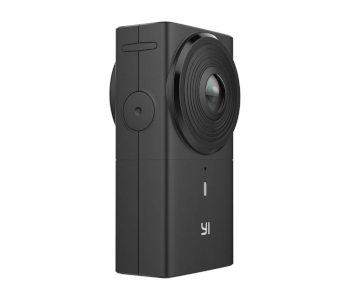
A 360 camera is another relatively new piece of technology that could be useful for real estate photography. A 360 camera typically has two wide-angle lenses that create a composite image. This image can be viewable from all 360 degrees, which means that the viewer can seemingly navigate a room freely. The difficulty with a 360 image is that it’s virtually impossible to compose – you would have to show a room in its raw form with only its built-in lights. Still, a 360-degree image can be a very novel addition to your portfolio and could pique the interest of real estate agents and property buyers alike.
Final thoughts
Real estate photography may be considered a niche of more traditional photography, but it takes more than simply taking a camera inside a house and taking photos. You also need to consider which parts of a house to highlight, how to arrange the furniture, and how to create the illusion of space. A good set of real estate photos can be the key to selling a property. Real estate agents know this and are usually more than willing to pay a premium for high-quality photography services.
What we’ve given here are only general tips on how to make a real estate photography business work. There are smaller details we’ve glossed over, such as how to compose your shots and to postpone shoots in case of bad weather. However, these tips should be enough to get you started.

