Tips on Reducing the Noise of Your 3D Printer

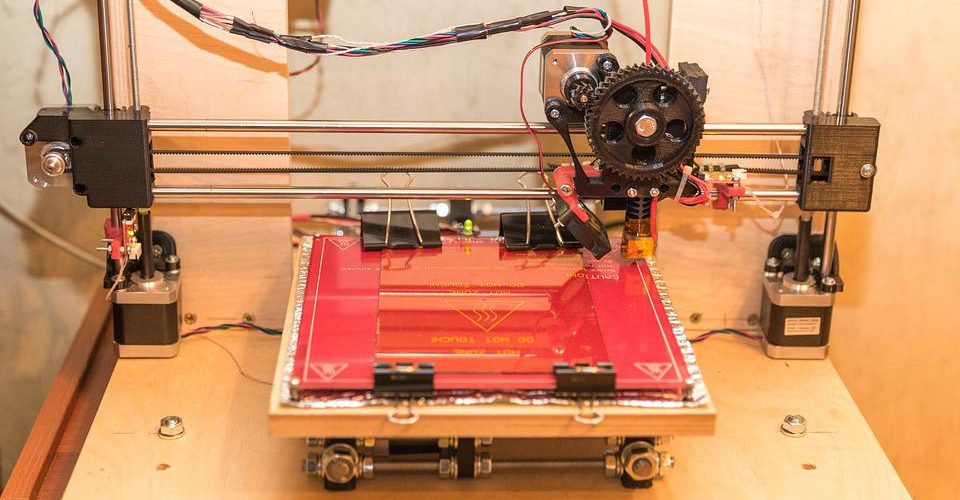
A major consideration when choosing where to place your 3D printer is the fact that it gets irritatingly noisy when it is running. This is particularly troublesome if you’re printing a project that will take 12 hours or more. For this reason, placing a 3D printer in your bedroom or living room simply is not practical.
The noise of 3D printers is unavoidable, but it can be reduced to more tolerable levels. You will also want to make sure that the noise you’re hearing is normal and is not a sign of damaged or misassembled components. Check out this guide on diagnosing and reducing the noise of your 3D printer.
Why are 3D printers so loud?

The noise made by 3D printers typically ranges from 40 to 55 dB. This is a pretty wide range in terms of loudness – 40 dB is comparable to the ambient sound in an urban area, while 55 dB can sound like there are people talking loudly right beside you. In any case, having a 3D printer in the same room – or even in the next room – is definitely not a good idea if you like your quiet time.
Why are 3D printers so loud anyway? It all comes down to the number of moving parts involved in operating a 3D printer. The common culprits for the noise are the stepper drivers, cooling fans, drivers, bearings, and a resonating structure. FDM printers tend to have more of these moving parts than SLA printers, so they are expectedly noisier.
This does not mean that you have to live with an unacceptable level of noise. Even among FDM printers, some brands or models are quieter than others. This means that the noise of 3D printers can be reduced through the careful selection of parts. Cheaper 3D printers tend to be noisier, though this is not an absolute rule.
Aside from the moving parts causing noise, higher levels of noise may be taken as a sign that the printer needs maintenance. Loose components or lack of lubrication can cause increased vibration or friction in the moving parts, which in turn tends to create greater noise.
Tips on 3D printer noise reduction
There are two strategies for reducing the noise level of your 3D printer. The first is to pinpoint each source of noise and address them separately. If your printer still is not quiet enough after solutions of this nature, then you can try to repress the noise by isolating or enclosing the 3D printer. Here are our recommendations, in order of easiest to hardest:
1. Check that everything is tightened

Before you do anything drastic, it’s very easy to spend a few minutes trying to tighten each screw, nut, and bolt on your 3D printer. Loose connections tend to cause more vibrations than usual, which can contribute to noise. If you want to avoid having to retighten these components frequently, you can apply some thread locker to these connections. This will help keep fastening components in place while also protecting them from corrosion.
2. Cushion the bottom of the printer
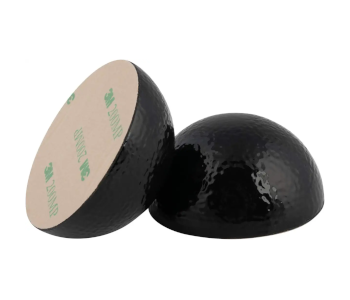
Is your printer in contact with a hard surface? Vibrations from the printer can travel over this hard surface, further amplifying the noise of your 3D printing setup. To avoid this, the common recommendation is to “decouple” the 3D printer from a hard surface. This simply means placing a vibration-resistant barrier between this surface and your 3D printer.
Any material with good flexibility can work for this solution. Even placing a cheap yoga mat on the bottom of the printer can do wonders to reduce its noise. If you’re willing to be a bit fancy, then you can grab some of these sorbothane non-skid feet. These are specifically designed to absorb vibration and reduce noise in industrial equipment.
3. Grease the linear bearings

Excess friction can also create high levels of noise, especially on the X and Y linear bearings. These are constantly moving throughout an entire 3D printing project, so the sound from poorly lubricated bearings can get really grating after a couple of hours.
Applying some WD-40 regularly to the linear bearings should do the trick. We recommend using the white lithium grease version, as these are ideal for metal-to-metal contact. Conversely, you can also use standard machine oil.
4. Reduce printing speed
A printer’s stepper motors are likely some of its noisier components. These motors will be running constantly throughout a 3D printing project to move the printhead around. Fast movements and constant changes in direction will further amplify the noise coming from these stepper motors.
Reducing the printing speed for your project should help reduce noise levels, even if only marginally. There are also a couple of other benefits that you can get by printing slowly, such as better detail accuracy. This option is worth exploring since it only requires changing your slicer settings.
If slowing down all your 3D printing projects is not an option, then you can consider only doing so when the printer is running at night or during quiet hours.
5. Install stepper motor dampers
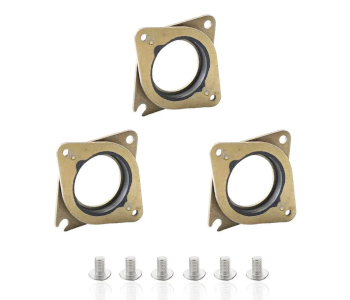
If slowing down your printing speed does not work or is not an option, then you can try to reduce the vibration from the stepper motors that travels for the frame of the 3D printer. This can be done by simply installing vibration dampers on the stepper motors. Reducing vibration dampers may even improve detail accuracy and overall print quality.
6. Build an enclosure
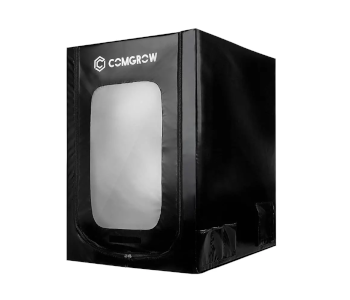
Building an enclosure around your 3D printer should help suppress some of its noise. There are lots of DIY ideas out there or you can just buy a pre-made 3D printer enclosure. Aside from noise suppression, an enclosure also helps reduce emission of unpleasant odors from the 3D printer. More importantly, an enclosure allows for better temperature control – quite handy if you’re running into warping issues.
Keep in mind that you’re dealing with components that can get very hot, so make sure to avoid flammable materials when building an enclosure. A full enclosure can also expose the mainboard and other electrical components to excess heat, so you might want to consider rewiring them so that they can be placed outside the enclosure.
7. Replace the cooling fans
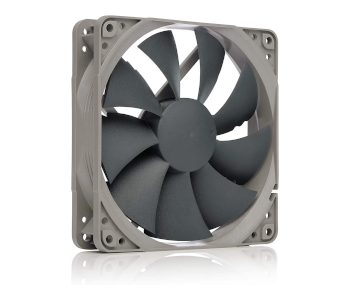
Depending on the model of your 3D printer, it can have several cooling fans with different applications. At the very least, it should have a cooling fan for the heat sink and a part cooling fan to speed up cooling of the extruded filament. Some 3D printers may also have a separate cooling fan to manage the temperature of the power supply.
In most cases, the stock cooling fans of 3D printers are very loud. This is magnified even further if your project needs rapid cooling, such as when printing at very high temperatures or with flexible filament. Stock cooling fans are loud because they are usually cheap. There are also not many people who would choose one 3D printer over another simply because the cooling fans are quieter.
For the heat sink cooling fan, replacement options include the line of silent cooling fans from Noctua. These come in a wide range of sizes, so you should be able to find one that fits your 3D printer.
Quiet blower fans for part cooling are a little harder to come by. Your best bet would be to get a larger blower fan that spins at high RPM, and then run that at about 40% to 50%. A high RPM fan should still generate enough air to cool the filament quickly. The key to keeping blower fans quiet is to avoid running them at 100% speed.
Replacing a power supply cooling fan is a lot more complicated and dangerous if you’re not familiar with what to do. If the noise from the power supply is bothering you, the easiest solution would be to replace the entire power supply with a fanless alternative. Fanless power supplies, however, tend to run at a maximum of 200W of power owing to the passive cooling design.
8. Replace the stepper motor drivers
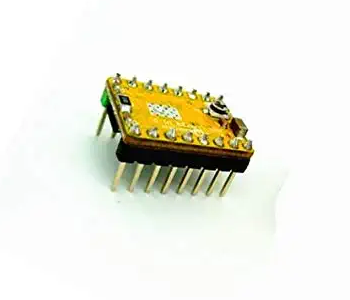
The stepper motor drivers are responsible for controlling the rotation of stepper motors and dividing the rotation into multiple discrete steps. This allows the print head of the 3D printer to move to specific locations accurately.
The problem with this design necessity is that it means that the stepper motors go through a continuous stop-and-start cycle. This contributes greatly to the noise of a 3D printer.
Some stepper motor drivers attempt to reduce noise by microstepping – dividing the rotation into even smaller steps to smooth out the movement of the motor. Upgrading the stepper motor driver not only reduces noise but can also improve the overall print quality.
Most stock stepper motor drivers have a minimum microstep of 1/16. Quiet drivers typically have a small microstep. For instance, this LV8729 stepper driver can be configured for as low as 1/128 microsteps. The TMC2209 is also a very popular quiet stepper driver that uses stealthChop2 Mute technology to reduce motor noise.
9. Upgrade the control board
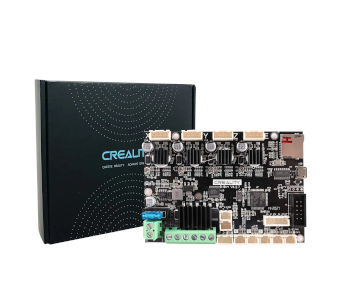
Not all 3D printer control boards come with replaceable stepper driver motors. If this is your situation, then your only choice would be to replace the control board entirely. Fortunately, main boards are not expensive and are easy to find.
The most popular silent control board is the Creality Ender 3 v2 with TC2225 drivers. This board claims to reduce the noise of compatible 3D printers to below 50 dB. It is plug-and-play only for the Ender 3 V2 printer, although it can be used with the Ender 5 by flashing the firmware.
Final thoughts
The constant noise of a 3D printer can be one of the more infuriating things about the technology. Considering how 3D printers can run for more than a dozen hours at a time, reducing their noise is a huge quality of life improvement. This is even more important now that 3D printing has become a hobby that people do in their homes.
Pinpointing where the noise comes from is the first step to making your 3D printer quieter. Solutions can range from changing a few slicer settings and doing preventive maintenance to outright replacing some of the 3D printer components with quieter alternatives.