Tips on Removing your Finished 3D Print from the Bed

Can you imagine working on a project for several hours, painstakingly adjusting settings to get the best results, only for something to go horribly wrong when it’s almost finished? This is exactly the case when something snaps off your 3D print just when you’re removing it from the bed – a situation that is familiar to anyone who has ever dabbled into 3D printing. What can you do to prevent this from happening? Here are some of the best tips and techniques that we have tried.
Before you print
Even before the print starts, you can take a few measures to prevent your print from sticking to the bed. If you’re printing on a glass bed without any tape or adhesives, make sure to clean the surface of the bed thoroughly with some isopropyl alcohol. This removes any residual adhesives from your previous projects.
Some users also find that setting the nozzle height at a too low Z-setting for the first layer tends to make the base stick to the bed too well. As a rule of thumb, set the home position of the nozzle at a Z-setting that is about 70% to 80% of the height of the first layer. This is a pretty good middle ground that ensures that the base layer sticks to the model during printing but can still be removed when the print bed cools.
After printing
When your print has finished, and you’re satisfied with its quality, it’s worth the time to take it slow and deliberate to make sure that you get the finished print off the bed. There are two objectives to this part: remove the print without the print getting damaged, and without the bed itself getting damaged. Here are the step-by-step procedures we suggest you take:
1. Cool it down
Right after printing, the best thing you can do to make sure that the print comes off cleanly is to leave it be. Let it cool down to room temperature from several minutes up to an hour. Not only does this help the print solidify and become more durable, but it also results in a slight contraction in the filament material. This contraction should too small to have any effect on the print’s visual appearance but should help it lift off from the print bed.
In most cases, the cooling effect is enough for a print to pop right off the bed. This method typically works with PLA and with other filaments that don’t require the use of any adhesives.
2. Use a bit of force
If the print has already cooled down but does not pop right off, then you might need to apply some force to it. Depending on how big or how sturdy your print is, you’ll have to exercise some care on how much force you apply. Most prints can be pushed, pulled, or twisted to some degree. Even if this does not fully remove the print from the bed, it should result in even the slightest allowance on the base, which will help you do the next step.
3. Tap with a screwdriver
Many experienced 3D printing professionals swear by this method. Once your print bed has cooled down to room temperature, simply take a flat head screwdriver, place it near a corner of the base of the print, and give it one sharp tap on the handle. The print should come right off in most cases. If you print with some tape on your bed, this method is really useful in preserving the tape, so you won’t need to reapply it for your next print.
4. Scrape it off
If you’ve reached this point and still cannot remove your print from the bed, then it’s best to remove your print bed from the build platform. The next steps could damage the clamps that hold the print bed in place.
Use a thin, flat object and insert it on any clearance that you can find between the base of the print and the bed. For this purpose, most 3D printing professionals keep a flat-edged steel scraper on hand. You can also use a razor blade with a handle (which you can print yourself with this design). Use a combination of a sliding and lifting motions to gradually lift the bed off the print. Again, be sure not to apply too much force, as you can still easily damage the print.
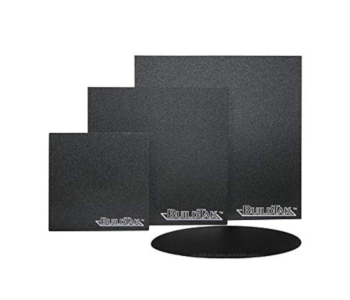
Just a word of warning: this method has the potential of damaging your print bed. If you print on an untreated glass surface, doing this method repeatedly can result in the surface getting progressively more uneven. If you print on a BuildTak, you’ll probably need to replace that BuildTak surface for your next print.
5. Cool it down even more
Cooling is your friend when it comes to removing the print from the bed. If you can cool your print down even lower than room temperature, then it should contract more and self-lift off the print bed.
The easiest way to do this is to place your whole print, including the bed, inside a refrigerator. You can leave it there for an hour or so, and it should be much easier to remove after. If your print is way too big for your refrigerator, then you can also use a couple of ice packs and place it on the underside of the print bed right below the base of the print.
6. Rinse with warm water
This method mostly works if you used an adhesive on your print bed, such as glue stick, ABS slurry, or hairspray. Lukewarm water – anything below 50 °C – should work well enough to rinse off the adhesive without damaging the filament material.
7. Use alcohol
If warm water doesn’t do the trick in rinsing off the adhesive, then some isopropyl alcohol should be a foolproof alternative. This works particularly well if you used blue painters’ tape to get your print to stick onto the print bed. The downside of this method is that you’ll have to remove all the tape afterward and apply a new layer before your next print project. Nobody likes the process of applying tape to a print bed, so consider this method a last resort.
For this method, simply pour some alcohol on the edges of the print. You’ll have to use a liberal amount since you’ll need the tape to soak up the alcohol and dissolve the adhesive. The print should come right off with a little bit of prodding.
Final thoughts
It can be really frustrating to come so close to the finish line and still mess things up. In 3D printing, if you’re not careful during the print removal step, you can end up ruining your finished print or damaging your glass print bed. Either way, it’s one of the most frustrating things that can happen to you in your 3D printing career.
Fortunately, this is a problem that just about all 3D printing professionals have gone through, so there is a wealth of good advice online. By taking the necessary measures before the printing starts and by following a deliberate and thoughtful approach to print removal, it shouldn’t be much of an issue. Do you have a method that works for you that isn’t listed here? Let us know in the comments below.
I’d definitely recommend the alcohol method. If a print sticks so well that it doesn’t want to come off it is probably a good one, so its time for a drink. Add lots of ice to a glass of something alcoholic (not IPA) and use it to cool the print by resting the glass on it (avoiding spills) and be patient and wait for the “thidk” sound. Whacking a hot print with rubber comedy hammer or chipping it off with a wallpaper scraper is something that could damage it and should only be done in sci-fi scenarios where the print is essential to save the world.