Getting Started with Resin 3D Printing – Beginner Tips

Up until a few years ago, the hobby 3D printing market was dominated by FDM printers. That seems to be changing now as more people become curious about the idea of 3D printing with resin. It also helps that desktop resin printers are now more affordable and easily available.
Making the transition from filament to resin 3D printing can seem daunting at first. It’s not that complicated – some would even say that they vastly prefer 3D printing with resin. For budding beginners, here are some of your best tips to get you started on the right foot.
Why 3D print with resin?
You’re looking at spending at least a few hundred dollars to buy all the necessary equipment and supplies to 3D print with resin. But is it worth the effort? As with any decision worth making, it’s a good idea to come up with a pros and cons list.
PROS
- The one characteristic that sets resin 3D printing apart from filament-based 3D printing is its better resolution. Resin printers are capable of creating very fine details, typically in the magnitude of 30 to 140 microns depending on the light source used to cure the resin. For this reason, many hobbyists who are into 3D printing action figures and busts vastly prefer printing with resin.
- Resin printing is generally faster than filament printing. Resin printers have fewer moving parts and do not rely on the mechanical motion of a heavy print head. The process is even faster if you use a Digital Light Processing (DLP) printer, as it can cure an entire layer at a time.
CONS
- 3D printing with resin can be a very messy affair. Liquid resin tends to get everywhere, especially when you are at the rinsing and post-processing phase. You will also need to use protective equipment because the liquid resin can be harmful when it comes in contact with the skin. You will also have to worry about the proper disposal of liquid resin – this is not stuff that you can just pour into the drain.
- The actual 3D printing process may be faster for resin printing, but you will need to go through tedious and messy post-processing. A resin print needs to be rinsed with IPA and cured under UV light. Again, the IPA that has been saturated with resin needs to be treated before disposal. The amount of additional work that goes into this should not be underestimated.
- Resin printers generally have smaller build volumes compared to filament printers within the same price range. However, this limitation can be easily hurdled by breaking down large models into smaller parts and putting them together physically.
- There used to be a time when the price disparity between filament and resin 3D printers was huge. That’s no longer the case nowadays, as there are now resin printers that cost less than $300. However, you will still need to buy additional supplies (IPA, UV curing station) on top of the slightly more costly bottles of resin. Looking at the overall costs, it’s still more expensive to do resin 3D printing compared to sticking to filaments.
Depending on your perspective, resin 3D printing can be either be better or worse than filament 3D printing. Resin printing certainly has its merits in terms of output quality but will require much more work.
Which resin printer should you get?
As mentioned, the resin printing field is now much more accessible because of the presence of inexpensive and beginner-friendly resin printers. Here are some of the resin printers that are most frequently recommended for beginners.
1. ANYCUBIC Photon Mono
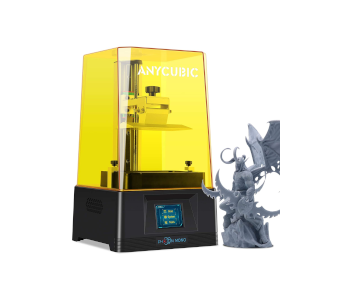
The ANYCUBIC Photon Mono is one of the most popular entry-level resin printers. This almost-fully-assembled 3D printer uses a 2K Monochrome LCD on a matrix parallel array for faster and more even curing. The total build volume (5.11 x 3.14 x 6.49 inches) is quite limited, but this is par for the course for budget resin printers. The Photon Mono is one of the few resin printers that cost below $300.
Many users have attested to the ease of use of the Photon Mono. Even with minimal knowledge, you should be able to set this printer up and start printing within the first hour. If you need a larger build volume, you can consider the upgraded and more expensive version, the ANYCUBIC Photon Mono SE.
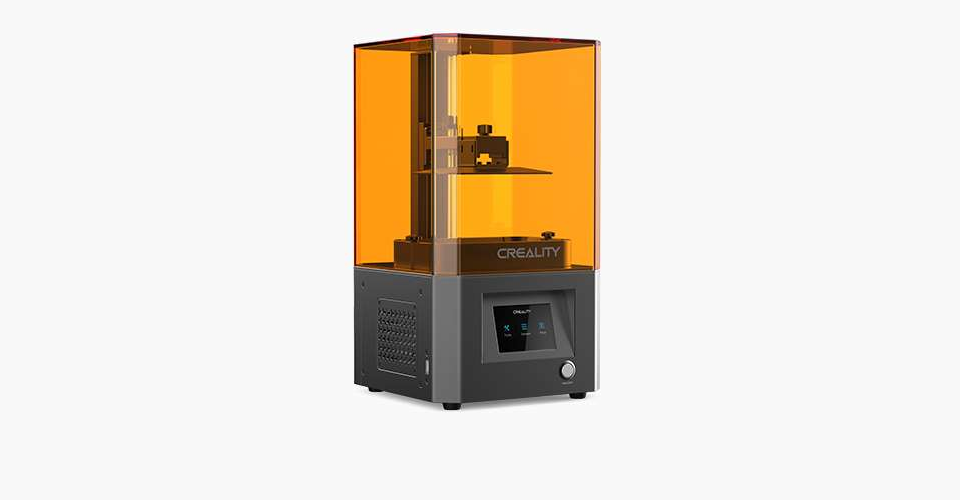
2. Creality LD-002H Mono
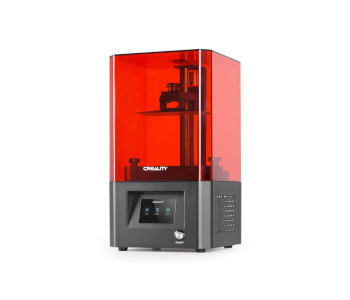
At just above $200m the Creality Mono is even cheaper than the ANYCUBIC version. Its build volume, ease of use, and overall quality are just about equal to the ANYCUBIC Mono by all practical measures. The slightly lower price tag should already make the LD-002H a compelling option.
A major difference is that the LD-002H uses the Chitubox firmware. This helps simplify your workflow if you use Chitubox as your slicer. However, this also tends to create compressed files that the 3D printer has to decompress during printing. A side-by-side comparison of the Creality LD-002H and ANYCUBIC Mono shows that ANYCUBIC has the edge in terms of printing speed.
3. ELEGOO Mars 2 Mono
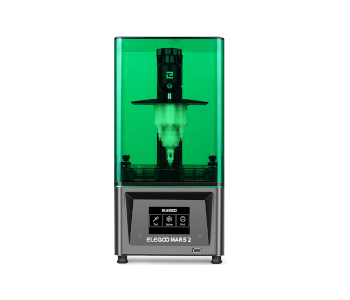
Completing the triumvirate of entry-level resin 3D printers is the Mars 2 Mono from ELEGOO. This printer is within the same price range (less than $300) and uses the same 2K HD LCD light source technology.
As with the other entries, the Mars 2 Mono has excellent build quality and a beginner-friendly workflow. It loses out to the other two in terms of build volume (5.08 x 3.15 x 5.90 inches) but is side-by-side in all other specs. The Mars 2 Mono also uses Chitubox firmware for a more streamlined workflow.
If you’re willing to spend just a bit more, the ELEGOO Mars 2 Pro still technically falls within the sub-$300 price range. This upgraded version has a larger build volume and a built-in fan and carbon filter to absorb odors and particles from the resin during printing.
Each one of these three resin printer brands has a fairly loyal following and active online communities. They are all equally valid options for beginners.
Other stuff you will need to get started
If you purchased a resin printer for a big brand, there’s a good chance that it will come with a basic set of supplies and accessories. However, these likely aren’t enough. Here are some more accessories you will want to get before you start with your first resin printing project.
Resin
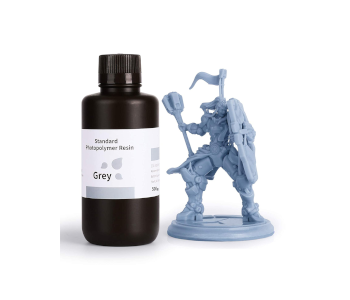
If your 3D printer comes with a couple of bottles of resin, you might want to use those first before buying your next bottles. Resins may seem similar but each one may have variations in performance or appearance. It will take some experience before you can tell which brand works for you.
The ELEGOO Grey 3D Printing Resin is an excellent option for an entry-level resin. It’s one of the cheapest 3D printing resins available today and is easy to work with. It’s not the best in terms of detail accuracy so it might not be the best choice for small action figures. The ANYCUBIC 3D Printer Resin offers a great upgrade on print quality, albeit it also costs twice as much.
IPA washing station
When resin printing is done, you will end up with a solid object that still has a lot of uncured resin on its surface. This resin has to be rinsed off using 99% isopropyl alcohol (IPA). You can buy a commercial IPA washing station for this or simply shake the print inside a large container with IPA.
Should you decide to make a DIY IPA washing station, make sure to get containers that are large enough for your prints to be completely submerged. We also suggest doing IPA rinsing in two steps – the first for bulk removal of the resin, and the second to ensure that there is no longer any residue.
UV curing box
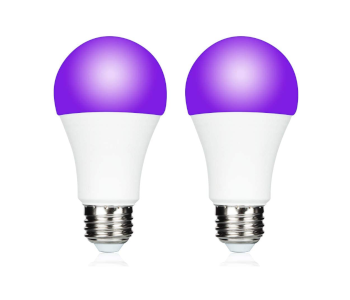
A resin print may feel fairly solid after printing, but it’s still really in its “green” state. Additional UV curing will be needed for the plastic to become as durable as possible. This is best done in a UV curing box.
Again, the three brands we have recommended above also sell their own UV curing stations. These are very effective but will also set you back an additional $100 to $200. If you’re on a tight budget, you can DIY a UV curing box using a clean can of paint and a $10 UV lightbulb.
Nitrile gloves and safety goggles
The photopolymer resin used in 3D printing is toxic. Make sure to wear nitrile gloves and safety goggles whenever you handle the resin – from pouring it into the resin tank and cleaning your finished 3D prints. Do NOT use regular latex gloves as they tend to deteriorate quickly when in contact with resin.
Paper towels
Have we mentioned that resin printing is messy? Try as you may to avoid them, you will inevitably end up with minor spills and drops of resin on your workstation. You will almost certainly need up a huge supply of paper towels to clean up the mess. Paper towels are also useful in wiping away excess resin or alcohol from your prints and in cleaning up your printer’s resin vat.
Plastic funnel with paper filters
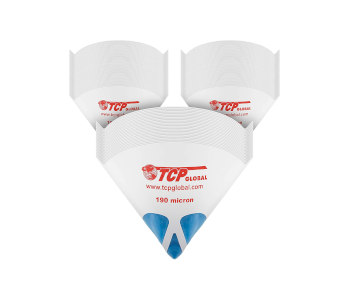
When you’re done with a print, you will likely still have substantial leftover resin in your vat. It’s perfectly fine to leave the resin in the vat until your next project, but you can also recover the resin and place it inside a fresh bottle.
The easiest way to do this is to pour the resin into a funnel that has been lined with a paper filter. The filter will strain out any solid particles that may have formed during the curing process. 3D printing resin can be reused as long as it is kept away from any UV light sources.
Spare FEP sheets
The FEP sheet of your 3D printer acts as the clear boundary between the light source and the photopolymer resin. The sheet that comes with your printer should be good for several projects. However, any scratch, perforation, or cloudy spots will warrant a replacement of the FEP sheet.
FEP sheets are not expensive, so it’s a good idea to have a handful of them always in stock.
Other post-processing tools
If you have printed with filament before, then you probably already have tools for post-processing. You will be using the same tools for resin printing. At the very least, you need to have a putty knife set for print removal, a pair of pliers, and an X-acto knife.
Digital workflow tools

The workflow for 3D printing in resin isn’t that much different from that of FDM printers – you take a digital 3D model, run it through a slicer software, and load the output onto a 3D printer. However, the small selection of resin printers also means that there is also only a limited number of compatible slicers.
No matter which resin printer you use, it seems that it will be most convenient to use the Chitu Box slicing software. Just load your 3D model into Chitu Box to prepare it for printing by reorienting it, hollowing it out, adding supports, and converting it into a sliced model.
Previously, the Photon Mono required files in the proprietary .photon file format. However, support for Chitu Box has already been added to later versions.
If you want an open-source slicer alternative, our go-to recommendation would be the Prusa Slicer. Some have argued that the auto-support and auto-orient features of the Prusa Slicer have a much better chance of success.
Take note that neither Chitu Box nor Prusa Slicer is perfect. You may still end up with failing supports or unsupported islands. You can use Photon Validator to check for any features that need supports.
Additional tips
Ensure good ventilation
If you were worried about toxic fumes when printing with filament, then you should be even more careful when printing with resin. Make sure that you’re printing in a room with an open window or door to avoid the accumulation of these fumes. Having a fan running in the room will also help in ensuring active air circulation.
Level both the build plate and the printer
Your printer should come with instructions on how to level your build plate. Just as important is the need to level the printer itself. Keep in mind that the resin in the vat will have a level surface no matter the orientation of the printer. An improperly leveled printer will have a build plate that is not perfectly aligned with the resin.
Cure anything with resin before disposal
Uncured resin is toxic and should be not disposed of directly. Instead, anything that has been touched with uncured resin must be cured under UV before disposal. These include paper towels, empty resin bottles, and the IPA solution used to rinse your prints. The cheapest way to do this is to expose the items to sunlight for several days (up to a week).
Take care to not leave your resin waste in containers that can be opened accidentally. This is especially important if you have pets or small kids around the house. The waste should be kept in a sealed contained and stored at a shelf out of their reach.
Final thoughts
In 2021, resin 3D printing is no longer as daunting as it used to. With companies like ANYCUBIC, ELEGOO, and CREALITY offering affordable desktop resin 3D printers, more hobbyists are making the transition from old-fashioned filament-based 3D printing.
As this guide has shown, getting started with resin 3D printing is quite simple. Even with all the tools and accessories you will need, you should be able to come up with a working setup for less than $500. Check out our other guides on SLA and DLP 3D printing to learn more about this technology before diving in.