Sanding your PLA Prints: How to Get the Best Results

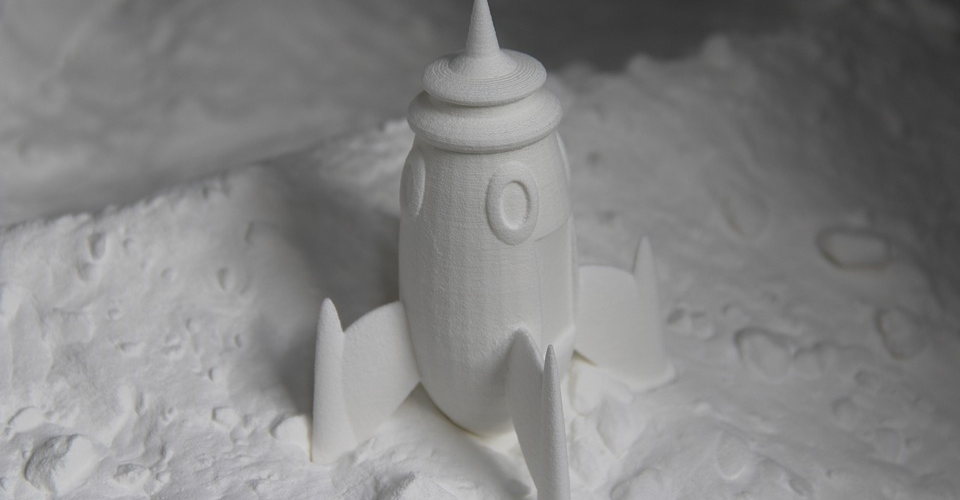
3D printing using PLA is easy. PLA prints at lower temperatures and does not warp, making it one of the easiest filament materials to print with. And while printing several designs using PLA is still somewhat satisfying, you can get an even greater sense of accomplishment by finishing your PLA prints to get a smooth finish.
While there are several ways to finish PLA prints, all of them start with a good amount of sanding. In this article, we go into the finer points of sanding your PLA prints in the proper way. Being the foundation for more advanced finishing methods, a properly sanded PLA print will be the foundation for finishing it with professional-grade quality.
Why sand your PLA prints?
No matter what filament material you use, 3D printing using Fused Deposition Modeling (FDM) technology will always come out with visible layer lines. This is an inherent and unavoidable part of FDM printing and getting rid of these layer lines is always the most finishing you can do.
Unlike filament materials that are soluble in a particular solvent, smoothing a PLA print is done through mostly physical methods. The simplest and most accessible methods of these methods is sanding. If you want to make your PLA prints smoother, you can go the extra mile and apply a polishing or priming compound. In any case, refining your sanding technique is the key to getting perfectly smooth PLA prints.
A few tips when sanding
Before we start with the guide, here are two important tips to keep in mind throughout the whole sanding process:
1. Sand in a circular motion
It’s best to be constantly moving in a circular motion while you sand so your print doesn’t come out with a noticeable grain due to direction bias.
2. Don’t sand too fast
Getting too gung-ho when sanding can result in friction, which generates heat. Keep in mind that you are still working with plastic, and the combination of heat and physical stress can easily deform your PLA print. It would be so frustrating to have to start your print over just because you messed up the sanding step.
A step-by-step guide to sanding your PLA prints
1. Gather all the materials
Just as with any DIY project, it’s essential to ensure that you have all the tools you will be needing before you get started.
- Eye protection (goggles or glasses)
- Respiratory mask
- Pliers or clippers
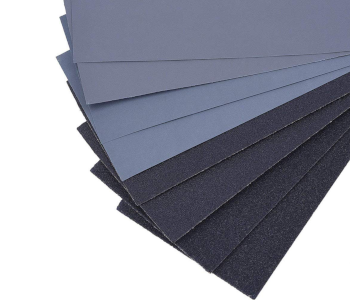
- Coarse grit dry sandpaper (120-grit)
- Medium grit dry sandpaper (240-grit, 400-grit, and 800-grit)
- Fine grit wet sandpaper (1000-grit and 2000-grit)
- Plastic bin with water
TIP: To make it easier for you to get the right grit numbers, you can simply get a complete set such as this 45-piece wet and dry sandpaper kit.
2. Put on your safety gear
Before you do anything, make sure to put on your eye protection and a respiratory mask. Sanding and finishing your PLA print will release a lot of dust, so make sure that you’re working in a well-ventilated environment.
3. Remove support structures
If you had to use support structures for your PLA print, then the first order of business is to remove them using a pair of pliers or shears. Be careful when doing this, as small pieces can fly off and hit you in the face – thus, the eye protection. We suggest erring on the more conservative side when removing support structures, so you don’t end up trimming the essential details of your prints. Small “nubs” can be easily removed in the sanding step.
4. Sand with coarse-grit sandpaper
It’s time to start sanding. Get your coarsest grit sandpaper (120-grit) and start sanding the surface of your print using slow and circular movements. Don’t focus on a single spot too much and try to apply an even treatment throughout the entire print’s surface. Every now and then, you might need to stop and wipe away the dust of the plastic that you’ve sanded away.
Out of all the sanding steps, the coarse-grit step will likely take the longest. Continue sanding until the layer lines are barely visible, or until any further sanding no longer changes the appearance of the print. Take note that you’re likely to end up with a surface that’s dull and rough. This is natural, and the shine will return once you move on to finer-grit sandpaper.
5. Sand with medium-grit sandpaper
When you’re satisfied with the results of the coarse-grit sanding, then it’s time to move up to the finer grit values. Move on to 240-grit and simply repeat the process, wiping the surface every now and then to remove the dust and expose more of the rough details. Make sure to cover the entire surface of the print with every succeeding sanding cycle.
Once you’re satisfied with the results of the 240-grit sandpaper, you can then move on to 400-grit, and then to 800-grit. Remember to be slow and gentle. The time you spend sanding should start to decrease as you use finer grit sandpaper.
6. Sand with fine-grit sandpaper using a wet sanding method
Up until this point, we have been using a dry sanding method. Now that we’ve moved on to fine-grit sandpaper, it’s time to start wet sanding. Not all brands of sandpaper can be used wet, so make sure that what you have is appropriate.
To do wet sanding, simply prepare a small plastic bin filled halfway with water. Submerge your PLA print just to wet the surface and start sanding. As usual, start with the 1000-grit sandpaper before moving on to 2000-grit.
While sanding, continue to wet the surface of your PLA print. This mobilizes the very fine particles of plastic that get removed from the surface during sanding while also keeping the plastic cool to prevent deformation. This technique should make these last few steps shorter and help to improve the quality of the finished product.
7. Set aside and let dry
When you’re satisfied with how the PLA print looks, simply set it aside and air-dry. Don’t dry your print under the sun as PLA can easily break down under heat and sunlight. You can tell if you’ve done a good job if the surface of your PLA print achieves a glass-like smoothness. If this isn’t the case, you can always repeat the fine-grit sanding process.
What can you do after sanding?
It’s completely fine if you’re satisfied enough with your handiwork that you can proudly display your PLA print after sanding. However, it’s still possible to improve on the finish of your PLA print to make it almost as shiny as a mirror. We won’t be discussing these methods in detail (that will require an article of its own), but here are the most common techniques:
1. Polishing
If you want your PLA print to have a nice sheen, then the easiest way is to use a polishing agent which will fill out any microscopic imperfections on its surface. Any metal polishing agent will do, although we’re partial to the Brasso Multi-Purpose Metal Polish. Just by applying some metal polishing and buffing the surface with a cloth, you should be able to see a huge improvement in your print’s surface quality.
2. Priming
Applying a sandable primer spray paint like Rust-Oleum to your print when it already appears smooth is another easy and popular way to give your PLA print a sheen. Much like a polishing agent, the primer fills in all those small pockets that are barely visible. While this mere action can already smooth out the surface of the print, the benefit of a primer like Rust-Oleum is that it can be sanded to make the characteristic sheen pop out.
3. Heating
This is a method that we only recommend for those who are experienced and skilled in using a heat gun. As you may well know, PLA has one of the lowest melting temperatures out of all 3D printing filament materials. This means that, by applying a small amount of heat, it’s possible to melt away the imperfections on the surface of a PLA print.
This method requires the use of a heat gun set at the glass transition temperature of PLA – somewhere between 80 to 100 °C. You’ll need to point the heat gun at the PLA print while constantly moving to achieve good results without causing any deformation. It’s a pretty complex method that requires a lot of finesse, so you might be better off with the more old-fashioned alternatives.
Final thoughts
Sanding isn’t some complex technique that requires hours of practice, so there’s no reason for you not to try it out on your next PLA print or any other old print you have lying around. For a method so simple, the payoff of sanding your prints is huge. You can even take that perfectly sanded print and progress to more advanced finishing methods.
Mastering the finishing techniques is what separates 3D printing pros from the amateurs. PLA is easy, so we suggest starting with it. Once you’ve got the technique down pat, you might want to try your hand at smoothing ABS prints using an acetone vapor bath.