How to Screen Print T-Shirts Professionally

Screen printing is one of the most popular techniques of printing custom designs onto clothing. Screen printing is also a great way to start a t-shirt printing business. The process involves using a mesh to transfer a special ink to the clothing substrate.
One big advantage of screen printing is that the process does not use heat. One does not need expensive machines or capital-intensive equipment to screen print. The absence of heat means that materials like silk shirts can also be printed with customized designs.
Screen printing is one of the fastest and simplest ways of creating professional-looking designs for a t-shirt or a piece of clothing. The process is quite straightforward. If you follow the basic steps and take all the necessary precautions, then you can start screen printing t-shirts from your home.
The following guide lists out the various steps involved in screen printing t-shirts. After a few rounds of practice, you will become quite adept with the whole procedure. You might even begin to experiment with new designs once you gain some confidence. Read on for more information.
Step 1 – Find a suitable space

The first thing that you need to do is figure out where you will perform the procedure. You will need a convenient space where you can work. A flat surface is essential. Another requirement is the ability to block light in that space. You need to create a dark room in order to transfer the design from the transfer paper to the screen.
You will also need access to electricity or some way to light up a bulb. The light plays a vital role in transferring the design from your printed paper to the screen. In a home environment, a closet with an electric plug point can prove to be a decent space for screen printing. Closing the closet will block out the light and having access to a plug point can allow us to light the bulb while the outside light has been blocked out.
You also need to think about the availability of water (to wash the screen after it has been treated in the dark space) and the availability of a flat surface where you can pour ink onto the screen and then force it through the design that has been created on the screen. Things can get messy because of the use of emulsions, inks, and water. So, the space you choose to do your screen printing should be selected accordingly.
Step 2 – Choose your design
You need to know what you are printing on your t-shirt at the very beginning. The choice of your design will affect the choice of equipment that you use. Hence, you need to search/design and finalize your design. You can get plenty of copyright-free designs on the internet.
Alternatively, you can create your own design/logo on a computer. You will need an image editing software like Photoshop or GIMP to edit the design. Whenever you select your design, make sure that it is not copyright protected. You do not want to be getting legal notices after you have screen printed proprietary stuff.
Step 3 – Gather all the equipment
Screen Printing Machine
If you have the budget and are serious about running a t-shirt screen printing business, then you can purchase a screen printing machine. It has the flat surfaces needed to transfer the design onto the t-shirt, it has clamps to hold down everything securely, and there are slots for mounting multiple screens.
Having a machine is not necessary. However, it saves time if you have to screen print t-shirts in bulk.
Screen
The next gather all your equipment. You will need a screen. Craft stores or online websites sell screens designed specifically for screen printing t-shirts. You will have to buy one screen for every design. If your design has multiple colored elements in it, then you need one screen for every color. If you plan to re-print the same design on multiple shirts, then you can re-use your screen as many times as you want.
If you do not find a readymade screen or if you wish to create your own, then you have to purchase a canvas mounting wooden frame and a mesh. You will have to manually stretch and mount the mesh onto the frame by nailing it or stapling it. If you mount the mesh manually, then make sure that it is completely stretched and tightly mounted.
The mesh that you purchase or the readymade screen that you buy should be selected based on the level of detailing on your screen printed design. Highly intricate designs require a screen with a higher mesh count. A count of 230 to 350 is what you should be looking at.
If your design is not very detailed and includes straight lines or bold patterns, then a screen with a mesh count of 180 should be just fine. So, depending on your design, the quality of your mesh will vary.
Shirt
The shirt is obviously one of the most important things that you need. It is the substrate on which you will be printing your design. If it is possible, try and test your screen print on a piece of cloth which is the same as the t-shirt. That way, you will know if your ink sticks to the cloth as well as you like it to.
Emulsion and sensitizer
These two fluids are to be mixed and then applied onto the screen to prepare it for the darkroom treatment. The emulsion and sensitizer are what enable the process of design transfer from the printed transfer paper to the screen.
Bulb
You need a bulb or a desk lamp which has a 250-watt bulb. This light is what burns the design from the transfer paper onto the screen. If you are willing to spend money, then you can purchase a machine which blocks out outside light and projects light onto the transfer paper.
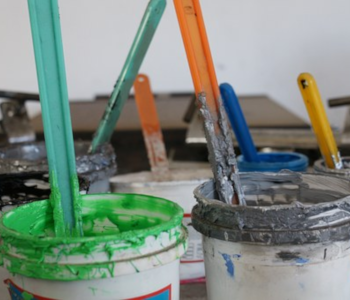
Ink
You will need the right ink for your choice of cloth. The ink should stick to the cloth and give you the desired level of quality and aesthetics.
Supporting tools
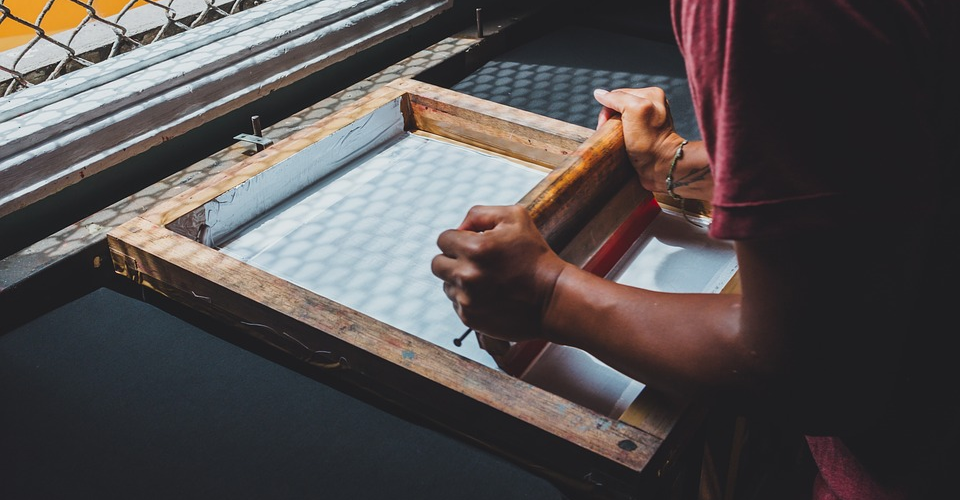
There are a few other useful things that you need to screen print. First, you need a good squeegee that you can use to force ink through the screen. This process requires exerting pressure evenly on the screen and a good squeegee can do that.
Next, you might need hand gloves because things can get pretty messy with screen printing. You might also need to wear overalls so that your clothes aren’t splashed with emulsions and inks.
You might also need a small piece of cardboard that can be placed between the front and back side of the t-shirt. When you transfer ink onto the front side of your t-shirt, the ink can seep through and spoil the back side of the t-shirt as well. So, to avoid such seepage, cardboard can be placed as a barrier.
You won’t need cardboard if you are using a screen printing machine. The machine is designed such that the front and back sides of the t-shirt are separated from each other.
Step 4 – Print your design
You have to print your chosen design onto a transfer paper or a transparent sheet. This sheet will allow the migration of the design from the computer to the screen.
With screen printing, you only need the outline of the design. Photoshop has a “silhouette” option which will print only the outline that is suitable for screen printing. Other software packages will have something similar.
If your design has multiple colors, then you will have to separate out each element with the same color and then print each of the colored elements separately. This is because the screens for each colored element will also be separately prepared.
It is recommended that you print the image in black color. The darker the color, the better its ability to block out light (an important part in the screen preparation process). If the color is not dark enough, then it won’t burn onto the screen very well.
Step 5 – Transfer design onto the screen
The next step is to prepare your screen for printing by transferring your chosen design onto it. First, you need to place your screen on a flat stable surface. As a precaution, place a sheet or plastic bag between the screen and the flat surface.
Next, you will apply a mixture of emulsion and sensitizer onto the screen. The instructions to mix the emulsion and sensitizer are written on the bottles of those fluids. Simply follow them and mix them in the proportions that the instructions suggest.
The emulsion mixture is to be applied evenly on the screen in a uniform layer. Use a squeegee to apply and spread the mixture. A thin layer is sufficient. Just make sure that there are no gaps in the area where the mixture is applied. Every inch of space should be covered with the mixture. The area of spreading should be a little bit larger than the size of your design print.
After coating the screen, place it in the darkroom/area until the mixture on it dries out. This can easily take 1.5 to 2 hours. After the emulsion has dried, place your design transfer paper or transparent paper face down on the screen. The design print should touch the framed side of the screen.
The transfer paper or transparency should be placed such that it is within the area that has been coated with the emulsion mixture. Tape the transfer paper so that it does not move. Then, place the screen face down on a black cloth and place the screen on a flat surface.
Light a 250-watt bulb and let it face directly on the screen. The bulb should be about 2 feet away from the screen. Close the room or closet and let the light shine on the screen for 15 minutes. Then, turn the bulb off and slowly lift one edge of the transfer paper. If you see blue marks on the screen with the outline of your design, then the transfer process is successful.
If you do not see blue lines, then turn the bulb back on for a few more minutes and check again. Try not to expose the screen to the light bulb for a very long time. Overexposure can spoil your screen.
The timing is what determines the quality of the image transfer. You may have to do a few trial and errors before you get the timing right.
Step 6 – Wash the emulsion mixture away
Once you are satisfied with your design transfer process, pull the screen out of the dark area and wash it and clean out the emulsion mixture. As you wash, you might see bits or flakes of the screen falling off. This is not a bad indication. In fact, it is a sign that your image transfer process was good.
You want those areas to allow the ink to seep through. Ultimately, you should be able to clearly see your design on the screen. Dry out the screen after washing it. You want all the water gone before proceeding to the printing step.
Step 7 – Print design on the t-shirt

Once the screen is dry, cover up the areas of the screen which were not exposed to the bulb’s light with masking tape or something else. The idea is to prevent the ink from seeping through areas which are outside the design’s outline.
Then, place your t-shirt on a flat surface. If you are using a screen printing machine, then the flat surface designed for the printing process will already be ready. Wash and iron the t-shirt to ensure that there is no dirt on it and there are no wrinkled on the cloth’s surface. Wrinkles will spoil the printed design as the ink may not transfer correctly.
Before you apply any ink, put in a piece of cardboard between the front and back sides of your t-shirt. This step is to prevent the ink from seeping to the back side of the t-shirt. A screen printing machine will already have a provision for this issue.
Place the screen face down on your t-shirt. Then, pour ink across the length of the screen and use a squeegee to force it through the light-burned areas. A squeegee will allow you to apply pressure evenly across the area of the design. This step is a bit awkward in the beginning but you will get better at it with practice.
When you are satisfied with the amount of ink and the pressing that has been done to make the ink seep through, slowly remove the screen. Remove the cardboard piece from the t-shirt if you inserted one. Hang the t-shirt on a coat hanger till the ink dries out.
A note about multicolored designs
If you have multiple colors within your design, then you will have to perform the above steps for each colored element. You will have different screens for every single color. You will also have to be mindful about the order in which you print the various colored elements. Start with the larger element and then follow it up with the less dense or smaller element.
Step 8 – Clean the screen
The last step is to clean the screen and remove the ink on it. You can then use an emulsion remover to clear out the burnt design on the screen. Doing so will make the screen blank again, the same condition as what you started Step 4 with. This way, you can re-use your screen for a completely new design.
Conclusion
We hope you found this guide on screen printing useful. With these pointers, you can start screen printing t-shirts at home or at your workshop. Once you master t-shirt screen printing, you can move on to more materials like caps, sportswear, and purses. Happy printing!