
How to Deal with Skipping Layers in 3D Printing

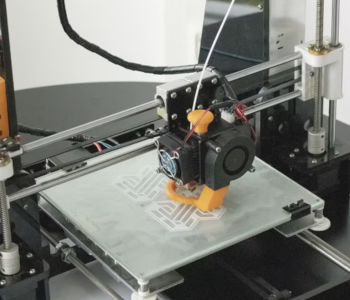
The whole process of 3D printing is built on the premise of building an object layer by layer according to slices made on a digital model. It is then easy to imagine how having skipped layers can ruin the integrity of a 3D print.
Skipping layers is typically caused by mechanical problems in the 3D printers such as loose parts, misaligned bearings, rods that need lubrication, or a print bed that has not been leveled. If that is not the cause, then it is likely an under-extrusion problem. This can be caused by several reasons, but missing layers indicate that the under-extrusion problem is severe.
Skipping layers is not a common problem but is one of the more frustrating issues that you can encounter in 3D printing. Here are our recommendations for how you can address the skipping layers error.
Do mechanical maintenance
In some cases, layers end up missing because of the failure of the mechanical parts of a 3D printer to move as they are expected. This can cause uneven steps in the movement along the Z-axis, thus creating the appearance of skipped layers.
A characteristic of FDM printers that adds to their complexity is that they have so many moving parts. It is almost impossible to pinpoint which part of the printer is contributing to the skipped layers problem. The best solution would be to just go ahead and do major mechanical maintenance of your 3D printer.
Tighten all nuts and screws
The first step is the easiest – take a screwdriver or wrench and go around the 3D printer while tightening any screws, nuts, and bolts. The goal here is to reduce unnecessary vibration and movement of the 3D printer that can lead to a host of different performance issues.
Don’t forget that unwanted movement can also come from the surface that the 3D printer is resting on. If the 3D printer is on a table with wobbly legs, that can be enough reason for the nozzle to miss its mark. Make sure to place your 3D printer on a surface that is solid and stable.
Check for misaligned rods and brackets
The rods and brackets in a 3D printer allow for the movement of the print head or the print bed. These have to be perfectly aligned so that the components can move as intended.
Checking for the alignment of rods is fairly easy. You can try moving the brackets around by hand and make sure that they are moving along the rails without interruption and with little difficulty.
Lubricate all necessary parts
If there are no misalignment issues, then it would not hurt to apply fresh lubrication to your 3D printer’s rods and brackets. Be careful not to put too much lubricant, as these can also attract dust and cause gunk buildup. Just use enough to make the bracket movements as smooth as possible.
Level the print bed
The print bed also plays a vital role in ensuring that your 3D printing layers are perfectly aligned. Leveling the print bed, whether automatically or manually, needs to be a part of your regular regimen before 3D printing.
If your 3D printer uses an aluminum print bed, take note that it can start warping due to temperature and natural wear and tear. The solution to this is to either replace the print bed or use a glass build plate. We highly recommend using glass because it does not warp at all, heats up more evenly, and is much easier to clean.
Doing general maintenance of the moving parts of your 3D printer should resolve not just skipped layers, but a host of other quality issues.
Address under-extrusion

If the issue persists despite doing maintenance, then you may be dealing with an under-extrusion problem. This is when the 3D printer is extruding much less filament than expected, resulting in layers that are incomplete or missing.
Check for clogged material in the nozzle
The most common cause for under-extrusion is a nozzle that has gotten clogged. If clogging is indeed the reason for layers that are getting skipped, then it’s safe to assume that there is a huge amount of obstructing material that has built up in the nozzle.
You can check this quickly by inserting a small pin or needle into the nozzle. Ideally, you should be able to move the pin around inside the nozzle without running into very hard or brittle material. If this is not the case, then some cleaning is in order.
For heavy clogging of the nozzle, we suggest either doing the cold pull method or unscrewing the nozzle for soaking acetone. It’s possible that the clogging has become so heavy that it can no longer be cleaned. In this case, your best recourse would be to replace the nozzle with a new one.
Check for filament stripping
When filament passes through the extruder, the teeth of the extruder gear “bite” onto the filament to push it forward. In some cases, portions of the filament break away and get stuck in the gear teeth. When this happens, the extruder’s ability to push the filament forward gets severely diminished.
This phenomenon, called filament stripping, is most easily observed via a clicking sound in the extruder coupled with a failure to extrude. An extruder that has been heavily fouled with bits of filament will almost certainly lead to extrusion problems bad enough to cause skipped layers.
Unfortunately, there’s no easy way to clean an extruder that has been blocked by filament stripping. You will have to take the assembly apart and clean the gear teeth manually. Make sure to put the extruder back together properly, taking note of proper alignment and tension.
Align layer thickness and Z-axis resolution
If all mechanical parts are working properly, then it may be time to take a look at your slicer settings. One possible error is if your layer thickness settings do not perfectly align with the resolution of the Z-axis of your 3D printer’s stepper motors. This can cause erratic movement in the Z-axis that can compromise the consistency of extrusion.
Your goal is to make sure that the stepper motors of your Z-axis can realistically move to fulfill the layer thickness settings as determined by the slicer. Even if you have to increase the layer thickness, say from 0.10 mm to 0.15 mm, there should still be an appreciable improvement in the quality of the finished product.
Check extrusion and other slicer settings
Assuming there are no mechanical problems, you can make a few adjustments to your slicer settings to induce increased extrusion. Make sure your slicer is set to the proper filament diameter and set the flow rate to 100%. You can even increase the flow rate to 105% if you think that it will help.
Under-extrusion is also possible if your printing temperature is too low. Try to increase the temperature by 5 °C increments and check if there is an improvement in performance. However, it is rare for the temperature to be the cause of skipped layers as long as you are within the recommended temperature range for the filament.
Under-extrusion can be tough to solve because of the number of factors that could possibly cause it. If you’re trying to experiment with different flowrates and extrusion multipliers, then we recommend using this flowrate calibration model that you can download from Thingiverse.
Final thoughts
Skipped layers in 3D printing are rare, but they are symptomatic of a serious problem in your hardware or slicer settings. It’s either your 3D printer is in dire need of maintenance, or your slicer settings need a major overhaul.
In any case, it would be best to stop your current 3D printing project to make the adjustments and do a few test prints or calibration prints. This is the type of 3D printing problem you will likely need to spend an entire afternoon or two to solve.