The Basics of Stereolithography: Benefits, Limitations, and Buying Guide

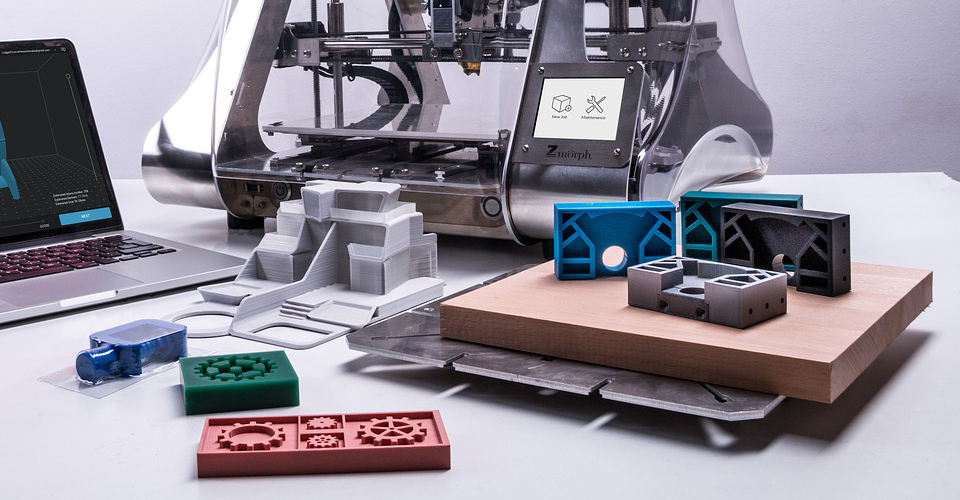
Nowadays, 3D printing as it is known in the mainstream seems to be limited to Fused Deposition Modeling (FDM) technology. After all, the public image of 3D printing seems to be pretty set as a machine depositing melted filament to build a model.
However, there is a technique that is even older and just as reliable as FDM. Stereolithography, or SLA, is an additive manufacturing technology that is similarly capable of creating fully customized 3D models. How does SLA work and how does it compare to FDM? Are there desktop SLA printers and how much do they cost?
What is stereolithography?
Stereolithography (SLA) was a term coined by Chuck Hull when he applied for a patent in 1984, which was then granted in 1986. However, the development of the technology of SLA had been started in the 1970s, making it the oldest 3D printing technique.
The abbreviation ‘SLA’ technically refers to the Stereolithograph Apparatus, a machine that converts liquid resin to solid plastic. SLA takes a very different approach to building 3D models compared to FDM. The first manifestation of this difference is in the starting material for the process. While FDM used spools of plastic filament, SLA uses a liquid resin solution. Instead of forming objects by material extrusion, SLA relies on photopolymerization technology to cure the liquid resin and turn it into hard plastic.
Both FDM and SLA are additive manufacturing processes, although SLA is capable of much higher resolutions. SLA has become the preferred technology when printing highly detailed designs.
How does SLA work?
To better understand the SLA printing process, it will be better to separate them into functionally distinct steps.
1. Design
SLA printers also interface with slicer software that separates a design into ‘slices.’ In this regard, there’s no difference between designs for SLA and FDM printers. However, there a few details in the SLA printing process that need to be considered when building a design to be printed using SLA.
As we have mentioned above, the SLA printing process relies on photopolymerization technology where liquid resin undergoes curing by ultraviolet light which converts it to hard plastic. The complication comes from the fact that this process is exothermic – meaning it generates heat as the reaction proceeds. This sudden temperature increase and the following cooling process can result in significant deformation in the finished print. These heating and cooling effects are unavoidable, and therefore need to be accounted for in the design process.
Thermal expansion and contraction exert stress on an object in all three dimensions. Normally, any material can withstand a certain amount of stress before it deforms. The key in avoiding deformations in your SLA print is to manage the resulting stress so that it’s well-distributed, making it unlikely for a single spot in your print to undergo deformation. This can be done by making a design with constant wall thickness, so there will be no single point of weakness in the final build. It is also a good idea to use smooth corners, as edged corners tend to accumulate all the excess stress.
Another way to avoid deformations due to thermal expansion is to include various supports or brackets on your design as a means to counteract the underlying stress. This is more of a “brute force” method but is nevertheless effective.
In terms of resolution, SLA is far superior to FDM. Since the conversion of the resin to plastic is done via an ultra-fine beam of ultraviolet light, SLA prints can have details as fine as 30 microns. SLA printers can also work with a layer height as small as 25 microns, while most FDM prints are only capable of 50 microns, at best.
2. Printing
The fundamental process behind SLA printing is photopolymerization. This is the process by which the liquid resin solution, that is composed of monomers and oligomers, forms bonds to create long-chain polymers. Monomers and oligomers are basically small molecules composed mainly of carbon, hydrogen, and other minor elements. By providing enough energy to these monomers and oligomers, their chemical bonds can be unwound and connect with each other to form a long-chain polymer. Polymers are merely long chains of carbon and hydrogen atoms that form points of entanglement, thereby resulting in a product that is rigid and durable.
The whole photopolymerization process can be completed in just a fraction of the second. Further ultraviolet treatment can be done on a rigid SLA print to allow the formation of new points of entanglement, effectively making the final product even more durable.
There are two types of SLA printers that are distinguished according to the position of the ultraviolet light source: bottom-up or top-down. Most desktop SLA printers have a bottom-up orientation, where the light source is located under the resin tank, and the print is built upside-down. In this type of SLA printer, the holding the tank for the resin has a transparent bottom that allows ultraviolet light to pass through to cure the resin. The build platform starts at the bottom of this tank and moves upward as each layer is printed, allowing a layer of fresh resin to enter the bottom of the tank and be available for ultraviolet curing.
Large-scale SLA printers and those used for industrial applications typically use the top-down approach. In such an SLA printer, the ultraviolet light source is located at the top. The resin tank is then placed below the light source, where the build platform starts at the top-most level and descends as more layers are printed.
Most desktop SLA printers use the bottom-up approach because it’s simpler and cheaper to manufacture. However, a bottom-up SLA printer is severely limited in the size of prints that it can produce. Printing in an upside-down orientation also limits the weight of the build you can make with an SLA printer, as it can easily detach from the build platform if it gets too heavy. Top-down printers have no limitations on build size and weight, making them the more appropriate SLA printer for industrial applications. However, they are also much more expensive in terms of both initial and recurring costs.
3. Curing
The final step of the SLA printing process is curing. This might confuse you, as the resin had already been cured during the printing process. While this is true, a very short exposure of each layer to ultraviolet light during printing leaves many of the reacting components in a “green” state. This means that although most of the bonds in the oligomers and monomers have been unwound to expose their reactive states, they have not been completely used up to form long-chain polymers.
A post-printing curing step ensures that all the resin components that remain in this “green” state react, making the build much more durable. This is best done in a dedicated UV-curing chamber, which will complete the process in just 1 to 2 hours. It is also possible to do this by exposing the print to direct sunlight but will take 1 to 2 weeks.
Other elements to considering during SLA printing
The whole process of SLA printing is considerably less fussy than FDM printing, but designs meant for SLA printing will require more preparation. There might also be more finishing involved, but SLA printing typically produces better quality and more durable prints than FDM.
1. Material selection
As we have gleaned upon, the starting material for FDM and SLA printing are vastly different. Instead of a solid filament, SLA printing starts with a liquid resin solution. These resin solutions are usually more expensive than FDM filaments. The cheapest resin solution you can get today will cost around $50 per liter, but this figure can go as high as $400 per liter for premium alternatives.
One other thing to keep in mind is that finished SLA prints will be made of thermoset plastics. These plastics can no longer be re-melted and reformed, making SLA prints a little less environment-friendly. Making mistakes while SLA printing can also be more costly, so it’s worth your time to ensure that all parameters are set before starting.
There’s now a wide array of SLA resin offerings that provide a variety of physical properties. If you need to create a durable print, you can get a resin that can mimic the durability of ABS. You can also get a resin that produces near-transparent prints. Other more specialized resin products, such as those with high-temperature resistance or rubber-like properties, are also available albeit at higher prices.
2. Support structures
Support structures are a more crucial element in SLA printing, especially when printing on bottom-up printers. Because of the upside-down orientation in which the print is built, detachment from the build platform is one of the biggest concerns when printing bottom-up. To avoid such an event, models are typically oriented to minimize the cross-sectional area of each layer. By taking this measure, there is less chance that whole print gets detached from the build platform during the peeling step after a layer has been cured. Orienting a design in such an unusual manner is often impossible without a support structure.
Another key difference is that there is no way to build support structures that are of a different material from the rest of the build. Since SLA prints are made from a single photopolymerization vat, all parts of the build will be made from the same material. This can be quite problematic when it’s time to remove the support structures. A set of finishing tools including sandpaper and X-Acto knives will be very handy when printing with SLA.
3. Layer adhesion
Layer adhesion is less of a concern in SLA printing, as the presence of unreacted resin on each layer creates very strong bonds with the succeeding layer. The durability of an SLA print is also enhanced by the fact that layers can be printed very thin. Moreover, SLA prints can undergo a post-printing curing step to further reinforce its durability and ensure maximum layer adhesion.
4. Finishing
In most SLA prints, the first step of the finishing process is the removal of support structures. Since the support structures are made from the same material as the rest of the build, solvent removal methods are out of the question. Your only choice is to remove these support structures manually using tools such as pliers or X-Acto knives. These will inevitably leave behind small nibs which need to be sanded down.
As with PLA prints, smoothing and polishing an SLA print starts with sanding. Thankfully, the process of sanding an SLA print is not as labor-intensive as a PLA print since layer lines and imperfections are much smaller. It’s even possible to sand and polish an SLA print to a smooth-as-glass finish.
What are the advantages of SLA?
Next to FDM, SLA is undoubtedly the second most popular 3D printing technology. It uses a relatively simple process and does not have such a steep learning curve. Desktop SLA printers are starting to become more popular nowadays, proving that it’s possible to fit all of the parts needed in a simple and compact setup.
SLA is pretty much the perfect alternative to FDM, excelling in areas where FDM is severely lacking. One of the biggest limitations of FDM printing is that builds will always come out with unsightly layer lines. These lines require quite a lot of work to smooth and polish. While layer lines are still a thing in SLA prints, they are much less pronounced and are easier to smooth.
Another area where SLA excels in is in print resolution. The level of detail of SLA prints is only limited by the size of the beams of ultraviolet light that strike the resin, resulting in prints that have a level of detail that is simply unattainable in FDM printers. In terms of visual appeal and accuracy, SLA prints will always come out better than FDM prints.
What are the limitations of SLA?
The main thing holding back SLA printers from gaining mainstream popularity is the fact that they are generally more expensive than FDM printers. While the usual FDM printers will only cost between $300 to $500, desktop SLA printers rarely cost less than $1000. However, there are now affordable alternatives – as you shall see later.
Aside from the high initial cost of getting an SLA printer, the liquid resin is also much more expensive than the filaments used in FDM printing. For instance, the cheapest resin you can buy will cost around $5 per liter. For this amount, you can buy an entire spool of cheap PLA filament. For the same price, you are likely to create more prints in FDM than in SLA.
The last limitation applies to both FDM and SLA printers. Although customized prints can look great after some finishing, objects made using desktop 3D printing rarely come out with enough durability to be functional. In the case of SLA printing, printed objects typically come out brittle and prone to cracking. This element of fragility is made worse when an SLA print is exposed to sunlight and outdoor elements. Similar to FDM, SLA printing is best used for proof of concept or display items but cannot be relied on for longevity or functionality.
What are the best desktop SLA printers?
The good news, if you are looking to get into SLA printing, is that there are now simple desktop SLA printers that are quite affordable. If you want something more advanced and have the budget for it, then your horizon of options will greatly expand. Below is our list of recommended desktop SLA printers for a variety of budgets and applications.
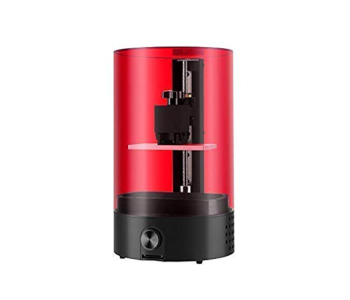
1. Best Budget Option – SparkMaker High-Resolution Resin SLA Printer
Editor’s Rating: 3.5/5
The SparkMaker is one of the cheapest SLA printers, making it the perfect entry-level model for those who want to try out SLA printing without the high costs. As the printer was designed for beginners, it will come fully assembled and pre-calibrated, so you don’t have to spend so much time tinkering with it before starting your first print. This model is a bottom-up printer with a small, unsophisticated resin tank.
Printing with the SparkMaker can be done by either connecting your computer that has an active Internet connection or loading an SD card with a ready-to-print project. The process is relatively simple and painless, and you should be able to get it up and running in no time.
Being a budget option, the resolution and build volume of the SparkMaker do not favorably compare to other, more expensive models. The SparkMaker also does not come with a pre-included resin solution, so you might as well order a bottle when you buy this printer. Customers who have purchased the SparkMaker have also noted poor experience with the manufacturer’s after-sales support.
Despite the limitations, the true appeal of the SparkMaker is its affordability. It’s the perfect gateway to SLA printing. If you want to test if SLA printing is for you but don’t want to spend a fortune, then the SparkMaker is just the right model.

| Tech Specs |
|---|
| Weight: 6.6 lbs. |
| XY Resolution: 100 microns |
| Z Resolution: 20 microns |
| Max build volume: 98 x 55 x 125 mm |
| The Pros |
|---|
| Cheap |
| Fully-assembled |
| Easy to use |
| Small and light |
| The Cons |
|---|
| Low resolution |
| Small build volume |
| Does not come with accessories or resin |
| Unreliable customer service |
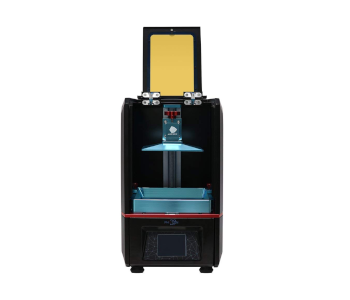
2. Best Value – ANYCUBIC Photon UV LCD 3D Printer
Editor’s Rating: 4.5/5
We have chosen the ANYCUBIC Photon as our best-value SLA printer since it packs quite a lot of premium features in a product that is not quite budget-level but still does not cost an arm and a leg. As expected from a desktop SLA printer, the ANYCUBIC Photon comes with a bottom-up orientation and a small resin tank. The construction of the Photon looks a little more solid and professional, as it comes with a plastic enclosure with an integrated exhaust system with air purification via activated carbon.
The Photon comes with a touchscreen user interface that you can use to adjust printer settings, view the model, start the printing process, and watch as the model gets printed in real-time. Offline printing is supported thru a single USB port, allowing you to easily work with ready-to-print models.
The higher price tag of the Photon gives you access to better resolution and a higher build volume. Such benefits come at the price of a much heavier printer with a larger footprint.
Unfortunately, it seems that Anycubic has failed to provide enough documentation to support users of this higher-end model. Getting successful prints with the Photon will require a lot of fine-tuning and adjustment of settings and parts, and many users are finding this part of the process quite challenging. The result is a lot of failed prints and a lot of frustrated customers.
| Tech Specs |
|---|
| Weight: 14.5 lbs. |
| XY Resolution: 47 microns |
| Z Resolution: 1.25 microns |
| Max build volume: 115 x 65 x 155 mm |
| The Pros |
|---|
| Bigger build volume |
| Higher resolution |
| LCD touchscreen user interface |
| Includes tools, safety equipment, and a bottle of resin |
| The Cons |
|---|
| Slightly more expensive |
| Bigger and heavier |
| Not user-friendly |
3. Best Overall – Formlabs Form 2 SLA 3D Printer Complete Package

Editor’s Rating: 4/5
This is the type of SLA printer that you’ll only consider if you’ve got some serious cash. At more than ten times the cost of the SparkMaker, the Formlabs Form 2 represent SLA printers at their most sophisticated. The Form is still a bottom-up printer that comes with a similarly shallow resin tank. It is much bigger and heavier than the previous two entries.
In terms of overall design, the Form 2 looks the part of being a high-end SLA printer. It comes almost fully assembled, and each of the components easily slides and snaps into place. It comes with a resin cartridge from where the liquid resin can be withdrawn automatically during the printing process. The printer can WiFi and Bluetooth connection, allowing you to interface with it wirelessly. The printer even comes with a comprehensive finishing toolkit which includes tweezers, scrapers, squeeze bottles, and various removal tools.
As long as you can dial in the proper settings, the print quality of the FormLabs Form 2 is impeccable. Unfortunately, FormLabs has seemingly dropped the ball on customer support. The Form 2 being a technically demanding model, many customers have been in contact with FormLabs for technical support and have received generally poor response. This can be disconcerting for customers who have spent thousand of dollars on their product. We hope that FormLabs can work on this glaring oversight, as it compromises the value of an otherwise excellent product.
| Tech Specs |
|---|
| Weight: 28.5 lbs. |
| XY Resolution: 25 microns |
| Z Resolution: 25 microns |
| Max build volume: 145 x 145 x 175 mm |
| The Pros |
|---|
| Comes with a finishing kit |
| Comes pre-assembled |
| High resolution |
| High build volume |
| The Cons |
|---|
| Very expensive |
| Poor customer support |
| Bigger and heavier |
Final thoughts
We are optimistic that SLA could be much more popular than it is today. With some more technological improvements, SLA even has the potential to overtake FDM as the mainstream 3D printing technology. With superior quality and printing speed, SLA has enough good things going for it to gain widespread mainstream acceptance.
The biggest hurdle that SLA technology has faced in the past couple of years has been its relatively high cost. Aside from SLA printers being more expensive than FDM printers, liquid resolution solutions are also more expensive. Thus, SLA printing hasn’t exactly been an attractive prospect, especially for hobbyists who might want to try it out but are not willing to spend a fortune.
It seems that times have changed, though. As we have listed above, there are now budget SLA printer options that are just about as expensive as standard FDM printers. The SparkMaker, in particular, is the perfect entry-level SLA printer. It’s cheap, small, and easy to use. The resolution isn’t the best, but it’s still better than what you can get with an FDM printer.
With just a couple more years of development, we can see desktop SLA printers getting much more affordable and accessible. This could be a massive shift in the industry, but we think it’s a step in the right direction. With the ability to create more accurate designs at a shorter time, SLA printing is a superior technology that shows great promise.
Contents
- What is stereolithography?
- How does SLA work?
- 1. Design
- 2. Printing
- 3. Curing
- Other elements to considering during SLA printing
- 1. Material selection
- 2. Support structures
- 3. Layer adhesion
- 4. Finishing
- What are the advantages of SLA?
- What are the limitations of SLA?
- What are the best desktop SLA printers?
- 1. Best Budget Option – SparkMaker High-Resolution Resin SLA Printer
- 2. Best Value – ANYCUBIC Photon UV LCD 3D Printer
- 3. Best Overall – Formlabs Form 2 SLA 3D Printer Complete Package
- Final thoughts