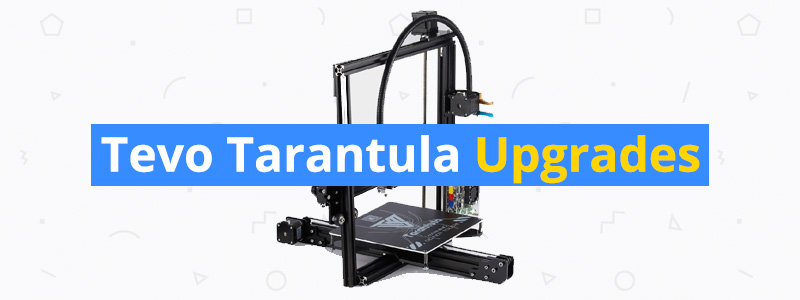
Tevo Tarantula Upgrades

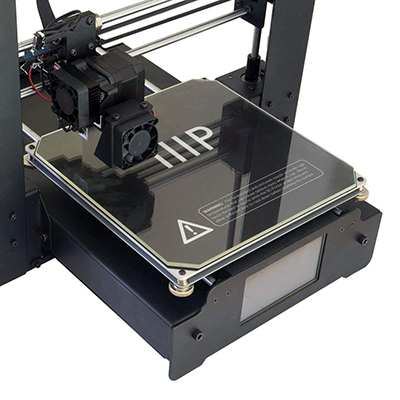
At just around $180, the Tevo Tarantula is one of the most affordable 3D printers on the market, making it an attractive option for those who don’t want to break the bank. Here’s the catch: To get the most out of it, you need to supplement it with a significant amount of upgrades. But while some of the upgrades are store-bought, the majority of them can be printed on the Tarantula itself.
Leaving the Tarantula in its stock form is not a good idea, especially if you plan to use it as your primary 3D printer. It has an unsafe mainboard and an unstable frame with serious wobbling issues that significantly affect the overall print quality. It doesn’t even have a filament cooling fan, not to mention the electronics and the cables are not well secured, to say the least.
Before you get too excited about the things you’ll print on the Tarantula, make sure to attend to its numerous flaws first, not only to make it a more stable 3D printer but also to drastically improve its performance. Here are the best upgrades that you can get for your Tarantula:
Important Upgrades
This section includes the most important upgrades for the Tarantula, the ones you should install as soon as possible. Some of the upgrades included in this guide can be postponed or skipped entirely, but not the ones listed in this section.
Filament Cooling Fan
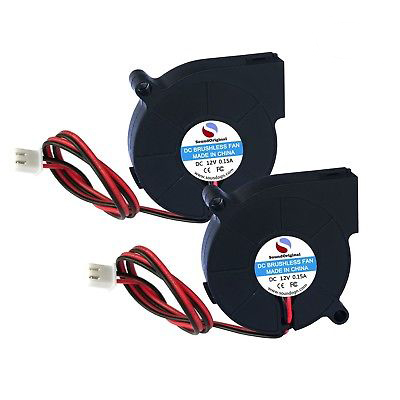
Certain filaments require cooling as soon as they land on the print bed. Clearly, Tevo missed the memo on that process as the Tarantula is only equipped with a heat sink fan. That’s right, the Tarantula doesn’t come with a filament cooling fan on the hotend, which is perhaps the ultimate proof you need that the manufacturer cut a lot of corners.
The good news is that you can easily buy a compatible radial fan for the Tarantula. A radial fan mount is also easy to print. Considering you can get a pair of radial fans for less than $15, we recommend that you go for a dual fan setup, which makes for a more effective cooling system. For a dual fan setup, you can check out the mount designed by supasorn on Thingiverse, which is built specifically for the Tarantula.
MOSFET
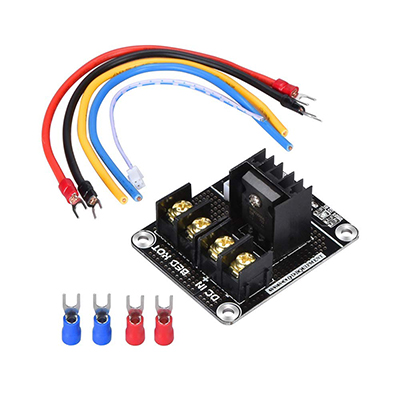
Cheap 3D printers like the Tarantula are notorious for their unstable electronics. The Tarantula’s mainboard is not built for high-temperature materials, which require a heated print bed. More specifically, it can’t handle the print bed’s power draw. If the mainboard becomes overloaded, it could result in a hardware failure or even cause the electronics to catch fire.
Installing a MOSFET for the print bed takes care of that problem. With a MOSFET installed, the mainboard will no longer be exposed to the print bed’s immense power draw. Of the upgrades listed in this section, this add-on is the most important as it turns the Tarantula into a safe machine. It’s easy to get your hands on a MOSFET, although installing it requires a bit of tinkering.
Power Supply Unit
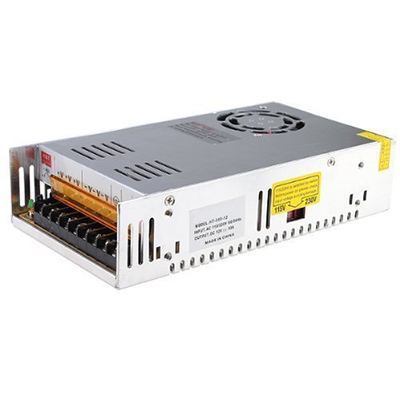
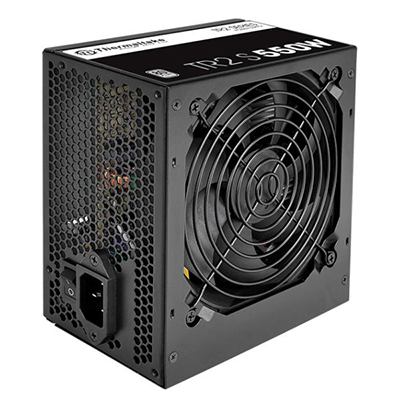
Like the mainboard, the Tarantula’s stock power supply unit (PSU) is not built for long-term use. In addition, it lacks an actual switch and comes with a noisy fan that can annoy the hell out of you. If you want an all-in-one solution and are willing to spend around $50, you can go for an ATX power supply, which is far more reliable and safer than the Tarantula’s default PSU.
If you don’t want an ATX power supply, a regular universal PSU combined with a switch add-on is also a good option. For that kind of setup, you need to print a power switch mount. Check out the mount designed by Elzariant on Thingiverse, which comes with a Tarantula branding.
Spool Holder
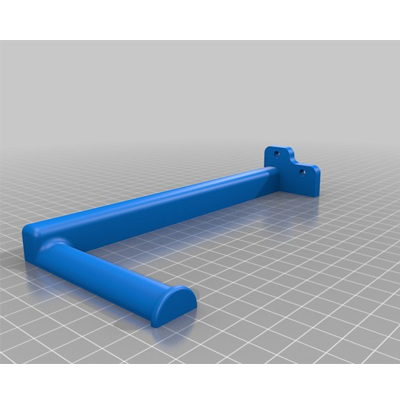
Since the Tarantula doesn’t come with a spool holder, you need to build your own. It’s one of the first objects you should build once you get the Tarantula properly set up and calibrated. You can go for a standalone spool holder or a frame-mounted spool holder. If you prefer the latter, check out the Tarantula spool holder designed by RCLifeOn on Thingiverse.
It’s easy to print and can be mounted on the frame with just a pair of nuts and bolts. But considering the Tarantula’s unstable default frame, a frame-mounted spool holder may not be the best idea until you’ve installed a series of frame-stabilizing mods. At the onset, it’s better to go for a standalone spool holder. There are several good standalone spool holder designs on Thingiverse, with the anti-tangle spool holder designed by graham01 being one of the most useful.
Performance Upgrades
This section consists of upgrades that can significantly improve the Tarantula’s print quality, stability, and overall performance. The list includes both printed parts and store-bought parts. Keep in mind that for most of the printed parts, you don’t necessarily have to use the designs mentioned here; there are other designs you can check out on Thingiverse.
Belt Tensioner
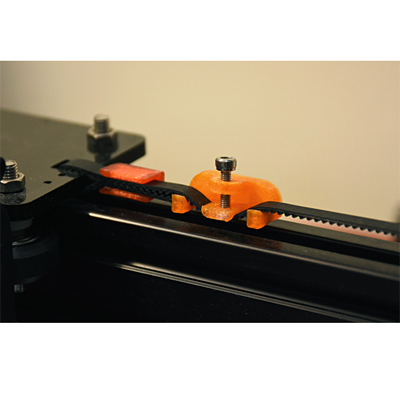
A loose belt can have a negative effect on the print quality. That’s why it’s important to keep the Tarantula’s belt in optimum tightness. There are several good belt tensioner designs on Thingiverse, most of them are compatible with different 3D printer models, including the Tarantula. If, however, you want a belt tensioner designed specifically for the Tarantula, you can check out the belt tensioner designed by Banholm, which comes with a thumbscrew for quick belt adjustments.
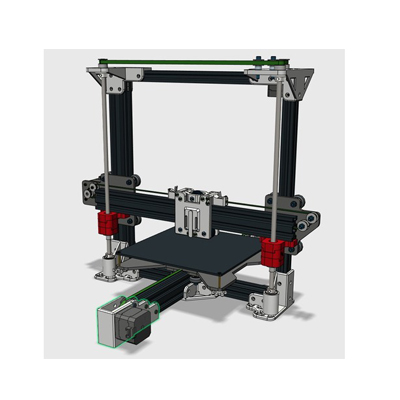
Dual Z-axis Upgrade
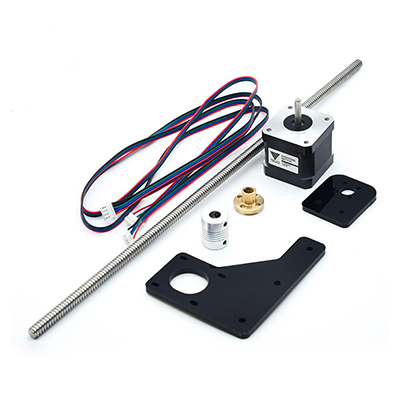
The Tarantula has a rather unconventional Z-axis motion system design. It has a single stepper motor mounted at the top of the frame, distinguishing it from most other Prusa-style 3D printers, but not in a good way. It works to a certain extent, but there’s a reason Tevo itself is offering a dual Z-axis upgrade for the Tarantula.
Simply moving the stepper motor to the base of the machine is not going to cut it. If you want a more stable 3D printer that can produce more consistent prints, upgrade to dual stepper motors on the Z-axis. It requires another threaded rod, of course. If you prefer not to buy another component from Tevo, you can easily source the parts you need to build a dual Z-axis setup.
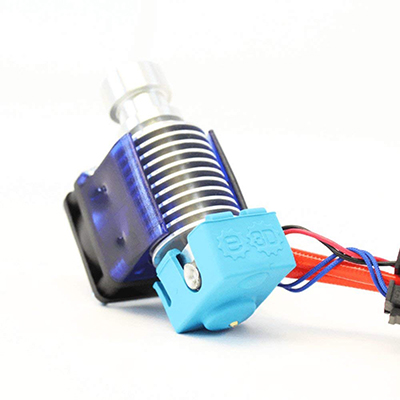
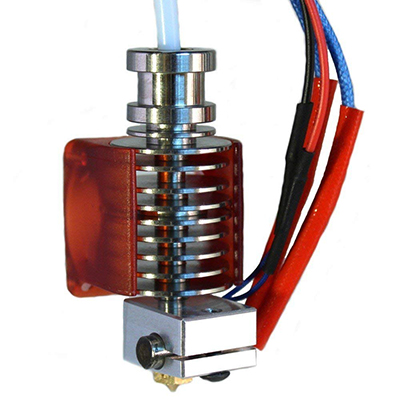
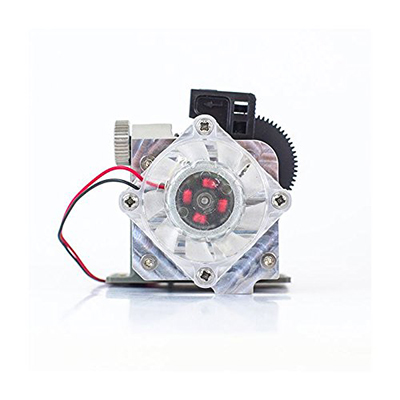
Extruder and Hotend Upgrade
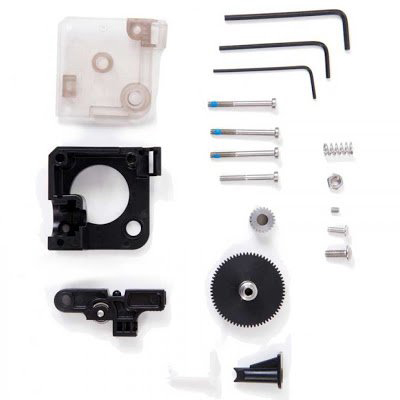
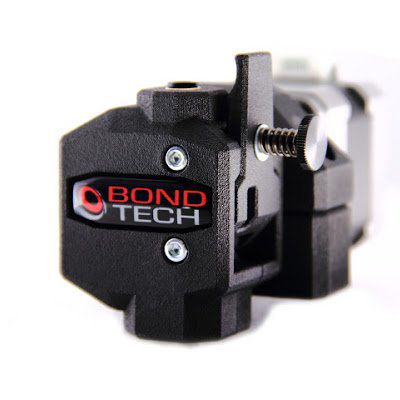
The Tarantula’s stock print head is very limited. It’s not built for high-temperature materials and has serious design flaws. If you want to experiment with advanced and more exotic filaments, upgrading the print head should be at the top of your list. Even if you only plan to print with PLA and other standard filaments, a print head upgrade is still recommended.
For the extruder or the cold end, consider the E3D Titan extruder. It’s customizable, lightweight, and compatible with the entire E3D ecosystem. The Bondtech QR extruder is also a fantastic option, especially if you want to experiment with flexible filaments.
For the hotend, the gold standard is also from E3D: the popular E3D V6. It’s a lightweight and reliable hotend that can easily handle high-temperature materials like ABS. If you’re not a fan of all-metal hotends, you can go for the less capable but still good E3D Lite6, which is similarly compatible with the E3D ecosystem.
Of course, you can always go for a complete print head setup if you don’t want to buy the cold end and the hotend separately. If you prefer that route, check out the E3D Titan Aero, a compact and reliable print head that can print all sorts of materials, including flexible ones.
In case all those products are not exactly in line with your budget, you can consider cheap knock-offs – the market is full of them. But pay attention to customer reviews before you commit to a product as cheap, China-made knock-offs tend to bring more problems than value.
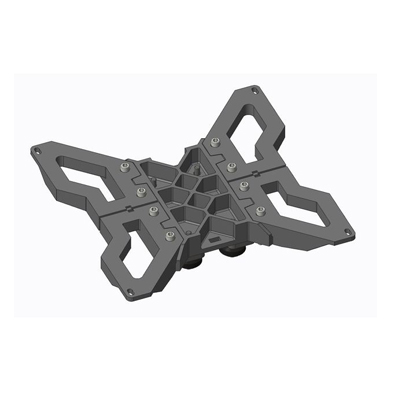
Frame Brackets

As mentioned, the Tarantula has a very unstable frame, which affects the overall performance. The simplest way to address this issue is to equip the Tarantula with frame brackets. With frame brackets such as the ones designed by thingirob on Thingiverse, the Tarantula instantly becomes a more rigid 3D printer capable of handling high-speed prints. It’s a simple and easily printable solution that takes care of one of the Tarantula’s most glaring issues.
Glass Print Bed
If you’re not a fan of aluminum print beds, which the Tarantula is equipped with, switch to a glass print bed. A glass print bed is considered easier to clean and use. It’s not prone to warping and offers a flatter surface than an aluminum print bed. But a glass print also comes with a few downsides you need to consider before making the switch. Apart from being prone to breaking, a glass print bed usually takes longer to heat up compared to an aluminum print bed.
Keep in mind that certain materials don’t stick well to bare glass and may require additional adhesion. If you plan to experiment with different materials, especially after upgrading the print head, make sure to check the level of adhesion required for each material.
Oldham Coupler
Installing an Oldham coupler on the Z-axis threaded rod takes care of the Tarantula’s Z-wobble issues, significantly improving the overall print quality. It’s a small add-on with a big effect. If you go for a dual Z-axis setup, you’ll need to build two Oldham couplers, one for each threaded rod or leadscrew.
Print Bed Support
The Tarantula’s Z-axis isn’t the only area begging for more stability. The print bed also needs a better support to handle the constant lateral movement. Made specifically for the Tarantula, the bed support designed by RobFlip on Thingiverse has you covered on that front. It’s relatively easy to build and can accommodate larger print beds. If your Tarantula is regularly subjected to high-temperature prints, printing the bed support with a material built for high temperatures is also a good idea.
On a related note, you can also install additional rails on the Y-axis to add even more stability. With a print bed that stays level for a long time, you can pass on installing an auto-level sensor, which can be relatively expensive if your Tarantula’s equipped with a glass print bed.
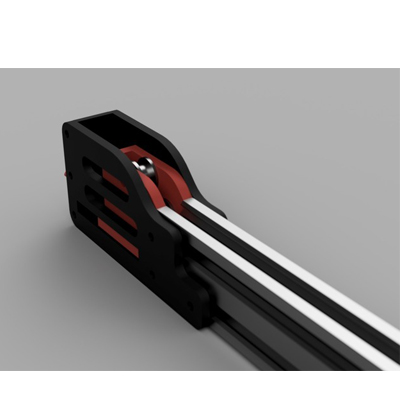
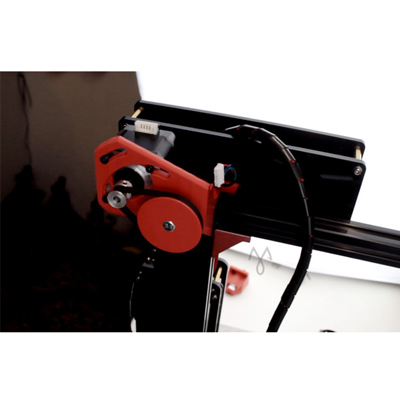
X Carriage Upgrade
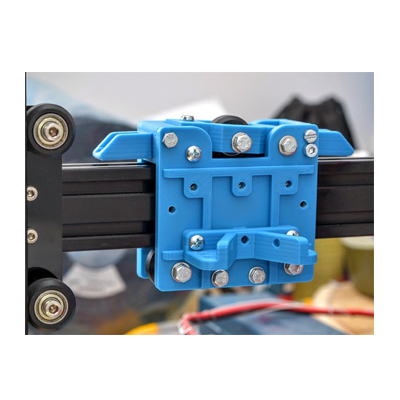

The Tarantula’s stock X carriage is not well designed. It’s not easily accessible, which can make adjusting the print head more laborious. We recommended discarding the stock X carriage and replacing it with a modular one. Before you look into hotend upgrades, consider upgrading the Tarantula’s X carriage first. There are a number of options on Thingiverse, one of which is a magnetic X carriage that allows you to quickly swap out different hotends.
Optional Upgrades
This section includes upgrades that don’t need to be installed right away and upgrades that you can live without. Some are simply for cosmetics while others add more convenience. If you want, you can simply ignore most of these upgrades.
Auto-level Sensor
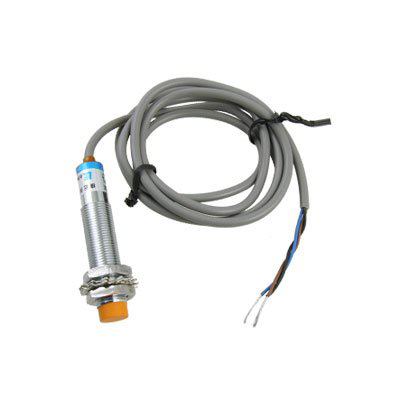
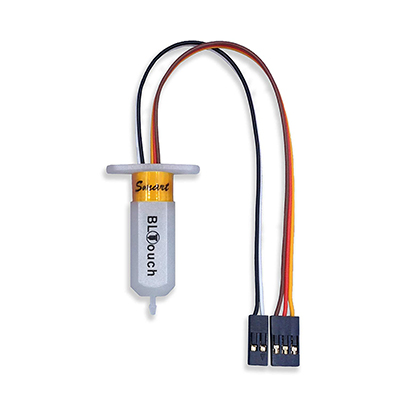
Manually leveling the Tarantula’s print bed can be a pain, especially considering the machine’s unstable frame. If you want to remove that from the equation and make the pre-print setup more convenient, install an auto-level sensor. With an automatic bed leveling system in place, you can just sit back and let the Tarantula do all the work.
But installing an auto leveling system is not as straightforward as you might think. Once you get your hands on an auto-level sensor or probe, which vary in price, you need to tinker with the Tarantula’s firmware and build a mount for the sensor. Of the two, the former is obviously the more complicated process, but certainly doable even for those who don’t have a ton of experience with 3D printers.
When choosing the type of auto-level sensor, consider your Tarantula’s print bed material first. Some sensors only work with an aluminum print bed while others are more versatile. For an aluminum print bed setup, go for an inductive sensor. For a glass print bed, consider a BLTouch sensor, which is a significantly more expensive hardware. If you regularly switch between aluminum and glass, a BLTouch sensor is more ideal considering it works with both glass and metal.
Belt-driven Z-axis
Instead of dual leadscrews, you might want to consider a belt-driven motion system for the Z-axis, similar to a delta 3D printer. With a belt-driven Z-axis, the Tarantula gets a boost in print speed without a dramatic drop-off in print quality. This upgrade requires a fair amount of tinkering, though, considering you need to overhaul the entire motion system of the Z-axis. When switching to a belt-driven Z-axis, the most important thing is to make sure the setup has the proper configuration to prevent the print head from crashing to the print bed as soon as the Tarantula is powered down.
Cable Chains
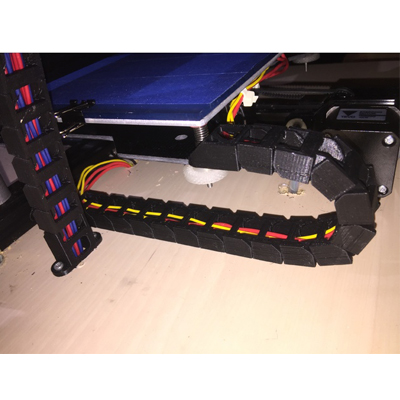
The Tarantula is known for its spaghetti wires, which can be hard to look at even for those with mild OCD. If you want the cables to be organized, the best way to make that happen is to create cable chains. Go for the complete setup and install cable chains for all three axes. If you want your Tarantula to stand out with more colors, you can print the cable chains in bright colors; otherwise, stick to an all-black setup that matches with the Tarantula’s frame color.
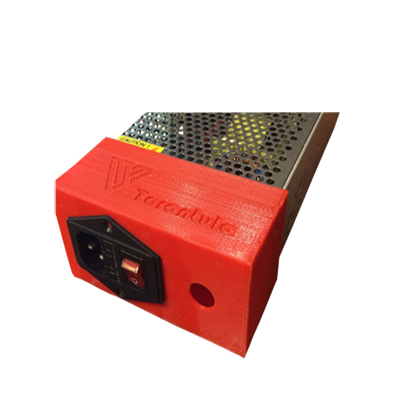
Electronics Case
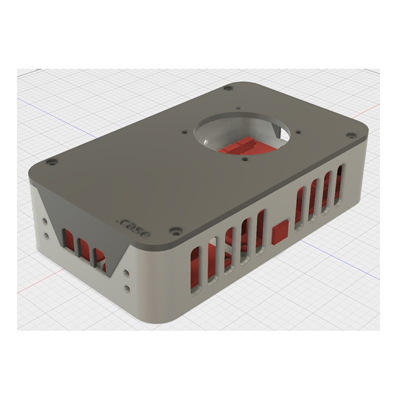
The Tarantula is not the prettiest 3D printer around, which is an understatement considering its cables are all over the place. If you want to improve the aesthetics of your machine, the most obvious solution – other than cleaning up the cables – is to cover up the bare electronics. There are different solutions you can consider, one of which is building individual frame-mounted cases for the electronics. Another option is a standalone all-in-one box that can house the LCD, the PSU, the motherboard, and other additional electronics such as a MOSFET.
Enclosure
The Tarantula has an open structure, which makes it unprotected against dust and other particles and not ideal for certain materials that need stable temperatures. In addition, the open frame exposes you to fumes, which can be harmful. The good news is that you can easily build an enclosure for the Tarantula. No need to create a fancy enclosure. Just build a sturdy enclosure that you can easily remove and has windows to allow you to quickly check the print progress.
Filament Sensor Enclosure
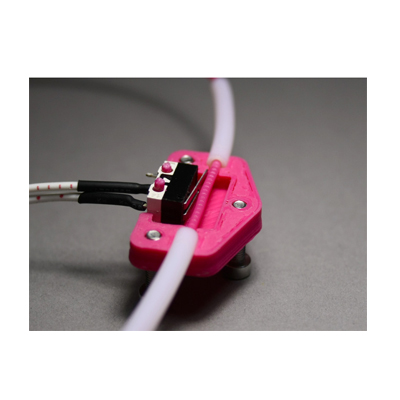
With a filament sensor, the Tarantula will automatically pause the print when out of filament, allowing you to load a fresh roll of filament before resuming the print. It’s a must-have component for those who regularly print large-scale, high-resolution 3D models that take forever to complete. If you need instructions on how to install a filament sensor for the Tarantula and build an enclosure for it, stylesuxx on Thingiverse has you covered.
LCD Mount / Case
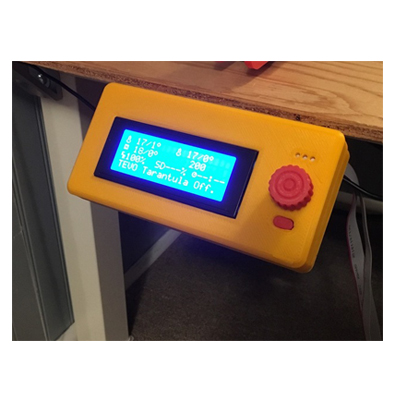
If you want a mount for the Tarantula’s LCD, one that separates it from the other electronics, you can easily build your own. You can build a clamp that simply mounts the LCD onto the top of the frame. But if you want a prettier setup, the solution is to build a case. Of course, if you go for the all-in-one electronics case mentioned above, a separate LCD case is no longer necessary.
Raspberry Pi and OctoPrint
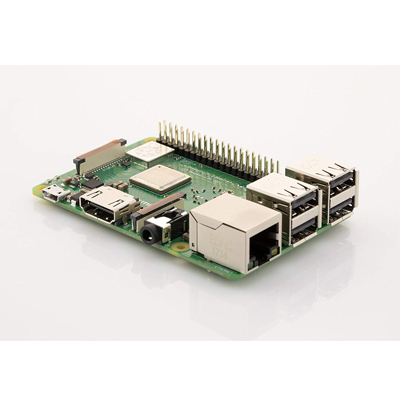
Considering the Tarantula’s print point, it’s not surprising that it comes bare and lacks the kind of features that would impress you, such as Wi-Fi compatibility. If you want to be able to operate your Tarantula from afar, go for a Raspberry Pi and OctoPrint upgrade.
With a Raspberry Pi and OctoPrint setup, you can monitor and control your Tarantula wirelessly, allowing you to operate it from the next room. It’s the perfect upgrade for those who prefer a more convenient way to access their 3D printer. If you want to take it a step further, you can also install a camera, which requires a dedicated mount. Going for a Raspberry Pi and OctoPrint setup is not cheap, though, so stay away from it if you want to keep your expenses low and just focus on other more important upgrades.
Z End Stop Upgrade

This one’s a pretty straightforward upgrade. It’s a small, two-piece component that will allow you to quickly adjust the end stop on the Z-axis. It uses a spring-based setup on the upper half to hold the adjustment. While not as impactful as an auto-level sensor, an easily adjustable Z end stop nevertheless adds more convenience to the overall user experience.
Contents
- Important Upgrades
- Filament Cooling Fan
- MOSFET
- Power Supply Unit
- Spool Holder
- Performance Upgrades
- Belt Tensioner
- Dual Z-axis Upgrade
- Extruder and Hotend Upgrade
- Frame Brackets
- Glass Print Bed
- Oldham Coupler
- Print Bed Support
- X Carriage Upgrade
- Optional Upgrades
- Auto-level Sensor
- Belt-driven Z-axis
- Cable Chains
- Electronics Case
- Enclosure
- Filament Sensor Enclosure
- LCD Mount / Case
- Raspberry Pi and OctoPrint
- Z End Stop Upgrade
Good list, I find the HD brackets is also good to add.
https://www.thingiverse.com/thing:2055827
I’m surprised there isn’t much to upgrade the hot bed power connector. So many horror stories of the bad connection and heating up. Mine just fell apart and about to make a thingiverse model to replace it.
I have a Tarantula and just enjoy it immensely. It has its pros and cons. Just curious, have you put a dollar amount to the upgrades? And if so, what is it, and how does it compare to purchasing a printer where those upgrades come stock?
If I buy another printer I may pick up an Ender 3. It seems to have dethroned the TT in the cost and usability department, and I like the fact that it is 24V.
I’ve got most of theses upgrades and I still have terrible prints.