TL Smoothers in 3D Printers – Everything You Need to Know
A perfectly smooth surface is one of the goals in 3D printing that is most difficult to achieve. Even with perfect settings, a 3D-printed outer shell often comes out with artifacts such as salmon skin or zebra stripes.
While these imperfections can be remedied in post-processing, some users would prefer that they not manifest at all. One way to do this is to use an extra accessory called a TL smoother. What exactly is a TL smoother and how does it work? Should you have it in your 3D printer? Check out our detailed breakdown on TL smoothers.
What is a TL smoother?

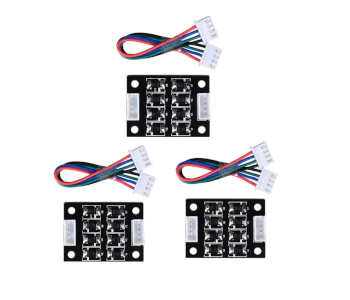
TL smoothers are not very commonly used, even for 3D printing enthusiasts. This may create an impression that they are a sophisticated piece of hardware that is difficult to use. In reality, a TL smoother is just a small printed circuit board (PCB) that plugs between the stepper driver and stepper motor.
One of the most appealing things about TL smoothers is the fact that they are incredibly cheap and easy to install in any standard 3D printer. As we shall see later on, the underlying circuit of a TL smoother is so simple that users can just DIY them.
There is no clear consensus on exactly what the “TL” in TL smoothers stand for. All we know is that the fundamentals of TL smoothers came from a blog post by user Schrodinger Z back in 2015 about the jerky movement of stepper motors. Since then, TL smoothers have become more easily available, although more recent developments in stepper driver design have made them less relevant.
How does a TL smoother work?
As you would expect, the primary objective of a TL smoother is to help smooth out the outer shell of a 3D print. This is done by correcting a design flaw of the DRV8825 stepper drivers – one that user Schrodinger Z identified in their blog post.
There were a couple of areas of improvement in the DRB8825 drivers. The first is that the sine wave of the driver was more stepped than smooth. Another is that the driver had a low voltage supply, preventing it from moving the motor when the target speed was less than 100 mm per minute.
Further analysis revealed that the driver had a “dead zone,” which meant that it could not output signals at lower currents. This sudden drop disrupts the smooth signal curve of the driver, creating the characteristic stepped profile.
The circuit of the TL smoother bridged the gap of this dead zone. This forced the stepper driver to output more current when the motor is supposed to be moving at slow speeds. By bridging the dead zone, it also created a smoother signal profile – more akin to the ideal sine wave signal.
Many TL smoothers are advertised as providing electrical dampening to the driver signals, thereby allowing motors to operate more smoothly. This is not the ultimate goal of TL smoothers but is a nice side effect.
Should you use a TL smoother?

From this brief discussion, we already know the purpose of a TL smoother – to address the design flaws of the DRV8825 stepper driver. If your 3D printer has this type of driver, then you will almost certainly benefit from having a TL smoother. Results may still vary based on the power supply of your 3D printer, but there should still be improvements in surface quality regardless.
For other stepper drivers, the benefits of having a TL smoother will be much less pronounced. You might still have quality improvements if your driver has the same design flaws as the DRV8825. You are more likely to benefit from the electrical dampening effect of a TL smoother. This should make your stepper motors quieter, even if only by a small amount.
It’s worth mentioning that some stepper drivers have already been designed to address all the flaws of DRV8825. A notable example of this is the Trinamic motor driver that uses active current monitoring to optimize current control during fast decay time. In this case, having a TL smoother does not generate any tangible benefits, merely increasing heat generation and reducing efficiency.
Take note that not all surface imperfections can be resolved by the use of a TL smoother. Artifacts such as ghosting, ringing, or misaligned layers can be caused by excess vibrations in the frame of the 3D printer. The remedy to this is often more fundamental in nature – reducing the movement speed of the print head, tightening the suspension underneath the print bed, or making sure that the frame of the printer has been assembled properly
Where to buy TL smoothers
The great thing about TL smoothers is that they are based on such simple circuitry, making them both cheap and easy to implement. Even if you’re not certain if you can benefit from a TL smoother, they are also so incredibly inexpensive that there is practically no risk in buying one.
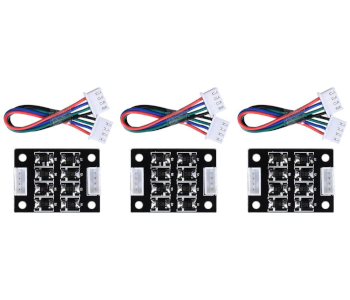
Good options include the ARQQ TL Smoother and Zeelo TL Smoother kits. Both these kits include three PCBs and cost less than $10. These are both 8-diode variants that have been described as providing better smoothing performance.
Conversely, you can make your own TL smoother using the original circuit design by Schrodinger Z. You will need a few circuit components – a prototyping board, four diodes, connectors for your stepper motors, and some wires. Just follow the circuit diagram but it’s better if the connectors and diodes are soldered in place.
To prevent damage to the PCB, it’s best to wrap it with some insulation material such as plastic shrink wrap or electrical tape.
Final thoughts
The TL smoother is somewhat of an artifact of the past era of 3D printing. It is just one of many examples of the 3D printing community stepping up to address the gaps of existing technology. Despite being based on such a simple circuit design, lots of 3D printing users have benefitted from the use of Tl smoothers.

